If you have Windows 10, you will also almost undoubtedly have Skype installed on your system, whether by choice or as a pre-install. Depending on your situation, this will either be useful or just a drain on your system's resources. If you are in the latter group, Downloadsource will show you how to remove Skype or limit some of its function.
How to Send Emails From Gmail to SMS Text Message.
With skype constantly running in the background and booting at startup, you will always be able to receive messages and incoming calls. Something you may not be aware of though, is that there are actually two versions of Skype available, both of which are probably installed on your Windows 10 computer.
There is the original desktop Skype program and more recently Skype Preview. The app-based alternative. The probability of you having both installed on your machine is quite high, so if you would like to remove one or both, here's how to do it.
Removing Skype Preview From Windows 10.
If you have already done this in the past and are wondering why it is back on your PC, it is because Windows 10 Anniversary update has Skype Preview included in the update. Thankfully, for now, it is still removable so let's get started. To find Skype preview, open the Start menu and search Skype Preview or scroll down to S and launch from the shortcut.
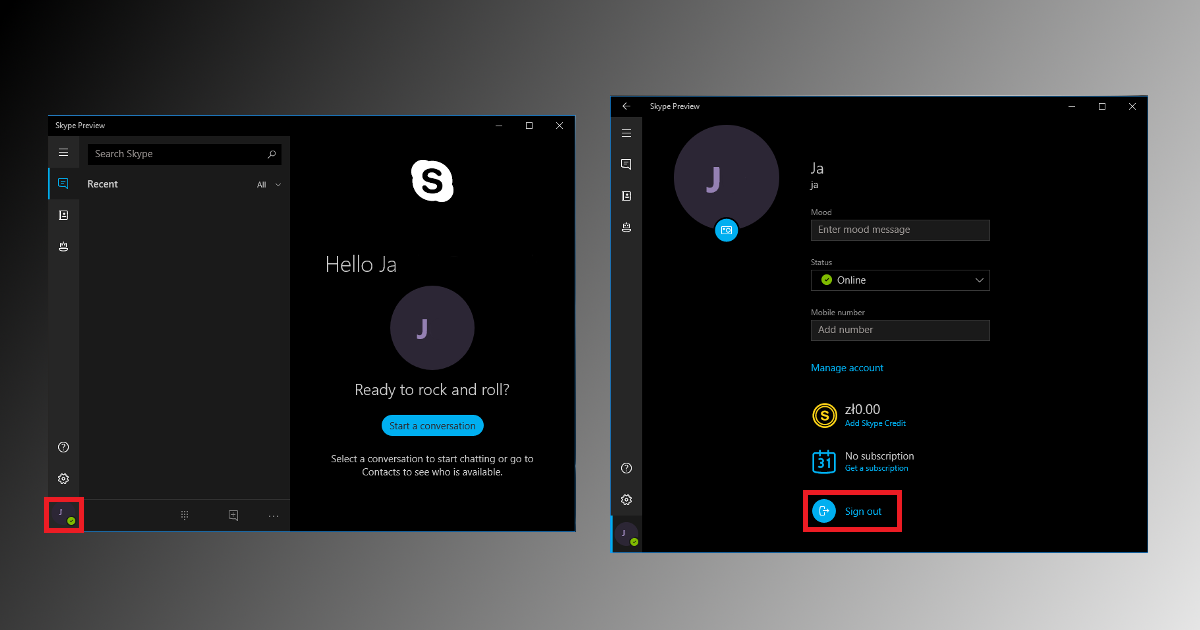
Once you have opened Skype, using either of the two options listed above, you will be dropped into the main screen. Looking at the main screen, you will see your Profile Picture in the bottom left-hand corner. Click on this to bring up a small menu, in this menu click Sign Out. Once you have been signed out of your profile, Skype will no longer automatically sign you in on startup, however, it will still boot the program for you to sign into.
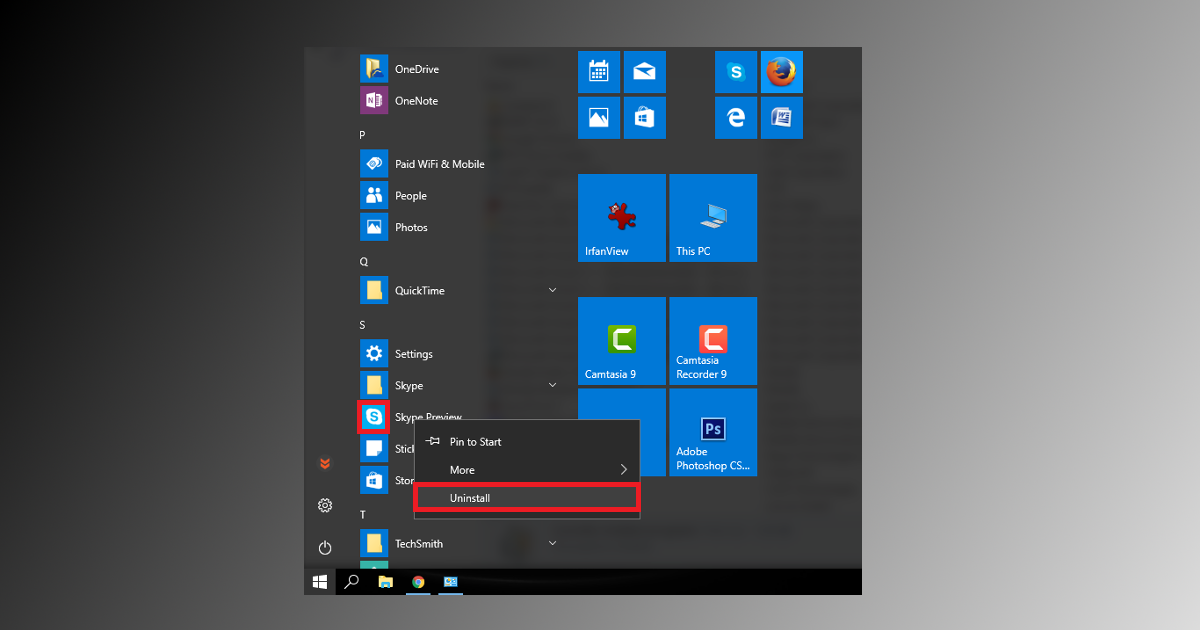
To completely uninstall Skype Preview, you will have to do it from the Start Menu, by right-clicking on the shortcut and selecting Uninstall. For some reason, Skype Preview isn’t listed in the control panel remove programs list. If you enter into the control panels remove programs section, you will only be able to locate the traditional Skype Desktop program.
Note: Another way you can remove Skype Preview is via the Uninstall section of CCleaner.
Changing the Startup Options For the Original Skype Program.
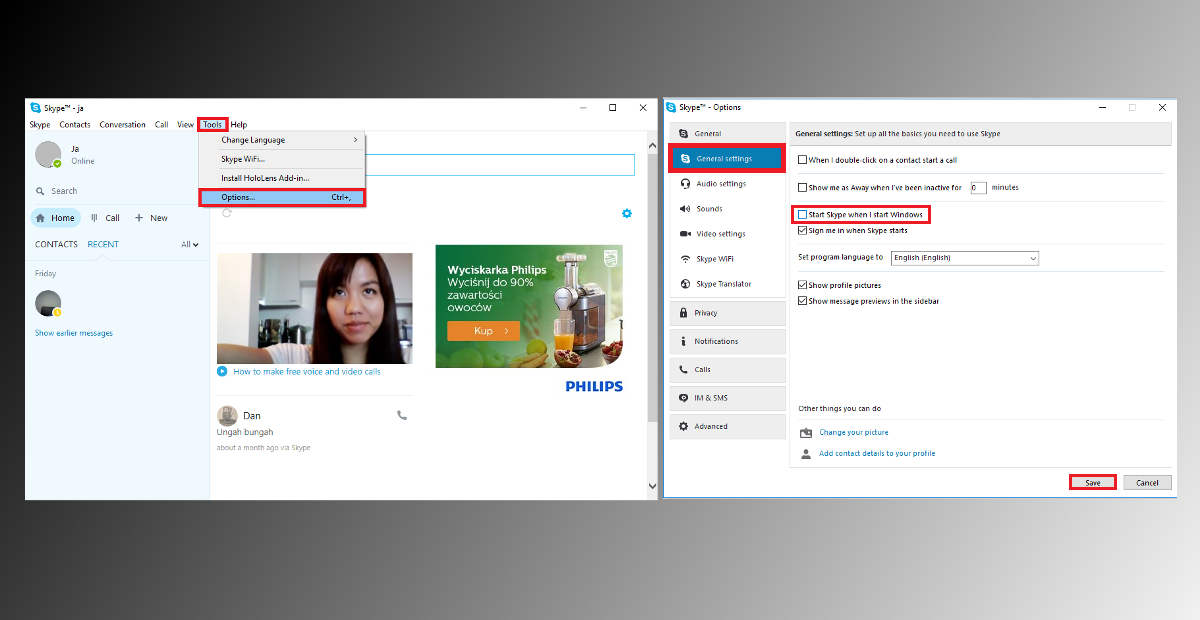
If you have the original Skype installed on your computer, it also starts automatically by default, making sure that you are always online and available to take calls and receive messages. As with Skype Preview, this option is completely adjustable, you can disable Skype from booting at system start. To prevent Skype from starting on Windows boot, you will have to launch it, when you have Skype open, go to Tools, then scroll down to Options.
Inside this menu, under the General Settings tab, you will see a ticked box called Start Skype when I start Windows. Unticking the box will stop Skype booting at startup, it will now only launch when you manually open it. Remember, if you close Skype using the cross in the top right corner, it will only minimize to the system tray. To close it properly, you will have to right-click on the icon in the taskbar and select Quit. If you wish to completely uninstall Skype, enter the Control Panel" and use the Programs and features menu.