Windows 10 has been out for quite some time and has seen many an update fix a large portion of its early day bugs. One bug that still makes an appearance, even after the latest Anniversary Update is the File Explorer crashing bug. If you are still having issues with your Windows 10 File Explorer crashing, below you will find a few things that should resolve the issue.
How to Factory Reset Your Windows 10 PC Without a Windows Installation Disk.
The Windows Anniversary update fixed a lot of the issues plaguing Windows 10, however, one that still hasn’t quite been fixed is the occasional crashing of the Windows File Explorer. Which makes navigating your computer painfully difficult. The problem is when trying to open a folder, the file explorer and the taskbar will have a spasm, closing and occasionally reopening or going into Not Responding Mode. it's also highly likely to occur during Windows file searches.
Fixing File Explorer Crashing in Windows 10 Solution 1
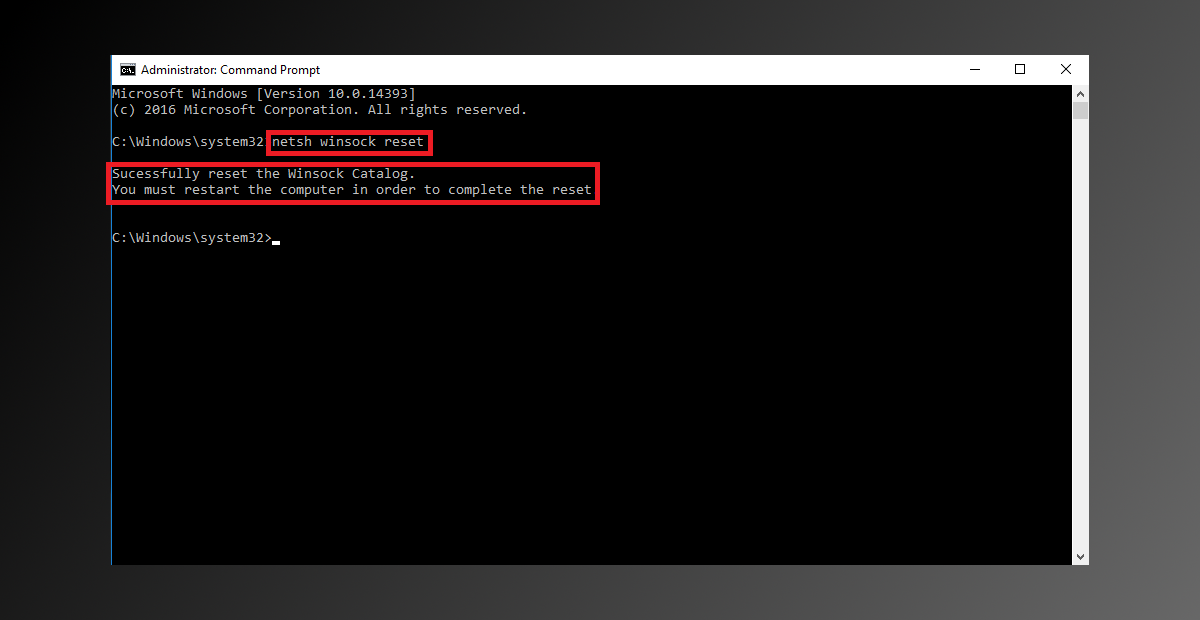
The first option we are going to try is running netsh and winsock reset
Note: netsh winsock reset is a command that you can use in Microsoft Windows to reset winsock catalog back to its default settings or a clean state. It's generally used if you are having problems with Internet access or networking, but for some reason seems to help fix file explorer errors.
To start, you will have to open the Command Prompt which can be done by searching cmd from the Start menu. Make sure you right-click on it and choose Run as Administrator. When you have the cmd box open, type netsh winsock reset into the prompt and press Enter. Cmd will accept the command instantly, showing the following on completion:
Successfully reset the Winsock Catalog.
You must restart the computer in order to complete the reset.
As stated, you will need to Restart your computer to make sure the changes take effect. Once you have performed a restart you can begin the next step.
Fixing File Explorer Crashing in Windows 10 Solution 2
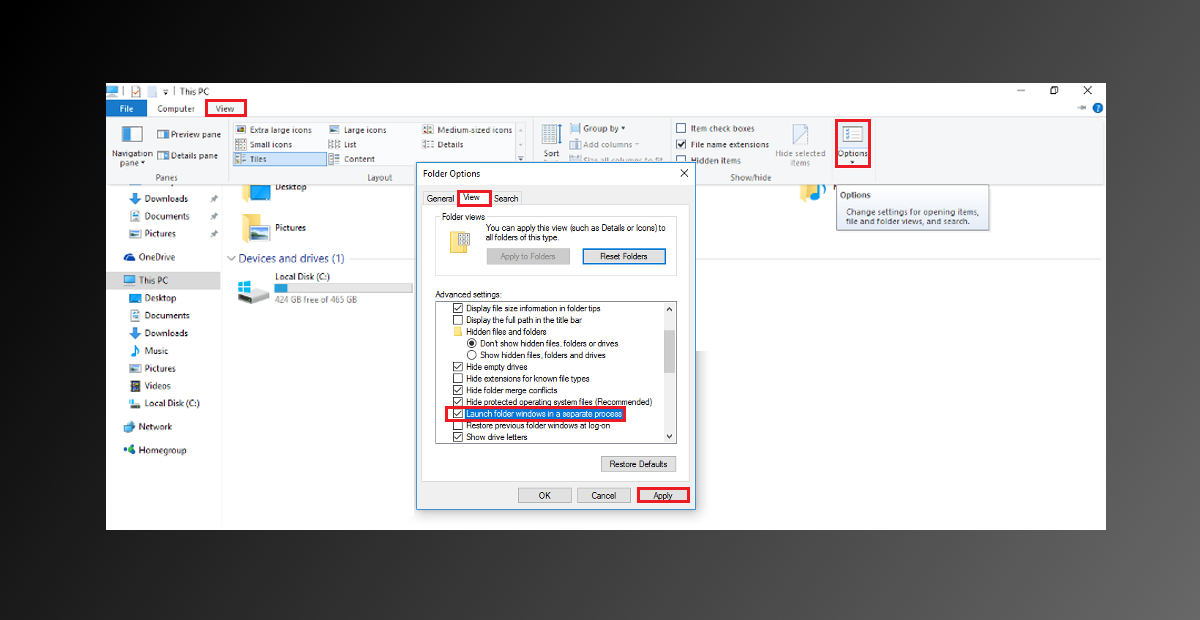
The next thing you can try, if the first option didn't work is open File Explorer go to View, then Options. Next, in the far right, go to View once again, then scroll down until you find the box launch folder windows in a separate process. (make sure you place a tick in the checkbox) With the box now ticked you can Apply and close.
Fixing File Explorer Crashing in Windows 10 Solution 3
Following the above step, go to the start menu and search for the Control Panel or alternatively, find it however you normally would. Using the Control Panel search box in the top right-hand corner, search for File Explorer. when it appears open the File Explorer options, then from the General tab choose clear file explorer history. Now use the tool to clear the history.
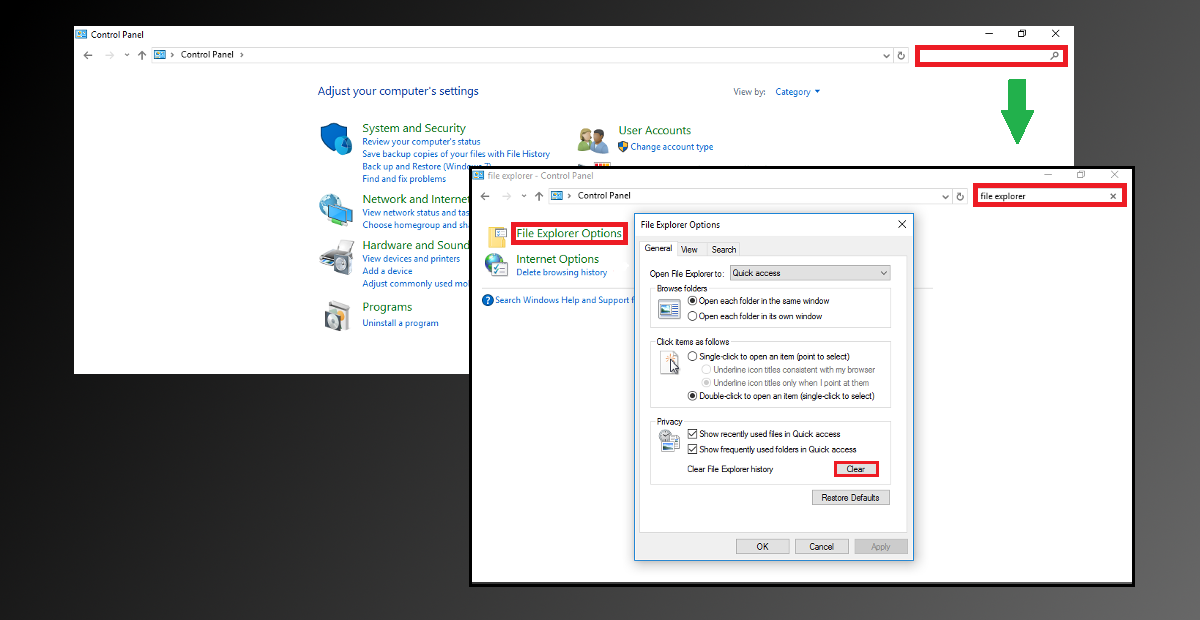
Out of the three options, most people will find the third one: clearing the file explorer history the most effective. If the problem returns again, just go back to the file explorer options menu and clear the history again. You shouldn’t have to do this too regularly thankfully.