It’s winter somewhere in the world, so if you have taken some wintery snaps and would like to add an extra layer of authenticity by adding falling snow, Downloadsource will show you how with this quick and easy to follow guide.
How to Fix the Text Tool in Photoshop Placing Punctuation at the Start of Your Text Not the End.
Photoshop has been around since 1988, evolving from a simple raster graphics editor, into the world’s most famous and most used image editing tool. It has become so widespread the term Photoshop is now classified as a verb in the English language. With this powerful tool at our disposal, let's add some filters and a few quick adjustments to create beautiful, realistic looking, falling snow.
How to Make Falling Snow With Photoshop.
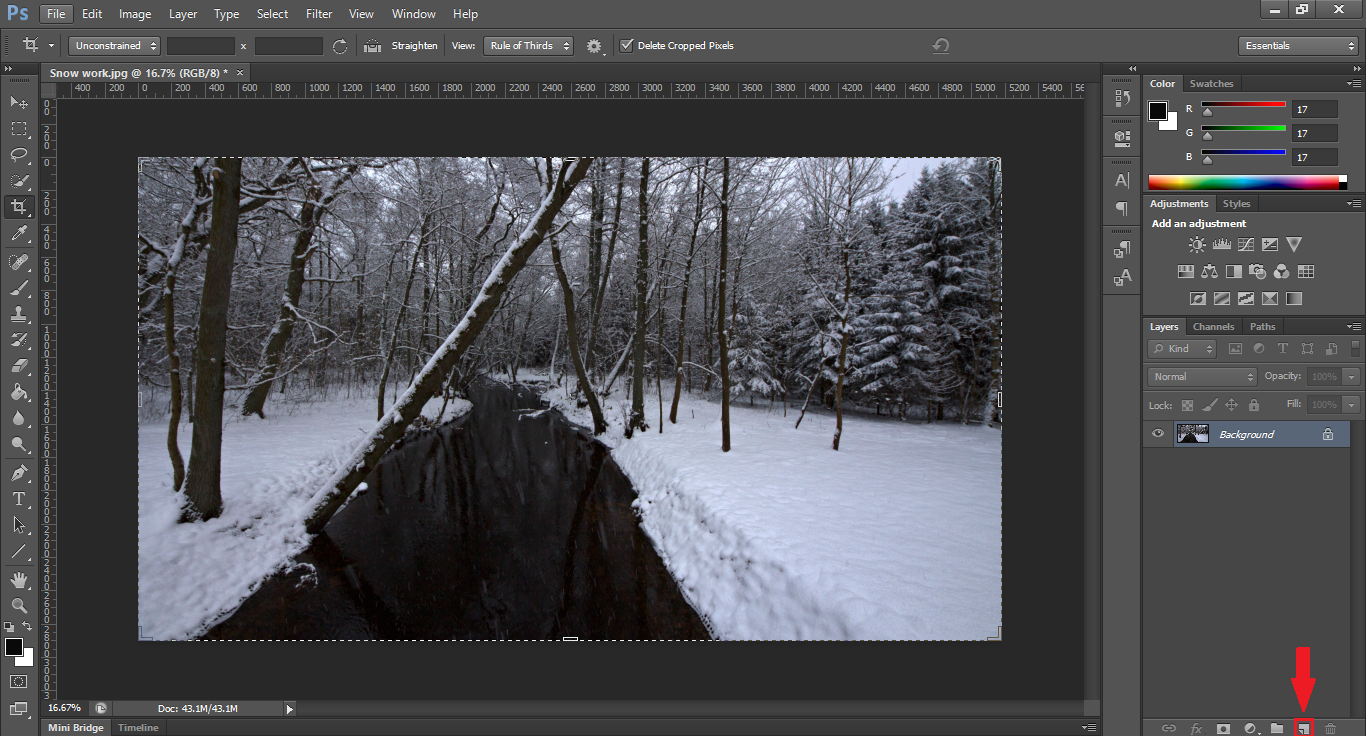
The first step in creating falling snow in photoshop is to select a wintery looking image. Once you have picked out your image, open it with Photoshop. With your image open, create a new layer using the shortcut in the bottom right-hand corner or by pressing Ctrl+Shift+N.
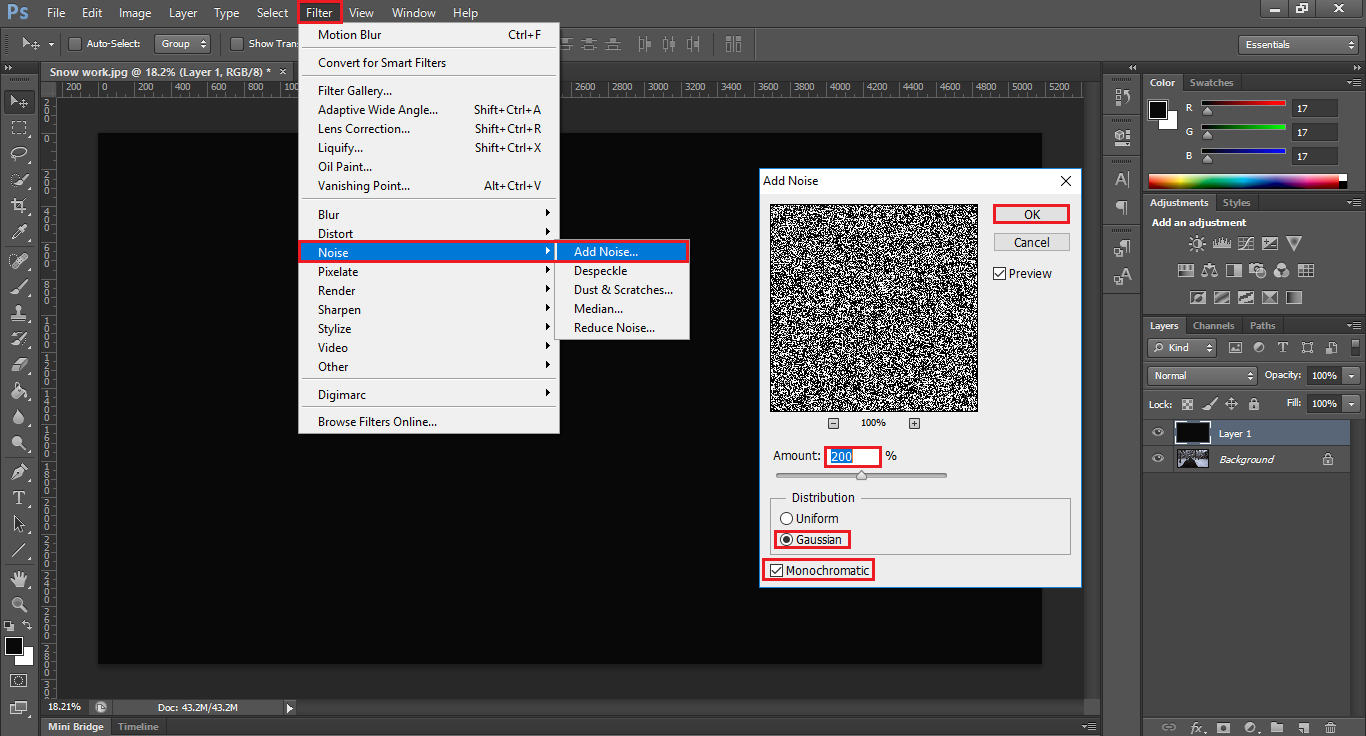
Now that you have a new layer created, you will need to make the foreground color black, you can use the Paint Bucket tool to do so or with the layer selected press Alt + Delete. Having changed the foreground to black, you can now go to Filter > Noise > Add Noise. In the Add Noise menu, change the amount to 200%, set the distribution to Gaussian and make sure the Monochromatic box at the bottom is ticked, then click Ok.
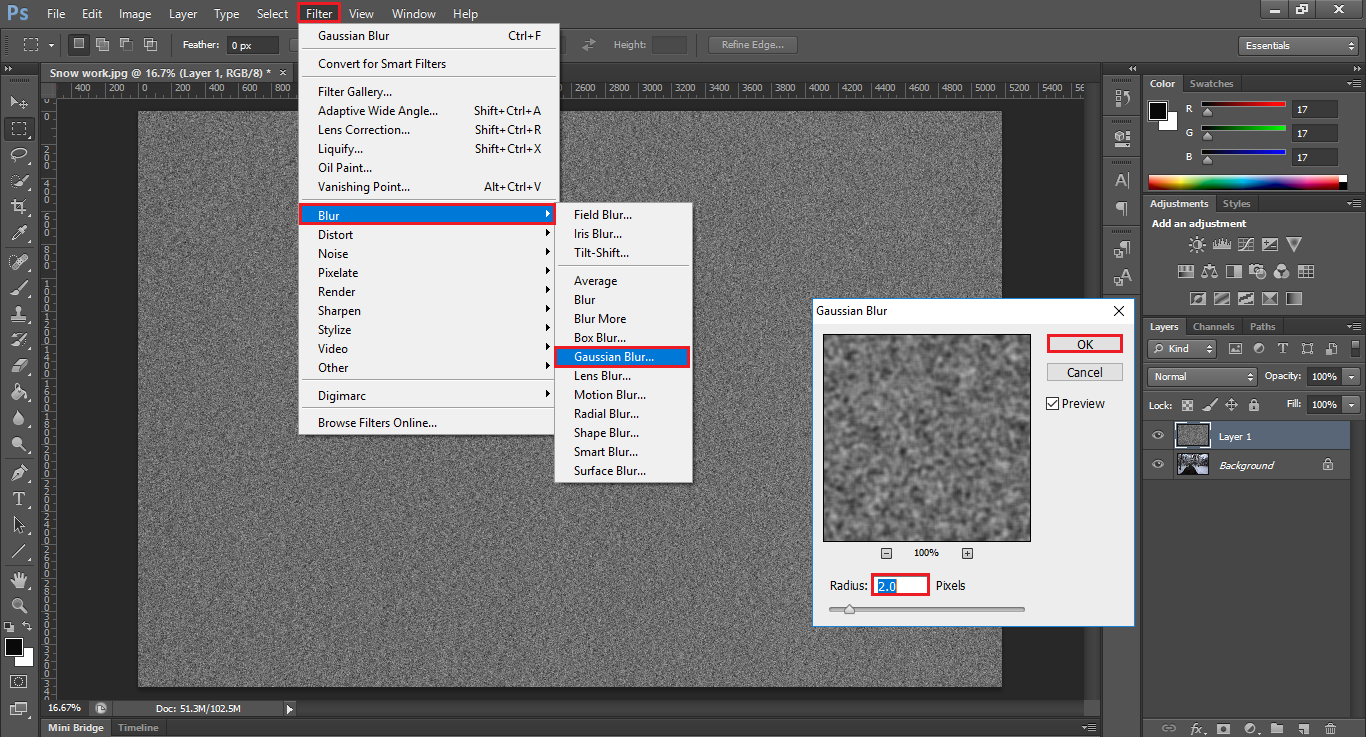
Next go back into Filter > Blur > Gaussian Blur. Set the radius of the blur to 2 pixels and confirm.
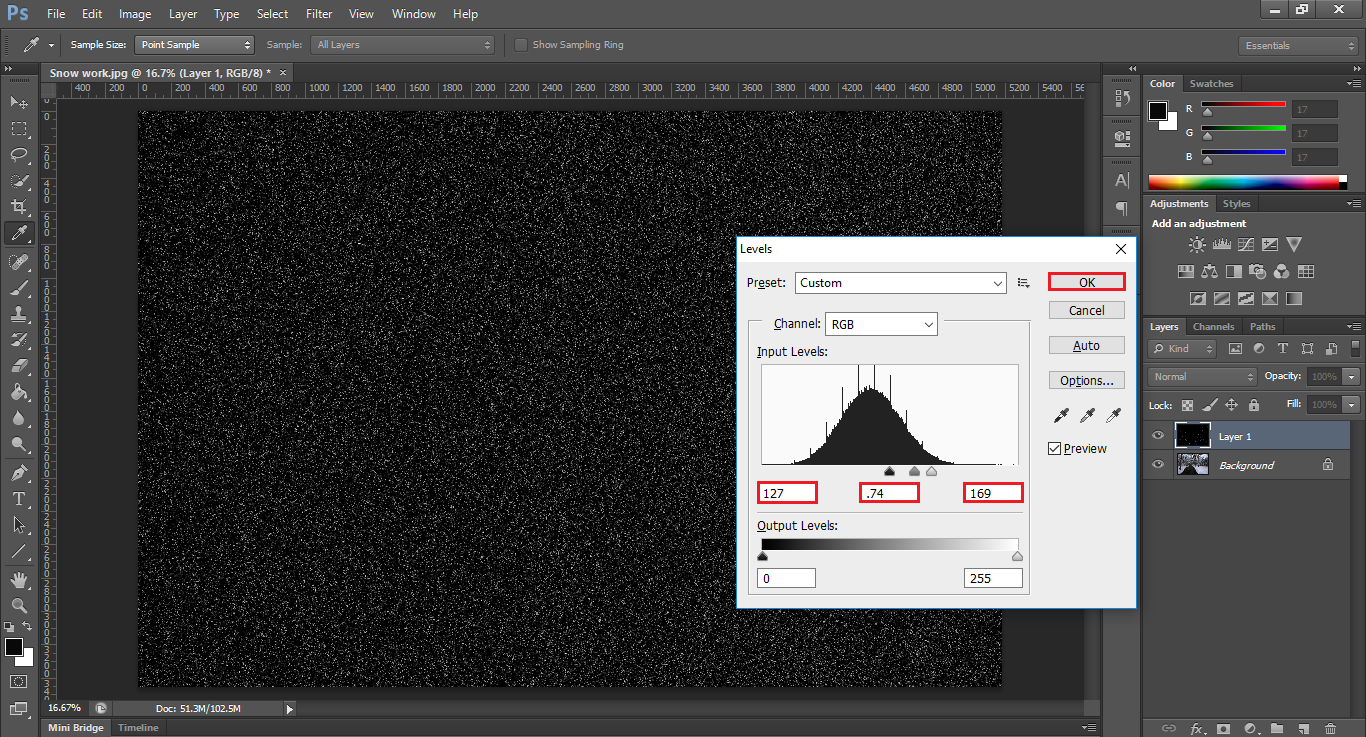
After confirming, press Ctrl +L to open the levels menu, this step will make the noise layer we created look more like snow by filtering out a selection of white colours. In the first box starting, from the left the blacks enter: 127 in the middle box the mid-tones enter .74 and in the final box the highlights enter 169 and click Ok.
Note: You can change these settings somewhat if you like, this will change the spread and look of your falling snow. Its always good to experiment with your scene.
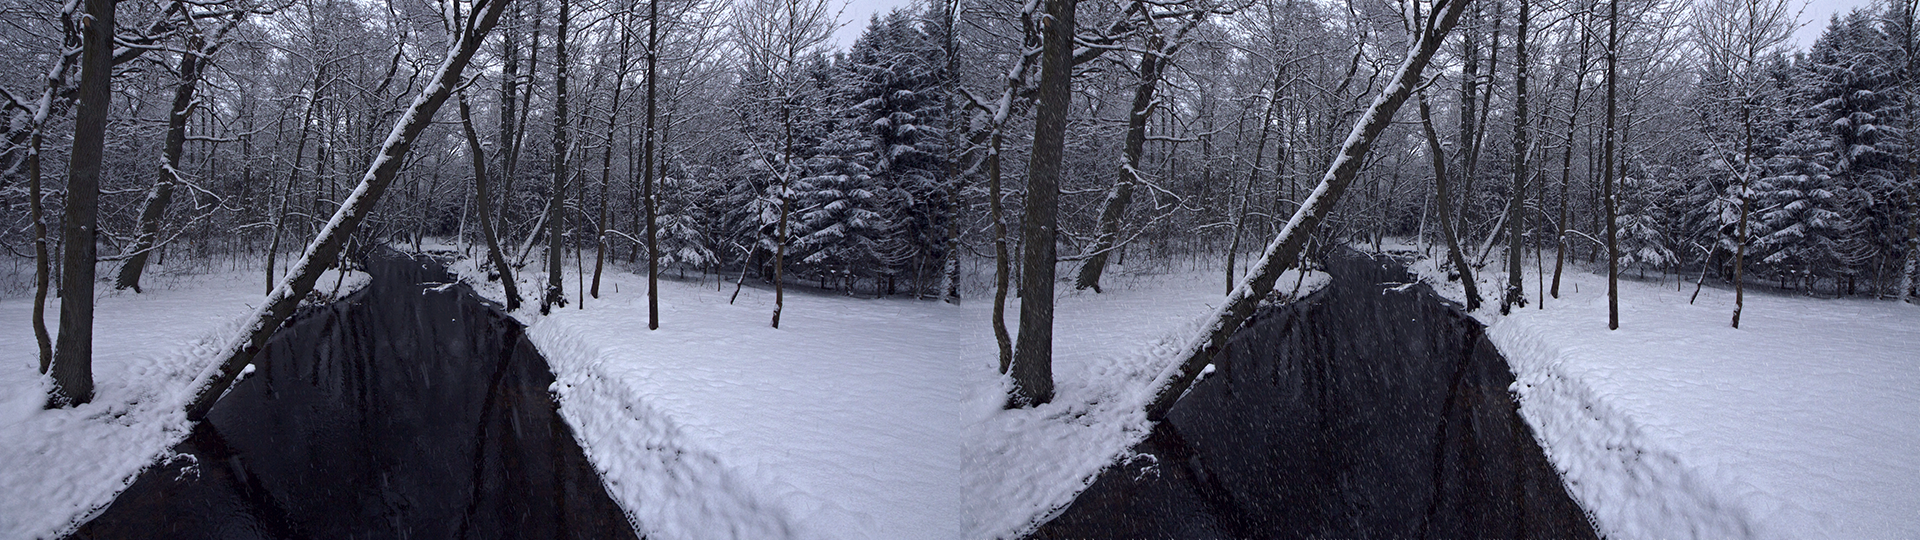
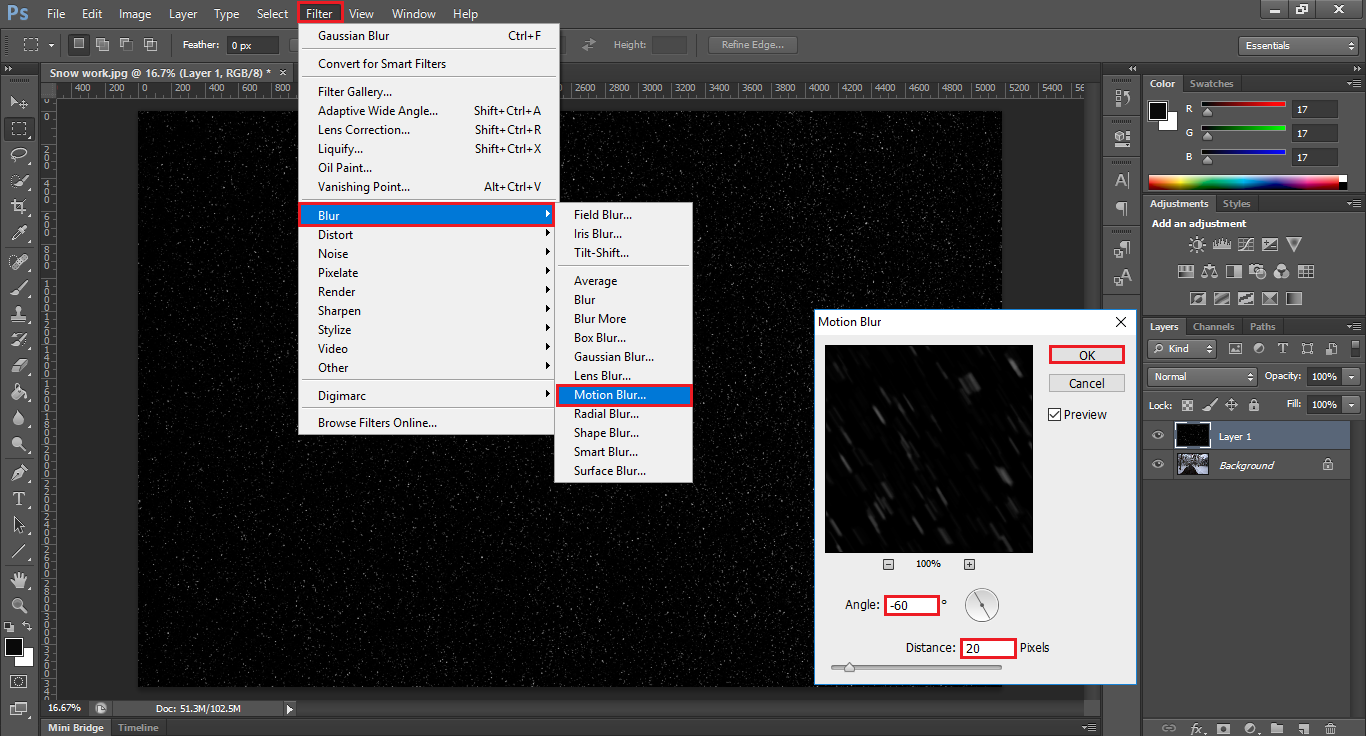
To make these white specks take on a more snow like falling motion, you will need to add a motion blur to the layer. In order to do this, go to Filter > Blur > Motion Blur. In the Motion Blur window, you have a couple of different options. The first is the angle in which you wish the blur to take. This setting changes the angle which the snow falls from. (as though the wind is blowing etc). If you have an image with snow already falling and you wish to add more snow, I would suggest matching the angle the snow is already falling at, otherwise, your image may look silly.
Once you have decided on the angle your snow is going to fall on, you can adjust the Distance Slider to mimic the shutter speed of your camera. The higher the number the longer the snow is going to look, therefore it will imply the shutter speed was slower. You can play with this however you please to get the right feeling for your image. As the snow in my image is coming down on quite an angle I'm going to select -62 and set the distance to 20 as the shutter speed was quite slow when I took the original image.
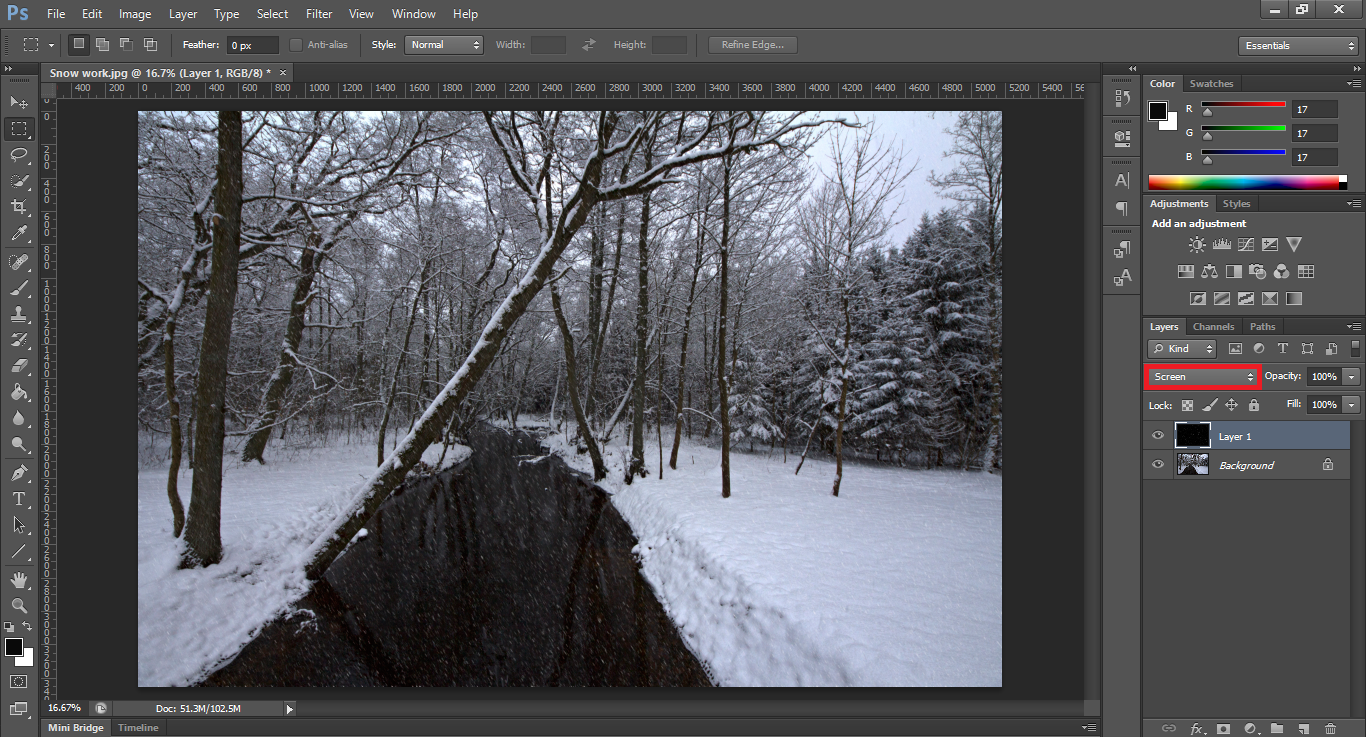
With this step done, your snow is complete, just change the layer mode from Normal to Screen and it will lay the falling snow over the top of your image. If you wish to make it thicker, you can select the layer and press Ctrl + J to duplicate the layer. Then just use the Opacity tab to the right of the layer mode to adjust how visible the copy layer is.
There you have it, you have just created falling snow. Feel free to deviate from these figures slightly, using the same technique to fine tune your falling snow to whatever suits your taste best.