Xperia Z1 is an awesome and very efficient smartphone but - as it is in the case of Android devices - you cannot personalize it in too much detail if you do not have administrative rigts. Let us take a look at how we can easily root Z1 and Z1 Compact.
Once you have rooted the device, you will gain access to system fail, be albe to install system-modifying applications, as well as remove needless additional programs installed by default by the phone manufacturer or the operator.
Keep in mind that we do not take responsibility for possible damages. You do everything on your own responsibility. Before starting the rooting process it is recommended to create a safety copy.
Check your exact smartphone model number
Before starting to root, it is important to check what exactly is the model and variant of your device. The procedure described below works only and solely on models C6902 / C6903 / C6906 / C6943 / D5503.
To check your phone's model, you need to go to settings in Android and then find the tab "About phone" where you can check the model. You can also check it in the phone's warranty papers or on the box it came with.
If your phone is not one of the models listed above, then this method will not work and may permanently damage your device!
Rooting Xperia Z1 / Z1 Compact
First you need to make sure that you have developer's options enabled and that you activated USB debugging in your phone. You can read about it in our guide to enabling USB debugging here.
Next, download onto your computer Xperia Z1 Newroot package which will allow you to root your device. In the meantime connect your phone to the computer using a USB cable.
Once you have plugged in your phone using a USB cable, you need to launch Newroot as an administrator. To do it, right-click on the Newroot.exe file and choose "Run as administrator".
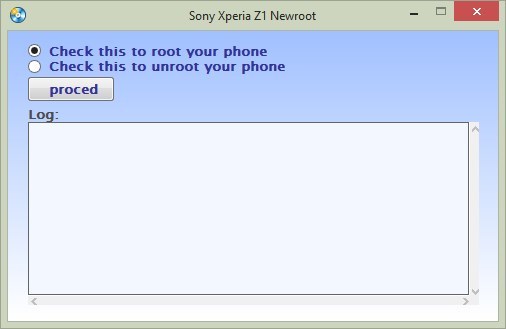
Once the program's window opens, tick in the option "Check this to root your phone" and click on the "Proceed" button. The program will connect with your phone and start the rooting process.
If a message asking for permission to connect with USB debugging displays on your smartphone's screen, then confirm the connection and enable communication. When the rooting process is finished, the phone will automatically reboot.
You can check whether the phone has been rooted correctly using Root Checked. You can download and install this app on Play Store. If the root is correct, then it should show a green message confirming that the phone has been rooted properly.
