Windows 10 has been out for quite a while now, originally being released back on the 29th of July 2015 as a free upgrade to anyone already using Windows. As with all new release software it had its bugs and privacy issues, one of the most frequent and annoying being the internet connection problems.

How to Better Safeguard Your Privacy if You Are Using Windows 10.
Although Windows 10 has been out for ages now and has seen many a patch roll on in, to fix a good portion of issues, many users are still having problems when trying to connect to the Internet, using a Wi-Fi connection. The message: Limited Connection is the usual frustration presented, preventing your computer from connecting to the Internet. The worst part is the usual turn it On and Off again method doesn’t even fix the problem, no matter how many times you disconnect and reconnect.
Troubleshooting Internet Connection Problems on Windows 10.
The first thing that is recommended, is to make a Restore Point on your operating system, just incase your computer suffers a failure. With a restore point set, it is possible to return to the previous point at which it was working properly. Saving a complete reinstall. If you don’t know how to do this please proceed to the following article and return once you have made a restore point.
How to Make a Restore Point (Manual and Automatic) on Windows 10.
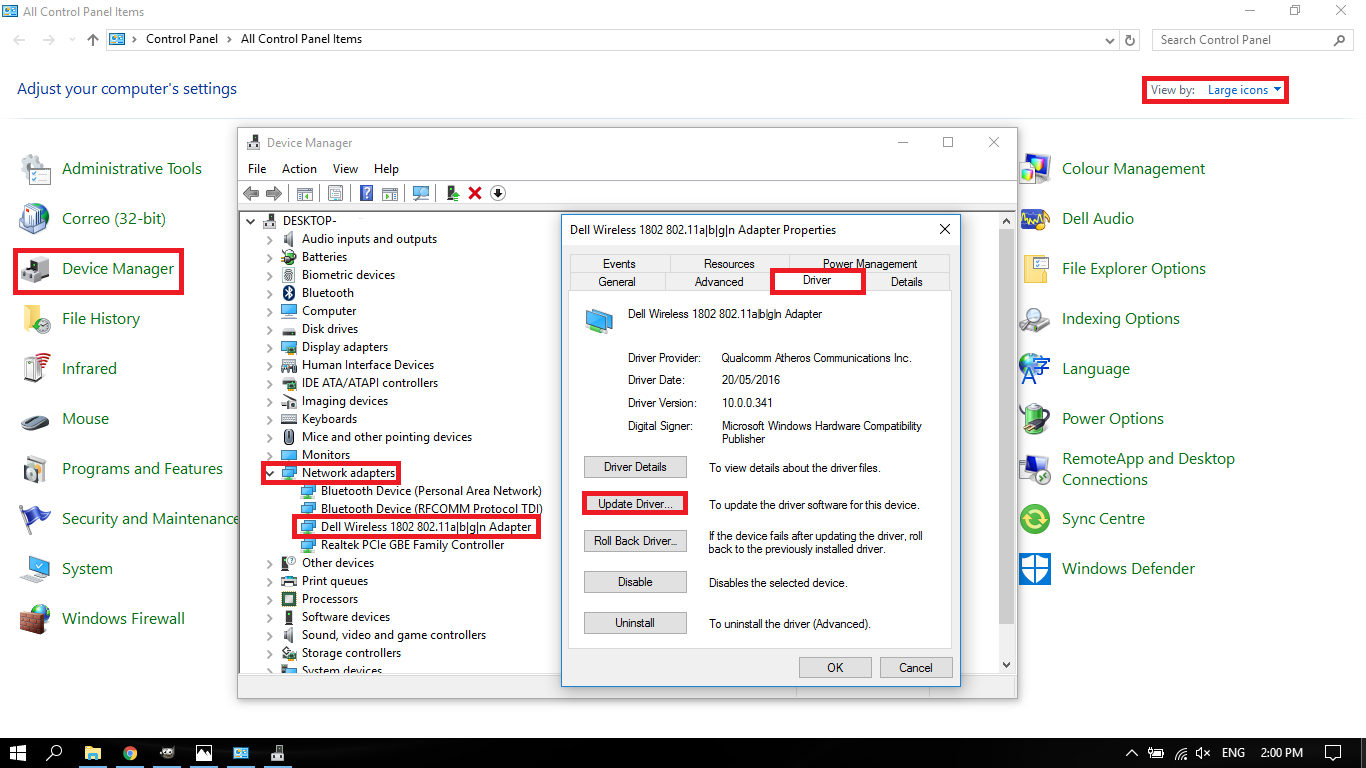
Now that you have a safe point to fall back on in case something goes wrong, go to the Control Panel, then Device Manager. Once the window is open, go to the section Network Adapters and locate your wireless network card. (It is easily identified by the word “Wireless” in its name) When you find it, double-click on it to open the next window.
In this new window, access the Driver tab and click Update Driver. Once your driver has updated, check to see if you have a working Internet connection. If the problem isn't fixed, go back to the Device Manager and right click on your wireless network card. Now, from the drop-down menu Disable your device, then check to see what happens with the Internet connection, wait a few moments, then re-enable it again with the same method.
Note: Alternatively you can always uninstall the driver completely and reinstall it from scratch.
For the next step, you need to access Command Prompt (with Administrator rights). To do this, search cmd from the Start Menu, when you see the cmd icon right click on it and select Run as administrator.
When you have the command box open in front of you, enter the following commands. (don’t forget to press enter at the end of each line to send the command)

netsh int tcp set heuristics disabled
netsh int tcp set global autotuninglevel = disabled
netsh int tcp set global rss = enabled
netsh int tcp show global
After you have entered all of these, Restart your computer, hopefully, all internet connection problems have been fixed. If not continue with the next option.
Making Sure There Isn’t a Problem With Your Cable, Modem or Internet Service Provider (ISP) Using Command Prompt With Administrator Rights.
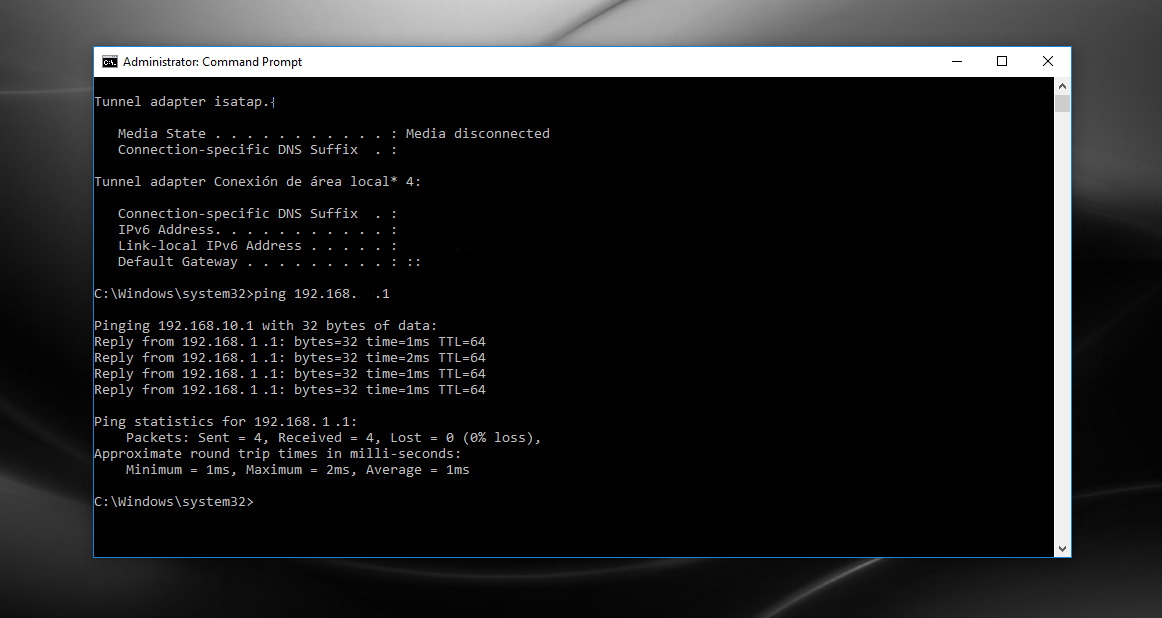
Using Command Prompt (as admin), type ipconfig, then look for the IP address listed next to Default Gateway. Next, type ping plus the address that was listed next to your default gateway then press Enter. For example:
ping 192.168.1.1
If done correctly it should look similar to like this:
Pinging 192.168.1.1 with 32 bytes of data:
Reply from 192.168.1.1: bytes=32 time=1ms TTL=64
Reply from 192.168.1.1: bytes=32 time=2ms TTL=64
Reply from 192.168.1.1: bytes=32 time=1ms TTL=64
Reply from 192.168.1.1: bytes=32 time=1ms TTL=64
Ping statistics for 192.168.1.1:
Packets: Sent = 4, Received = 4, Lost = 0 (0% loss),
Approximate round trip times in milli-seconds:
Minimum = 1ms, Maximum = 2ms, Average = 1ms
If the ping is successful and you see results that look similar to the ones shown above, it might be best double check that your modem/router is working correctly and/or contact your (ISP) Internet Service Provider.
A Couple More Methods You Can Try to Fix Internet Connection Problems.
Option 1: Go to the Device Manager again, as we demonstrated above, when the window is open, go to the section Network Adapters. Once in that section, right-click the Internet adapter you are using. From the Drop-down menu, select Properties, then in the new window go to the Power Management tab here is where you will find the option: Allow the computer to turn off this device to save power. Uncheck the option and click on OK to save the change. Immediately afterwards Restart your computer, hopefully, your Internet access will be restored.
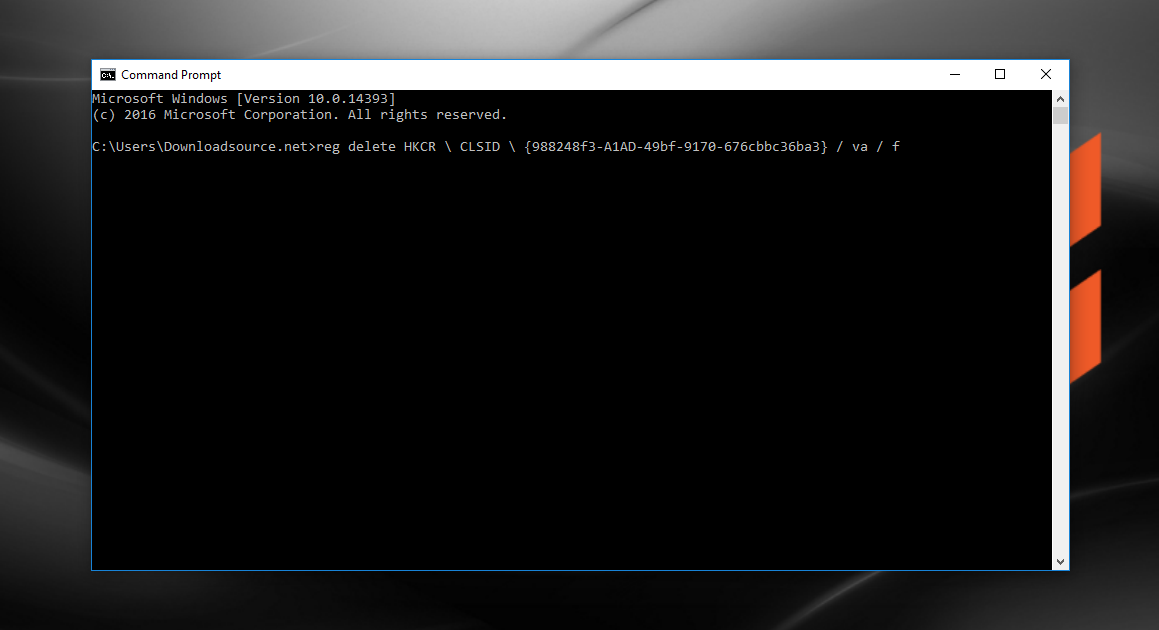
Option 2: If you have updated from an older version of Windows, there is a possibility that the problem with the internet is due to previous VPN service (possible if you are using a new VPN service added later) In this case you will need to delete the VPN through the Registry Editor in Windows 10. To do this, press Windows Key + R to open the Run dialogue box, type cmd then press Enter. In this window enter the following command.
reg delete HKCR \ CLSID \ {988248f3-A1AD-49bf-9170-676cbbc36ba3} / va / f
Once you have typed the command press Enter to execute it, then add the next command line.
netcfg -v -u dni_dne
After entering this, Restart your computer and check if Windows 10 is now able to connect to the Internet via your WiFi network.
Option 3: Another solution is the use the official Microsoft tool for troubleshooting network problems in Windows 10. This tool is included in Windows to troubleshoot network issues and will check what is causing problems and fix them automatically. To find the network troubleshooter in Windows 10, search Identify and repair network problems from the start menu. In all the time I have been using Windows (any version) this has not once fixed a connection problem, however, that’s not to say it won't for you. It’s worth a shot if you are getting frustrated.
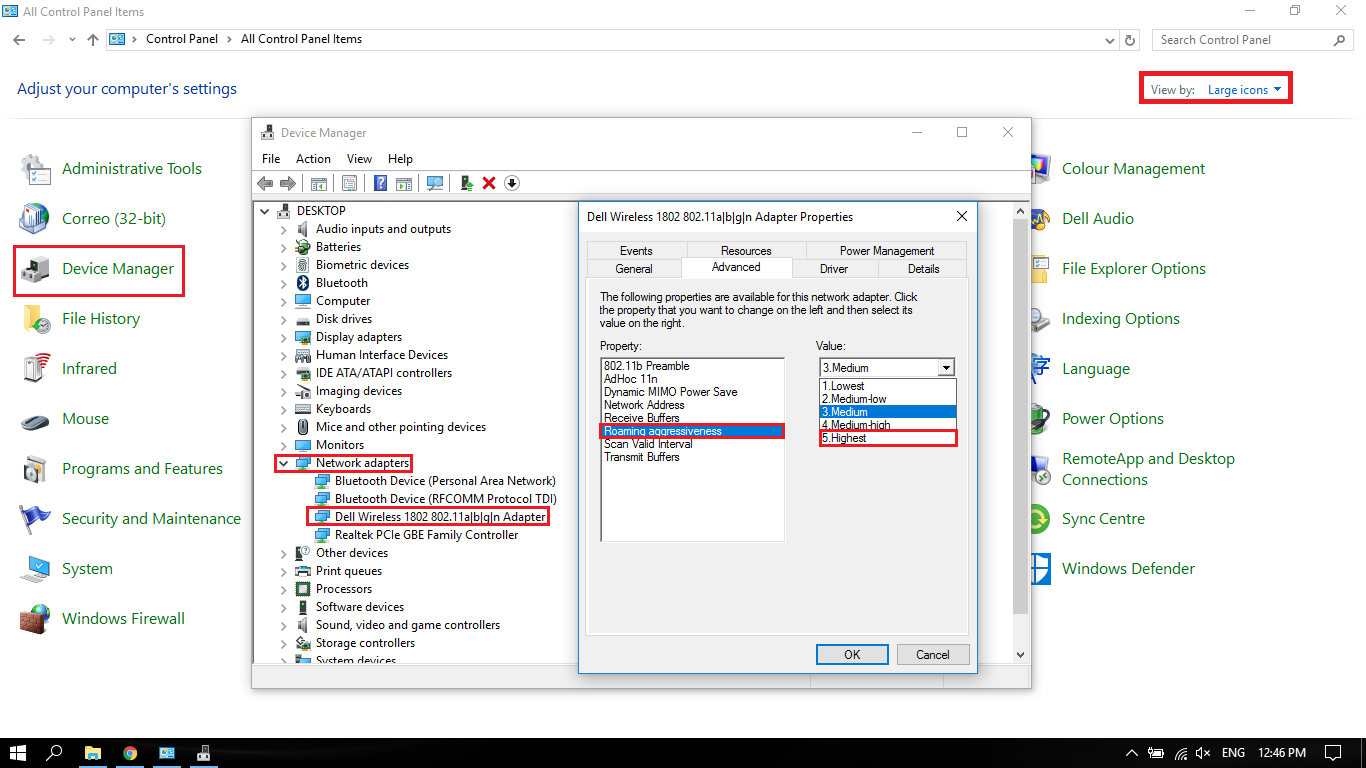
Option 4: Go back to the Device Manager as shown in the above steps, find your Wireless Adapter, then click twice on it to open the Settings menu. Here go to the Advanced Options tab and find the option Roaming Aggressiveness, this will show a configurable field where you will need to set the option to Highest. (setting roaming aggressiveness to high increases the transmit power and can help with connectivity) Now just click Ok to save the changes. Your computer is going to try to connect to Wi-Fi networks in a more persistent and aggressive way from now on.