If you are looking for a great free program to make some quick adjustments to your photos or digital artwork, GIMP is a fantastic alternative to paying a monthly subscription for Adobe Photoshop. Mind you Gimp in no way compares to the power of Photoshop, however, if you're not yet a professional, it's easy to use and ticks a lot of boxes in the features department. You can even use selected Photoshop plugins in GIMP enhancing this experience even more.
How to Make Falling Snow In Photoshop.
Expanding on the introduction a little more, if you are new to Gimp, it offers a lot of one-click tools and a huge assortment of filters that are also featured in Photoshop. As well as this, there are plenty of advanced options that allow huge amounts of adjustment. As with Photoshop, GIMP includes manual adjustments too, Curves, Levels, Saturation, Hue, etc. On top of all this the standard stuff, there are countless user created extension available for download.
Even cooler is that GIMP has little trouble assimilating plugins originally designed for Photoshop. Here are the Photoshop formats that GIMP accepts 8BF, 8BA, 8BI and 8LY. The only Photoshop files that GIMP really does not like are ATN Files or as they are known in Photoshop, Actions. Actions are basically just Macros, that automate functions like Frequency separation. (commonly used to airbrush portraits, and keep texture)
Making Sure GIMP is Ready to Install Plugins.
This is not the only way to use Photoshop Plugins on GIMP, however, it is a great way to start experimenting with them. The first thing you are going to have to do is make sure GIMP is Photoshop Plugin ready. If you do not already have GIMP installed on your Computer you can download the latest version here:
Once you have GIMP installed, you will also need to install a plugin that will allow other plugins to function properly, you can grab it below:
GIMP to Photoshop Plugin AKVIS
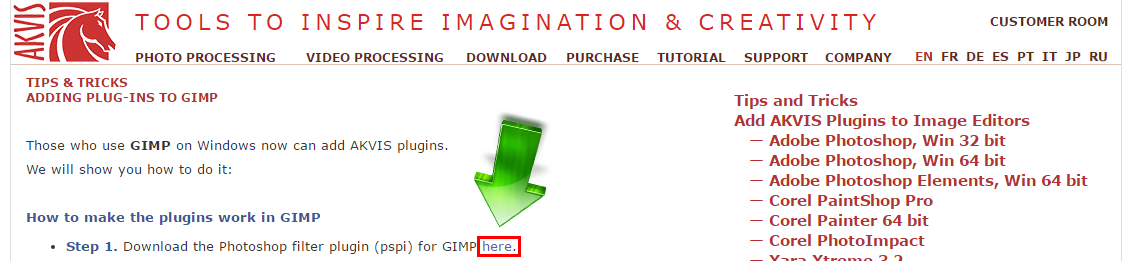
After you have read a little bit about Akvis at the above website, you can download and extract the ZIP archive to this folder:
C: \ Program Files \ GIMP 2 \ lib \ gimp \ 2.0 \ plug-ins
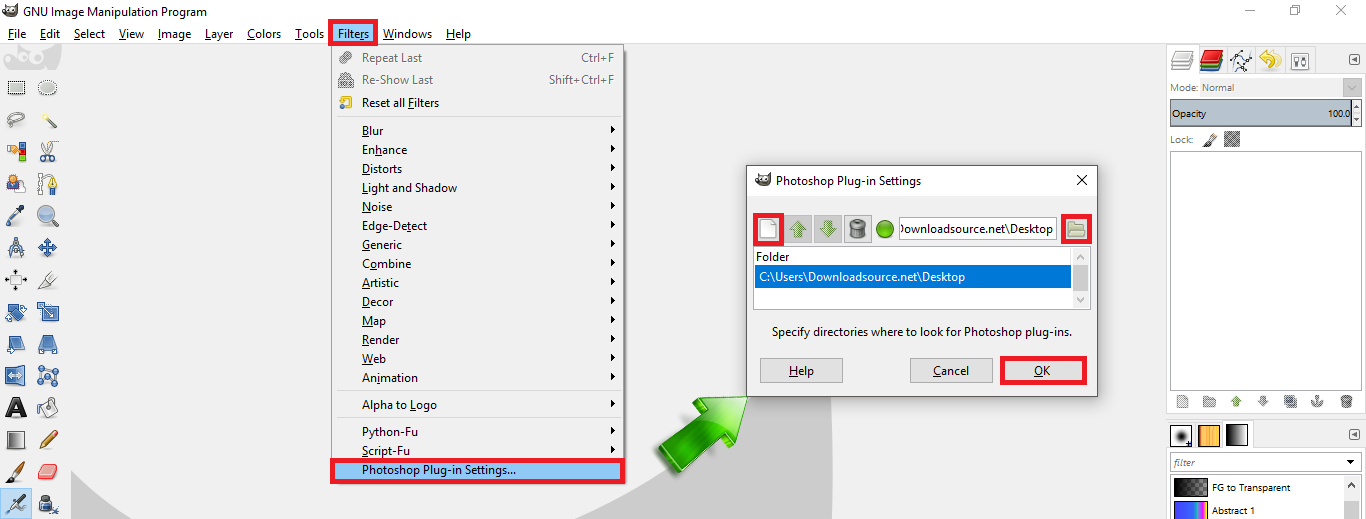
When you have the file in the correct place, you can open GIMP, when it loads click on the Filters from the top menu and scroll down until you see a new option called Photoshop Plug-in Settings. It should be the very last thing on the list. If it's on the list you placed the files in the correct place, if it isn't, go back and double check you have the files (not the folder) in the right location.
Choose a Photoshop Plugin You Wish to Use.
Now that you have GIMP ready to handle Photoshop Plugins, you will need to find some plugins to use. AKVIS has plenty to choose from, not every single plugin is going to work on GIMP, however, so you will have to browse around for a little while first. If you already have a few plugins from other sources on hand, feel free to try using them. For this guide though, we shall be using AKVIS Chameleon v 9.0 and Charcoal V2.0 (Make sure you download/install the plugin and not the standalone version)
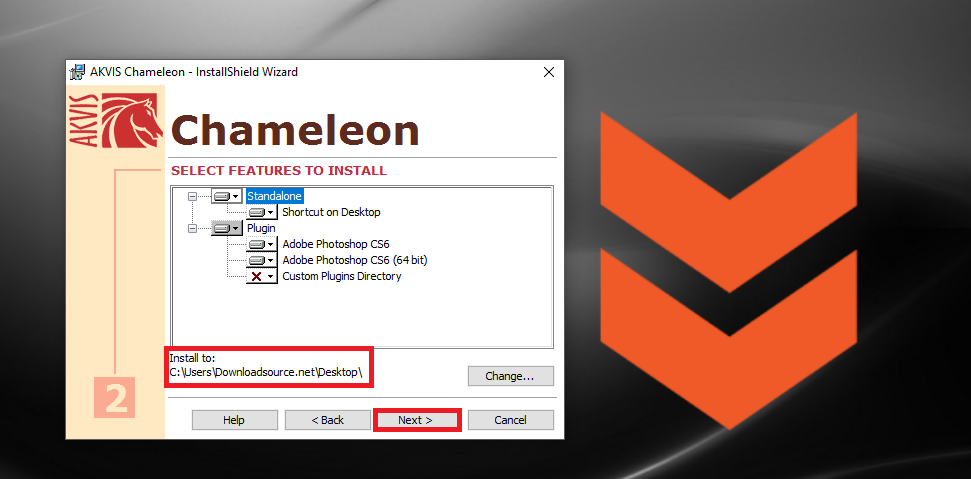
Once you have picked out a plugin you wish to try, make sure you download the correct version x32 or x64. Otherwise, it will not install on your system. When you have downloaded the plugin and run the .exe file, save it somewhere easy to find like your desktop, as you'll need to open it from that location shortly.
Now you can install the plugin in GIMP, simply launch GIMP and go to Filters > Photoshop Plug-in Settings then click the White Page icon on the popup window that appears. Next, click the folder icon on the right-hand side and select the directory you saved your Photoshop Plugins too. The red button on the Photoshop Plugin window will turn green if it's correct. Click OK and close GIMP.
How to start using your newly Installed Photoshop plugin in GIMP
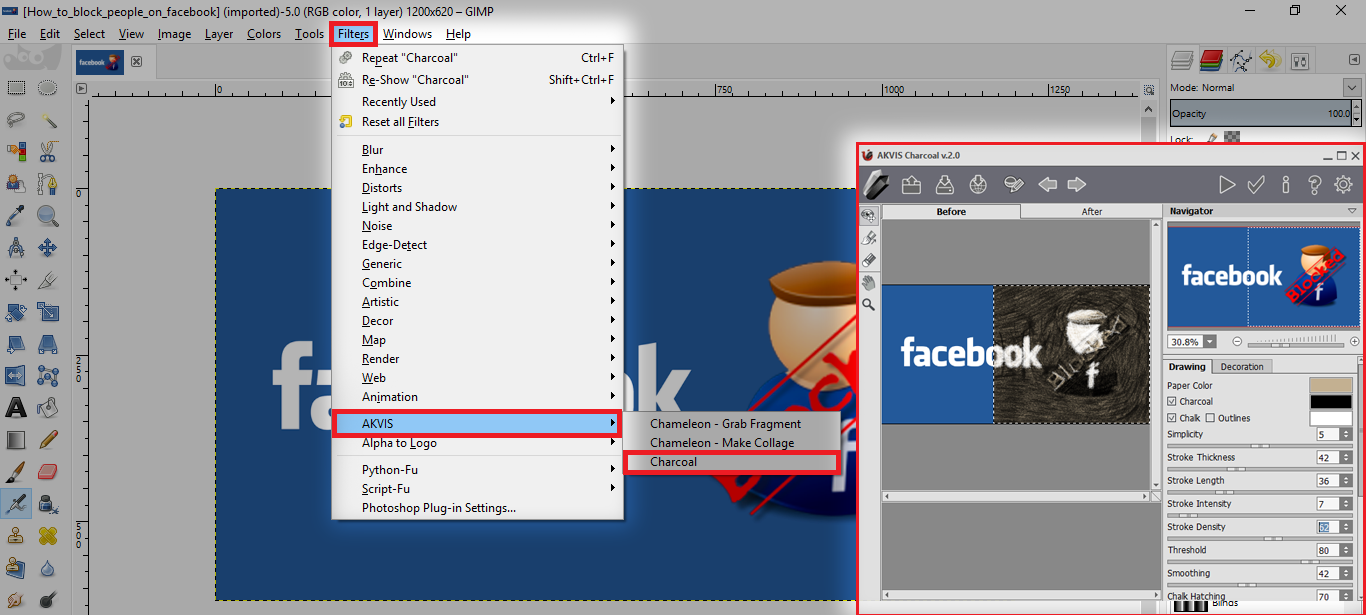
The next part is quite simple, your plugins are already installed now it's just a matter of finding them. First, you will need to open an image as the plugins will not work without an open document. Now you can click Filters and look for a new entry in this list, as we used AKVIS plugins, that is the new item on the list. Now pick the plugin and follow the prompts to start using it.
This is just one method of installing Photoshop Plugins on Gimp, there are quite a few alternatives to AKVIS so have a browse around until you find something you really like.