If you use Premiere Pro to create video content and are looking for a way to add AV1 encoding support or just want to try some more customisable export options. This article will show you how to get all of that with a fantastic third-party tool called Voukoder. This little plugin gives you a ton of extra export options which allows you to fine-tune quality and video size.

Related: How to Enhance audio quality for YouTube videos and Podcasts using Adobe Enhance Speech.
Voukoder is a free plugin for the video editing software Adobe Premiere Pro that allows you to use the advanced encoders x265 and AV1 to export videos. Both x265 and AV1 are open-source codecs that can produce high-quality videos with a relatively low bitrate, making them ideal for streaming and online distribution. However, using these codecs in Premiere Pro (some versions) can be tricky, as they are not natively supported. That's where Voukoder comes in.
Voukoder enables Adobe Premiere Pro users to take advantage of the advanced features and presets of x265 and AV1, and makes it easy to export videos using these codecs. In this guide, we will walk you through the process of installing and configuring Voukoder, and show you how to use it in Premiere Pro. We’ll be covering the basics in this guide but feel free to go down the rabbit hole and experiment with the settings because there is a truckload of them!
What’s the difference between AV1 & HEVEC? Why is AV1 better?
AV1 is a video compression standard developed by the Alliance for Open Media, while H.265 (also known as HEVC) is a video compression standard developed by the ISO/IEC Moving Picture Experts Group (MPEG) and ITU-T Video Coding Experts Group (VCEG).
The main difference between the two is that AV1 is designed to be more efficient in terms of compression than H.265, meaning it can achieve the same visual quality at a lower bitrate, or higher visual quality at the same bitrate.
AV1 also has better support for transparency and other features such as screen content coding and improved support for difficult video sequences. AV1 is also intended to be royalty-free, which means it does not require license fees to be paid for its use.
How do you add AV1 Support to Premiere Pro? Premiere Pro AV1 export encoding.
The first step is to download the Voukoder plugin from the official website. There are two different components you will need to download in order to get it working. The first is the primary Voukoder software which is the primary driving force. The second is the plugin that adds support for Premiere Pro.
Voukoder
Voukoder for Premiere Pro (Min CS6)
Note: You can also get it for DaVinci Resolve Studio, Adobe Aftereffects, VEGAS Pro, and VEGAS Pro 2.
Once you have downloaded the client and plugin, you will need to install it. This process is straightforward, and you simply need to follow the on-screen instructions. Once the installation is complete, restart your computer then open Adobe Premiere Pro. Depending on the version of Premiere Pro you are using will determine how you access it. Just explore the Export page and you should find it easily enough.
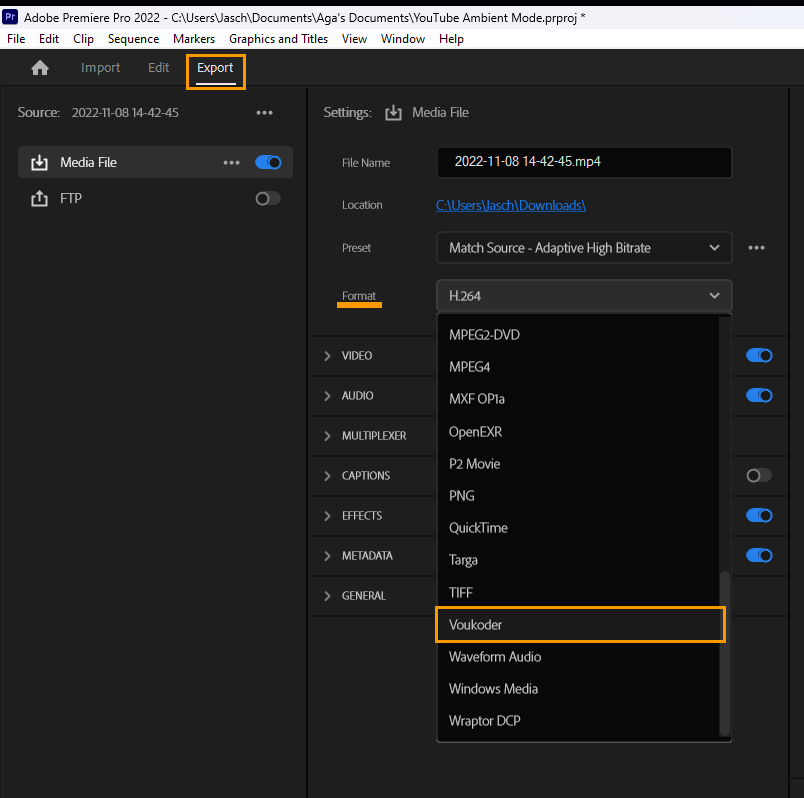
- For Premiere Pro 2022 and 2023 change to the Export tab then choose Voukoder from the Format section.
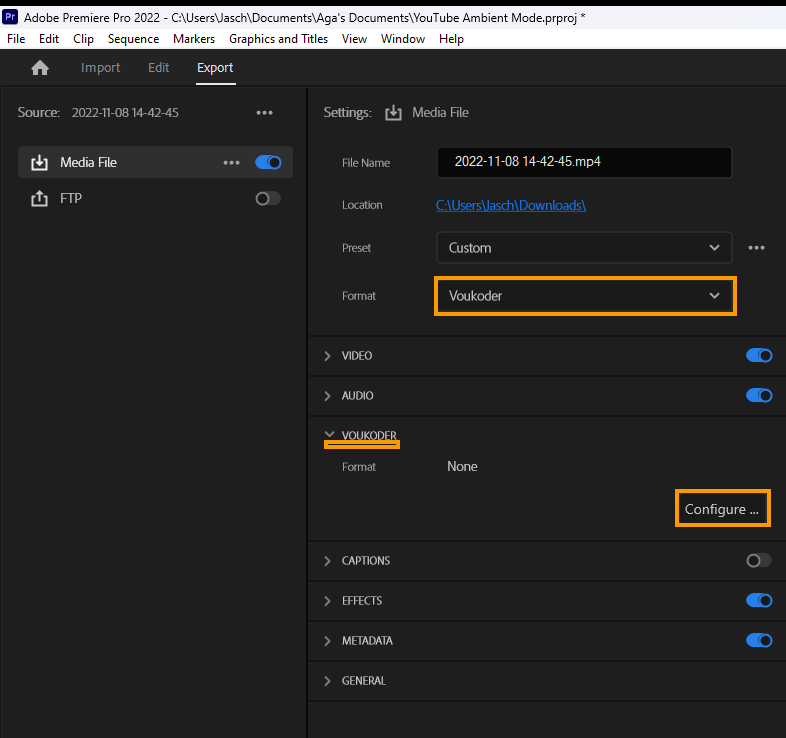
- When you have selected this you will see a new Voukoder option appear in the list of options below. Expand this and click Configure.
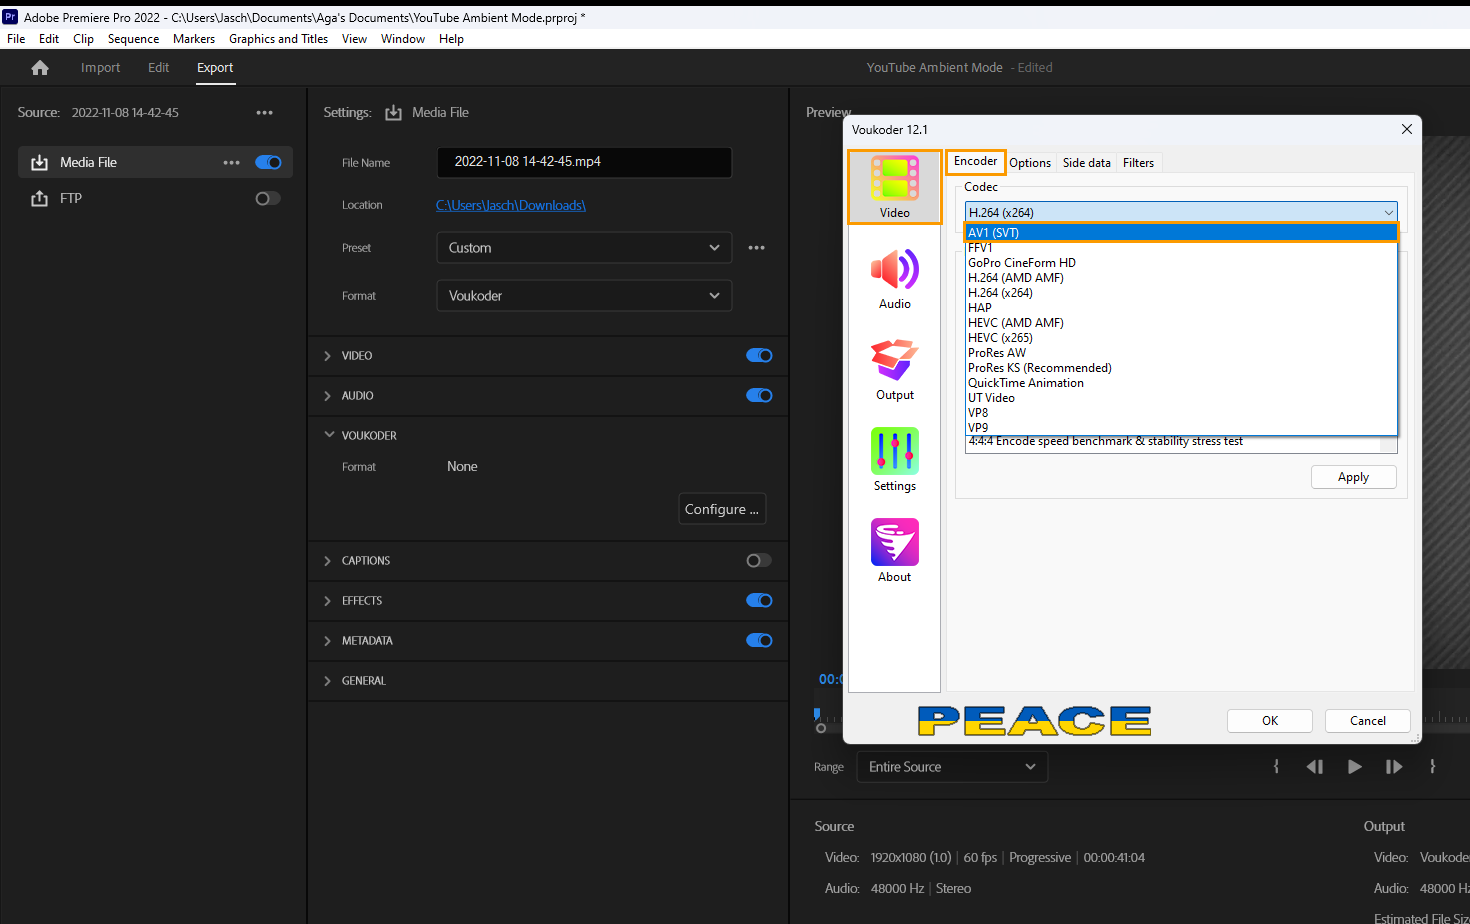
- This will open the Voukoder tool where you can change the encoder to AV1. Simply click the drop-down menu under the encoder heading and select AV1 from the list of options. Then click Apply to save the change.
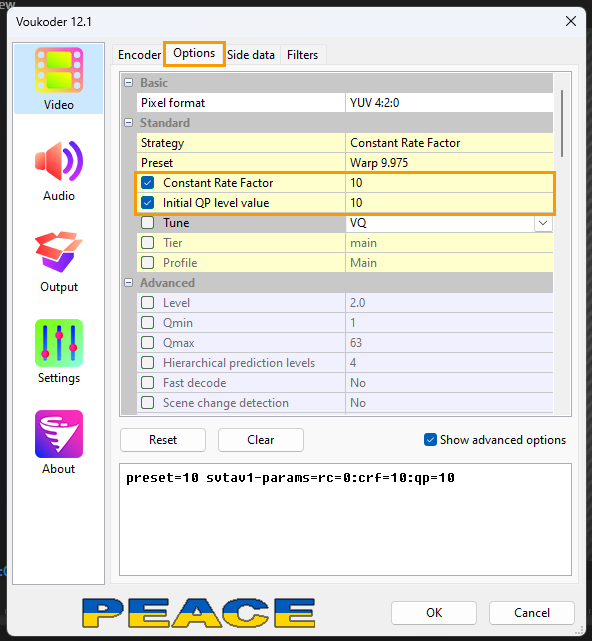
- The default options are pretty good, however, if you want to fine-tune things a little more change to the Options tab. There are plenty of options here, however, I would only adjust the Constant Rate Factor and Initial QP Level Value. The lower the number the higher the quality. However, this will also increase file size and render times.
How to Create Custom Presets in Voukoder.
One of the great features of Voukoder is the ability to create and save custom presets. This means that you can configure the codec settings to your liking, and then save them as a preset so that you can use them again in the future.
To create a new preset, you can go to the "Presets" tab in the export settings window, and click on the "New" button. Once you have created a new preset, you can configure the settings to your liking, and then save it.
Once you have configured the settings and created a preset, you can export your video by clicking on the "Export" button. The export process may take longer than usual due to the advanced encoding process, but the end result will be a high-quality video with a low bitrate.
Does YouTube Prefer H.264, H265, AV1 or VP9?
YouTube currently supports a variety of video compression standards, including AV1, VP9, H.264, and H.265. However, they generally prefer to use AV1 and VP9 over H.264 and H.265 because these newer standards are more efficient and can provide higher visual quality at a lower bitrate, which can help to reduce bandwidth costs.
Additionally, YouTube has stated they plan to phase out H.264 support over time to encourage adoption of more modern codecs. It also depends on the device and browser, As AV1 and VP9 requires more power to decode than H.264 and H.265. They will fall back to H.264 on older devices and browsers.