In the not so distant past, Windows used to allow easy drag and drop WiFi network management. Letting you choose which WiFi networks you wanted to take connection priority. Unfortunately, more recent versions of Windows have moved away from this easy to use feature. This doesn’t mean it isn’t still possible though, the steps in this guide will show you how to prioritize WiFi networks on Windows 10.

How to Add or Remove Write Protection From USB Flash Drives.
In a time when Microsoft is listening to users feedback more than ever, it seems quite strange to remove such a small, useful feature from their flagship operating system, Windows 10. Having the ability to prioritize which WiFi networks your computer connects to might seem pointless in a home office situation, but it does have its benefits when you are moving around a large office space, with multiple WiFi connections and networks services.
Thankfully, for the time being, Microsoft hasn’t completely removed the ability to prioritize WiFi network connections. You can still make changes to the network list from the Command Prompt, it isn’t as simple as the old drag a drop process, especially for users unfamiliar with using the command prompt. With our guidance and the steps below even the most novice of Windows users will be able to customise their Windows WiFi Network Prioritization list.
Using Command Prompt to Re-order Network Priorities in Windows 10.
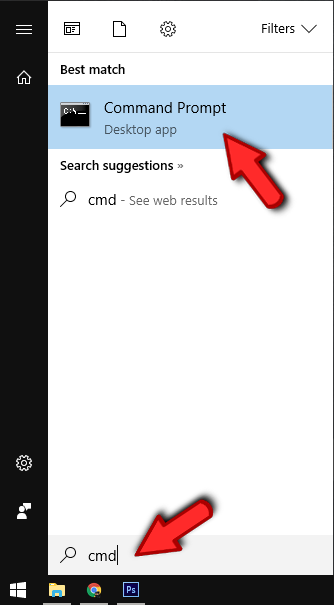
Even if you aren’t experienced using the Windows Command Prompt tool, there’s no need to stress, just stick to the steps and you’ll have everything rearranged in no time. First, open the Start menu, and type CMD, when you see Command Prompt show in the list, right-click on it and select Run as administrator, then accept the security pop-up with Yes.
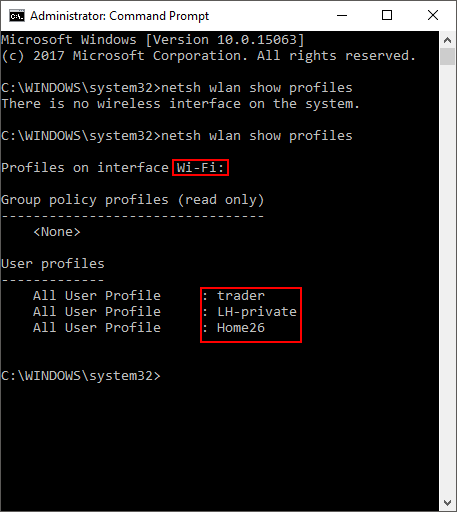
Now that the Windows command prompt tool is open in front of you, type or copy and paste: netsh wlan show profiles into the window then press Enter. This command will list all the WiFi networks your computer currently knows, in their current set connection order.
For the next step, you will need to make note of the exact name and details of the WiFi connections you wish to edit. You can either make a note on a piece of paper or type the information into another program like word or notepad. Once you have copied the details, enter or cut and paste the following text into the command prompt:
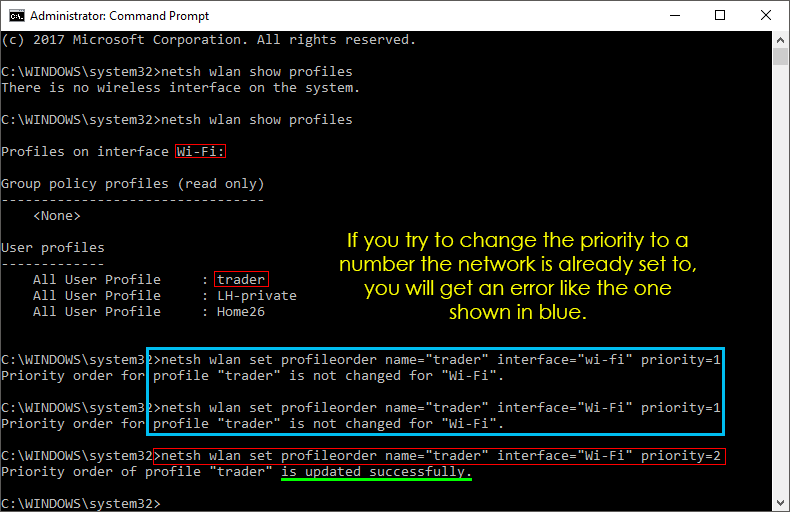
netsh wlan set profileorder name=”wifi-name” interface=”interface-name” priority=#
Replacing ‘wifi-name’ and ‘interface-name’ with the information you wrote down earlier. You will also need to replace the ‘#’ with the position you want that specific network to take. With the command line typed press enter to initiate the change. To double check your changes, reenter: netsh wlan show profiles, press Enter. if it has been successful the item will have changed position on the list. If you need to number any of the other entries on the list, follow the exact same process, however, make sure you use the next number in the sequence. 1,2,3 etc.
Note: If you are confused with what to enter into Interface name enter: Wi-Fi
Hopefully, Microsoft decides to change the feature back in future updates. Even macOS still has an easy WiFi network priority feature as standard. If you know of an even easier way to change the Windows 10 WiFi priorities list, please let us know in the comments and we will add it to the article.