If you have updated to Windows 11 you’ll probably want to get familiar with the new update history tool. This tool allows you to quickly and easily check what updates were installed and when they were installed. With so many new and random bugs and errors popping up on Windows 11 There’s a good chance you’ll need to know which updates to roll back.

Related: How to go back to Windows 10 from Windows 11. (Windows 11 Rollback)
Although there are a lot of areas in Windows 11 that haven’t really changed from Windows 10. The entire Windows 11 update system and most of the Settings app menus have been redesigned and updated. The menus are sleeker, less cluttered, and most of the time have options that are easier to locate, however, you’ll probably still find yourself missing the Control Panel.
This time around Microsoft has added an extremely detailed update history system that breaks down Windows 11 updates into categories, allowing you to better understand the updates that are installed. This also allows you to easily identify updates that may have introduced bugs or critical flaws. The new update system features the following update categories: optional updates, cumulative updates, feature updates, quality updates, driver updates, definition updates, other updates.
Just like on Windows 10, Windows 11 has three different ways to check your update history, from the Settings app, from Powershell, and from Command Prompt. For this guide, we’ll only be covering the Settings app method as the other two are pointlessly complicated and 99.9% of people won’t find them useful or valuable.
Quick steps to check your Windows 11 update history.
- Open the Settings app on Windows 11.
- Go to Windows update in the left-hand pane.
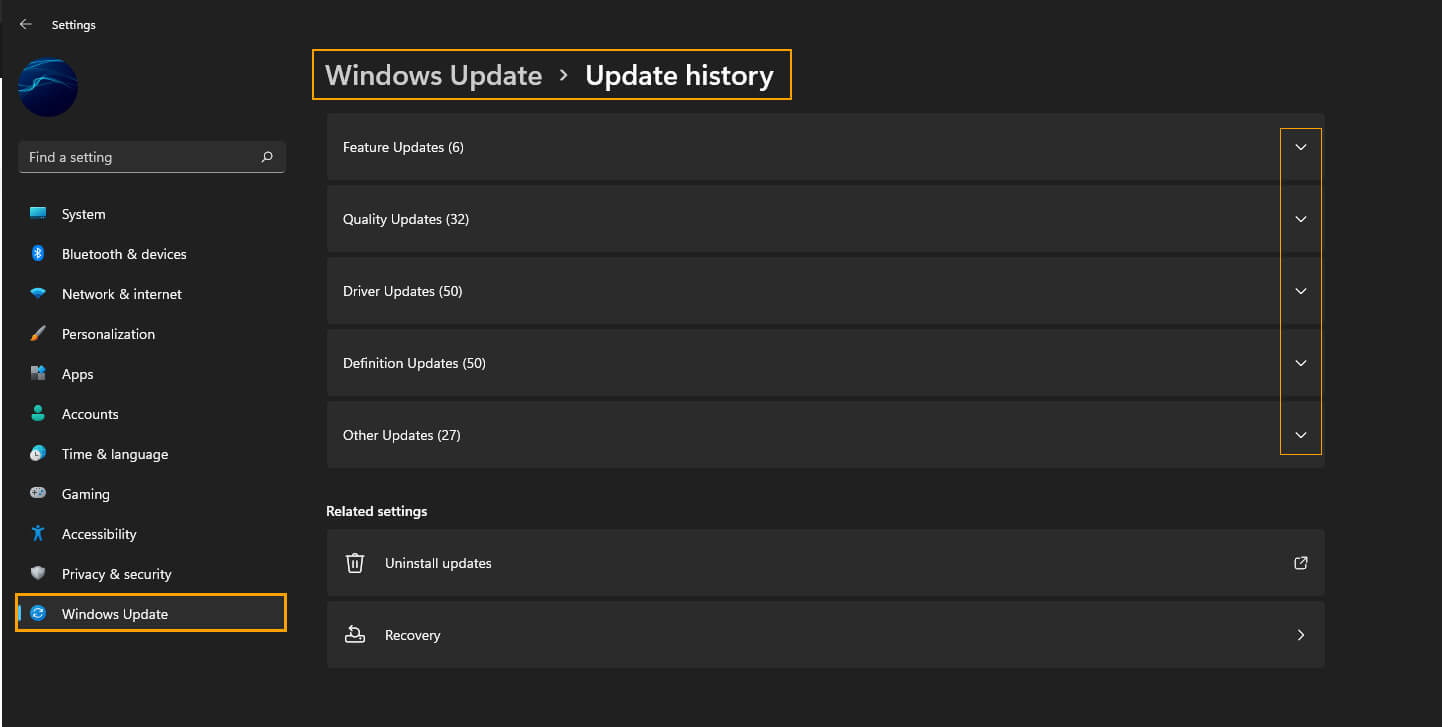
- Click Update history in the central pane.
- On this screen expand the categories to view recent updates.
- If you want to remove an update, you can use the Uninstall option at the bottom of the page. (more info on removing updates here)
How do you check your entire Windows 11 update history? View Windows 11 Update log data.
To check your entire Windows 11 update history you’ll need to do the following.
- First, open the Settings app on Windows 11 by pressing the Windows Key + I (or however else you like to open it).
- When you are on the main settings page click Windows Update at the bottom of the list on the left-hand side.
- Next, click Update history in the central pane. This will take you to a new screen where you will be able to see all of the Windows 11 updates that have been installed on your computer. This list will be broken down into categories.
- Feature updates
- Quality updates.
- Driver updates.
- Definition updates
- Other updates.
- To find out more about each of the updates, simply expand the list and check the information.
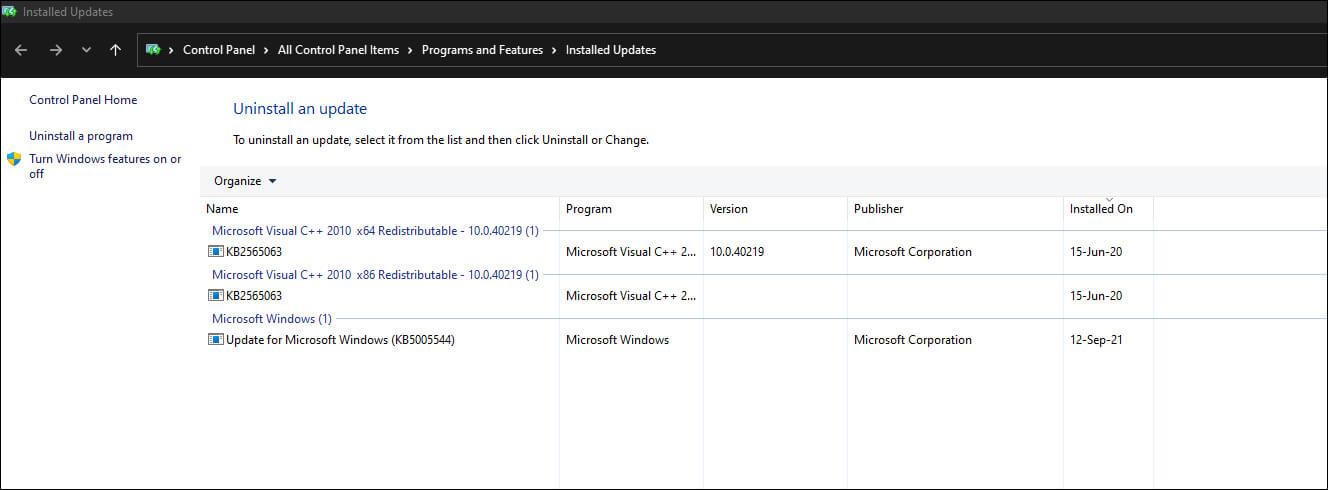
How do you uninstall a troublesome update on Windows 11? Remove Windows 11 update that caused issues.
If you notice that a new Windows 11 update has broken something on your system, you can uninstall the update and revert back to the last working version. However, there are some limitations as Windows doesn’t let you uninstall all the updates individually. If you want a full guide on removing bad Windows 11 updates you can check out our comprehensive guide here.