Windows 10 has two main options when you are setting up a network, Private and Public. You might not think much about which type you are using but you should be aware that the settings within each are quite different, especially regarding security. This guide will explain the difference between each and show you how to configure your network as Private or Public depending on which you have chosen.
An Overlooked Way to Speed Up Your Windows 10 Computer.
As we mentioned in the introduction, Windows allows you to configure your network connection as either Public or Private. The difference being security settings and file sharing, if you set your network as Public Windows will automatically interpret the connection as less safe, putting a block on the transfer of files. Setting it to Private is more open and should only be used on trusted networks or if you don’t mind your files may be accessed.
If you are already connected to a network and wish to change your settings, finding the option is a little more complicated, as you will no longer see the pop-up option. Below are the steps you need to follow in order to change the configuration of a network from public to private or vice versa.
How to Configure a Public or Private Network in Windows (Wi-Fi or Ethernet)
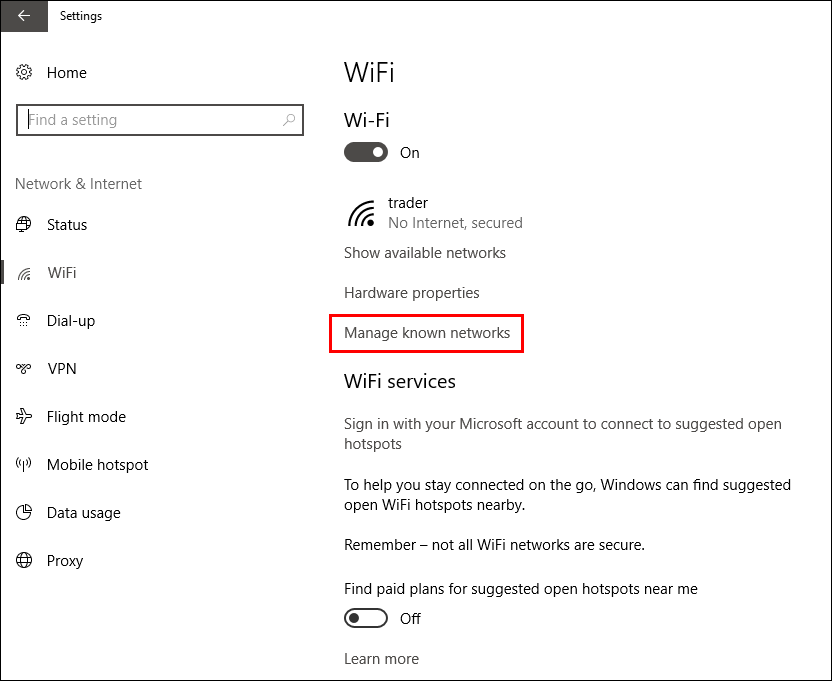
There are a couple of different ways you can go about changing your network settings, this is by far the easiest. First, press the Windows Key + I, from this menu select Networks & Internet. On this new page choose either WiFi or Ethernet, depending on what type of connection you are using.
For WiFi users click on Manage Known Networks on the right side of the window, this will display a list of all the networks you have connected to in the past.
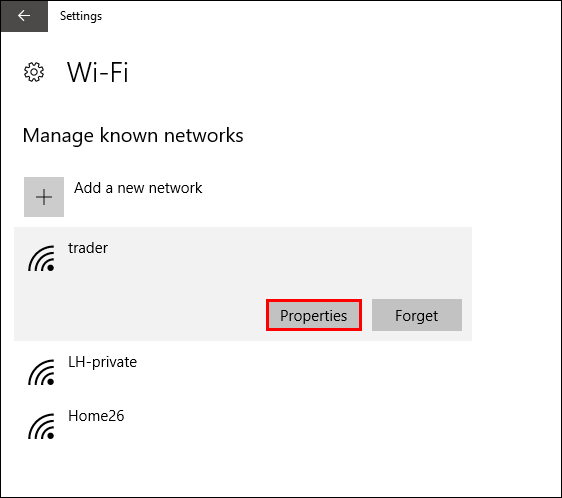
From this list click on the network, you want to configure and select Properties.
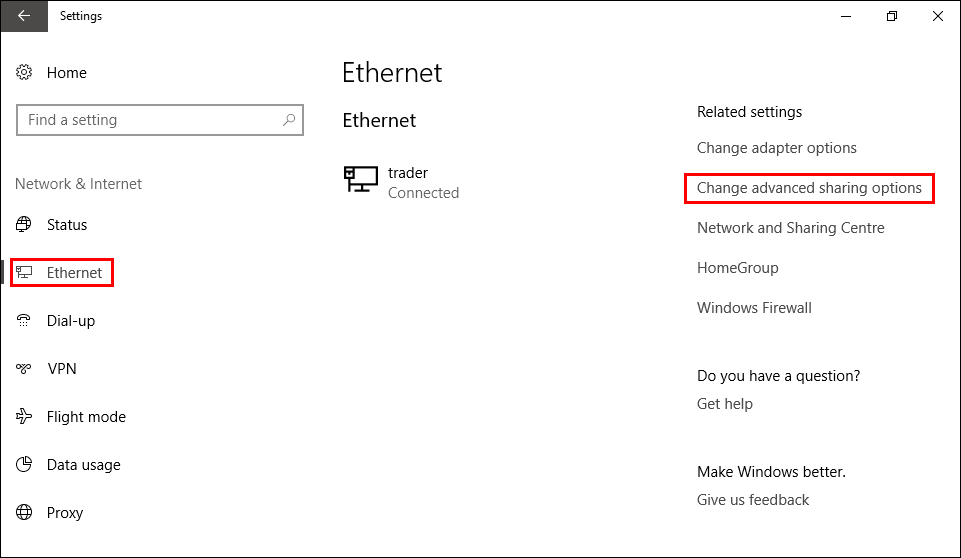
If you are using an Ethernet Connection the screen will look a little different, click on Change Advanced Sharing Options.
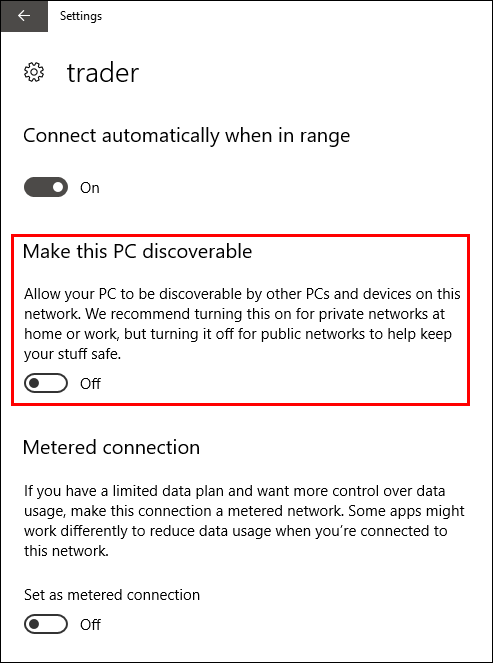
For the WiFi Users on this screen, you will see the option Make this PC discoverable. Change this setting to Off, this will make sure that none of your computer's contents are accessible and your computer won’t show on the network. Obviously, you are going to want to do the opposite if you need your computer set to public so data can be shared.
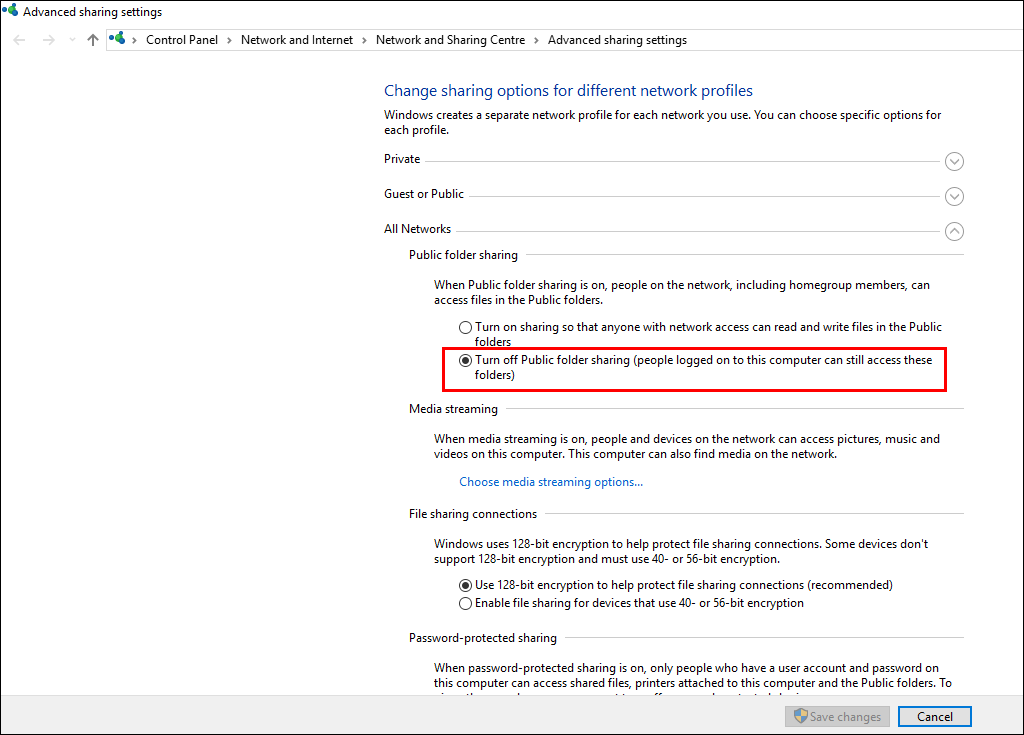
For Ethernet Users in the Advanced Sharing Menu go to Public Folder Sharing and set the Public Folder Sharing to Off. Obviously, you are going to want to do the opposite if you need your computer set to public so data can be shared.
Just remember that the first time you connect to a new network you will have the option to choose Public or Private which will save you from having to manually change these settings at a later date.