If you have an Insta360 camera of some kind and would like to know how to create a 360-degree video that you can upload to YouTube, Facebook or watch in VLC media player. This article will show you how to export a video in 360-degree format so you can upload it to YouTube, Facebook or watch it in VLC.

Related: How to convert 360 camera INSV format files to MP4.
360 cameras are becoming quite popular nowadays with most action camera manufacturers having a selection of 360 camera options to choose from. Although these cameras are awesome they do come with some major drawbacks. First of all they arent get greatest in low light situations, occasionally have stitching issues and most important of all, require a fair bit of post-processing work. This means you’re going to spend a fair bit of time on your computer or in the phone app.
This will take a little bit of time to get used to, however, once you have the basics sorted, you will be able to create content quickly and easily. Seeing as creating 360-degree interactive footage is the primary focus of these cameras it’s important to know how to export 360-degree video. For this guide, we are using an Insta360 One X2, and Insta360 Studio.
The camera you use won’t matter, however, you will want the latest version of Insta360 Studio installed on your PC. The newest versions are far better than the original ones so I highly suggest updating. Depending on when you read this guide the interface may have changed a little but the process will remain the same, so let’s get started.
How do you export 360° footage from Insta360 Studio?
To begin, the first thing you are going to need to do is to copy the footage from your camera to your computer. If you have an SSD make sure you copy the data onto that drive. 360 footage works best on really fast drives. Once you have all the files copied onto your device we can start.
- Open Insta360 Studio, then click File > Open Files. Now navigate to the location you have the files stored then select the LRV files. You can import as many as you like.
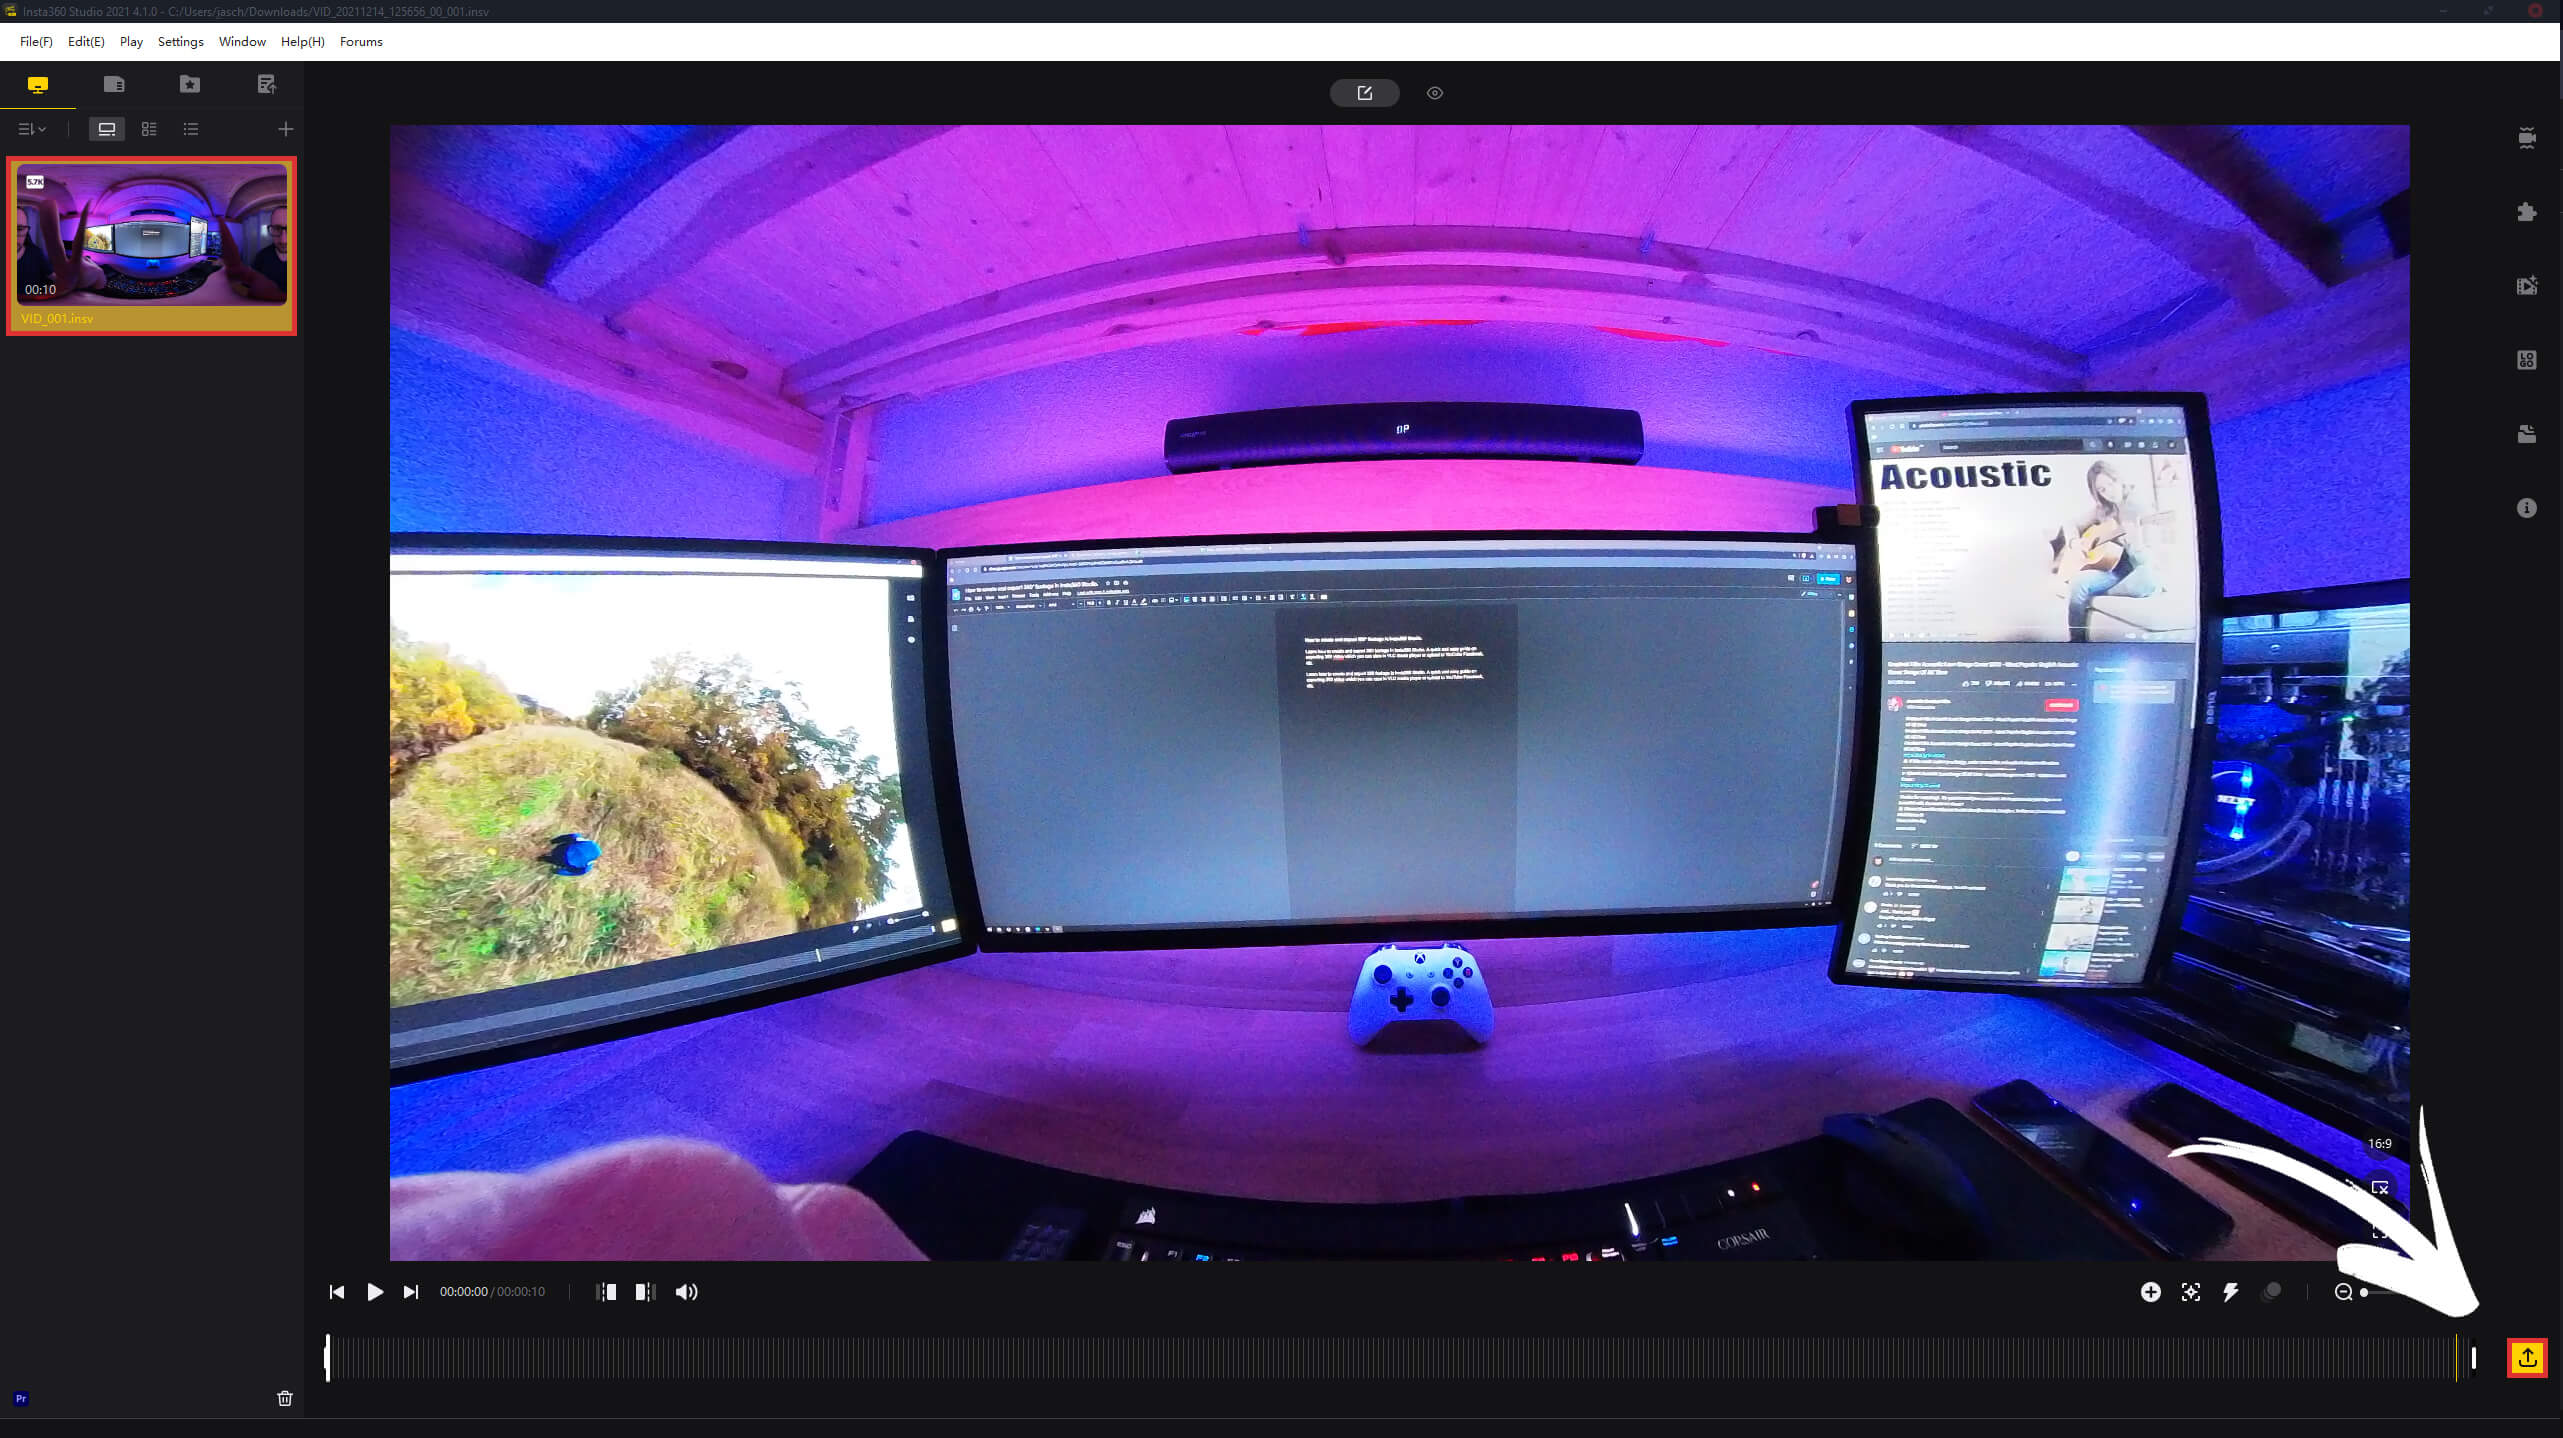
- Now that you have your LRV files imported into Insta360 Studio, select the one you wish to export. At the top of the page, you will see icons, the left icon is Reframe which allows you to edit and reframe the 360-degree footage, the other shows you the entire 360 videos as a whole. Which looks weird.
- When you have had a look at your footage, click the yellow Upload looking icon in the bottom right-hand corner of the screen.
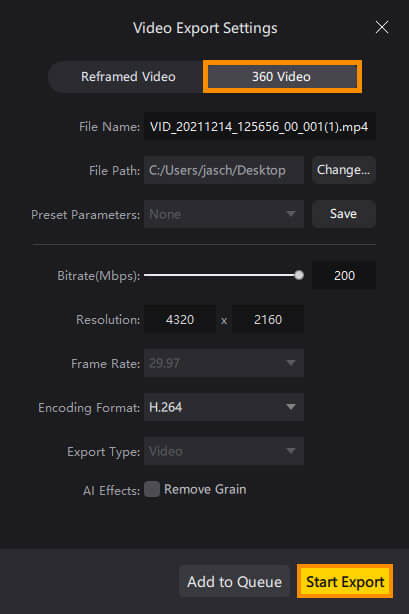
- This will open a new tab, switch this to 360 Video, then adjust your export quality settings. I personally always max these out by setting the Bitrate(Mbps) to 200, and the resolution to 4k (4320x2160). I also use the Remove Grain option which does a good job.
- Now simply click Start Export at the bottom of the screen and your footage will export to the folder you selected above. 360-degree footage takes a fair amount of time to export so be patient.
How do you view 360-degree footage and move it around?
As we mentioned above VLC Media Player is the best player to use to view 360-degree footage as it allows you to zoom in and out while moving the footage around. Sadly this is something that YouTube and Facebook cannot do. For some reason, all 360-degree footage uploaded to YouTube and Facebook is automatically fully zoomed in which makes it look grainy and horrible. Sadly there is no fix for this.
How do you upload 360-degree footage to YouTube and Facebook?
Thankfully you don’t have to do anything extra when uploading 360-degree footage to Facebook or Youtube. Both platforms detect that the footage is 360 format and encode it as so. However, as we mentioned above it will be fully zoomed in so lose a good part of its charm. Hopefully, in the near future, both platforms address this issue.