If you are having some graphics issues on Windows 11 or even Windows 10. This article will show you how to delete all the DirectX Shader Cache files on your computer. This stack of files is created by the graphics system on your device which can speed up application load time and improve performance but are susceptible to corruption, so do occasionally require clearing.

Related: How to set up configure a VPN on Windows 11.
Graphics problems are some of the most common issues people encounter on Windows devices. They come in a variety of different types and flavours and don’t always come across as graphical issues which is what often makes dealing with them a little tricky. If you aren’t familiar with the DirectX Shader Cache on Windows it is a folder that contains a ton of files that the graphics system uses to speed up load times and improve overall system performance.
The DirectX Shader Cache is also automatically generated if it is deleted so clearing/deleting it from time to time can help with a range of different graphics issues. Both on the operating system and with some games that you may be playing on your device. The good news is that Windows 11 has systems in place that allow you to quickly and easily clear the cache so follow along as we guide you through the process.
How do you clear the DirectX Shader Cache on Windows 11? Clear DirectX Shader Cache.
To clear the DirectX Shader Cache on Windows 11 you will need to do the following.
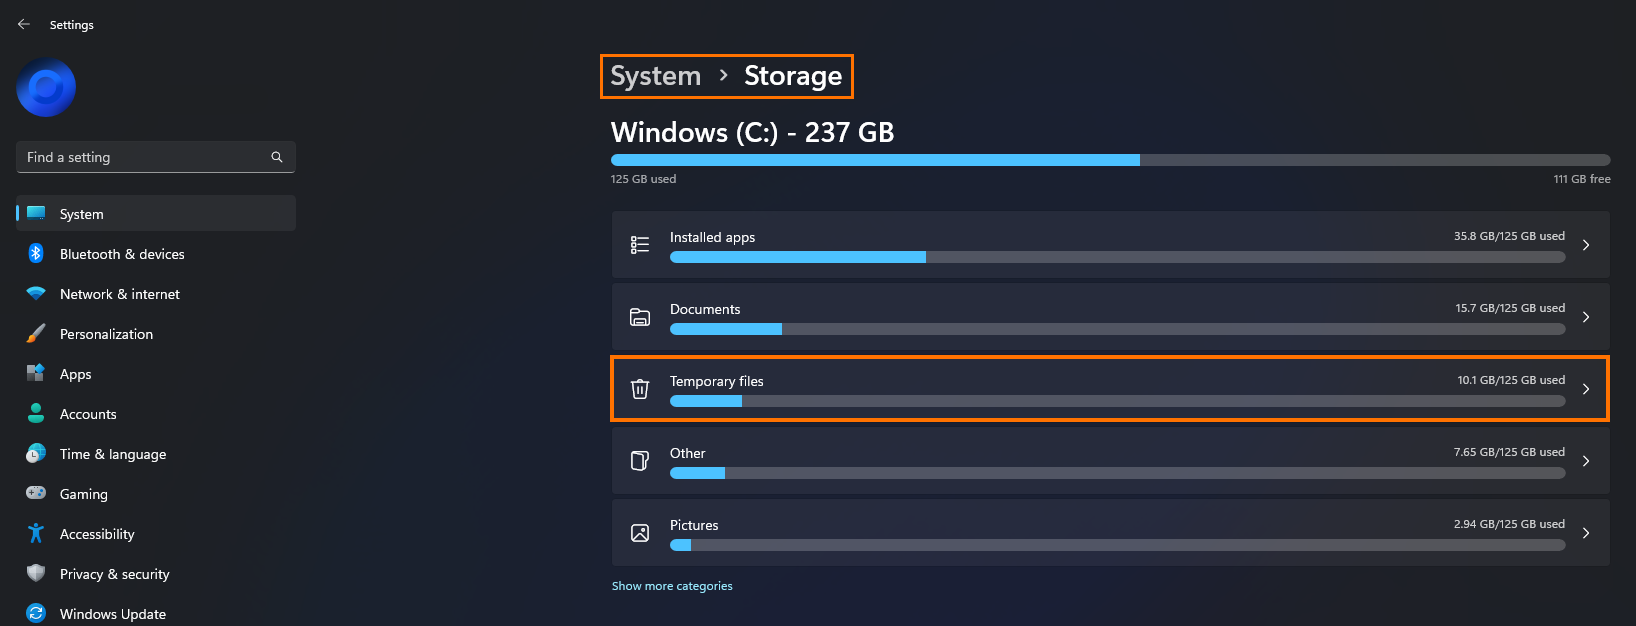
- First open Settings by pressing Windows Key + I then go to Storage in the centre pane.
- Next click Temporary files in the central area. This will load a new page where you will have to wait a while for everything to load. Depending on how long it has been since you last used this tool will determine how long it takes to load.
- Once it has loaded scroll down to the bottom of the list and make sure that DirectX Shader Cache is ticked. It should be by default however it’s best to check.
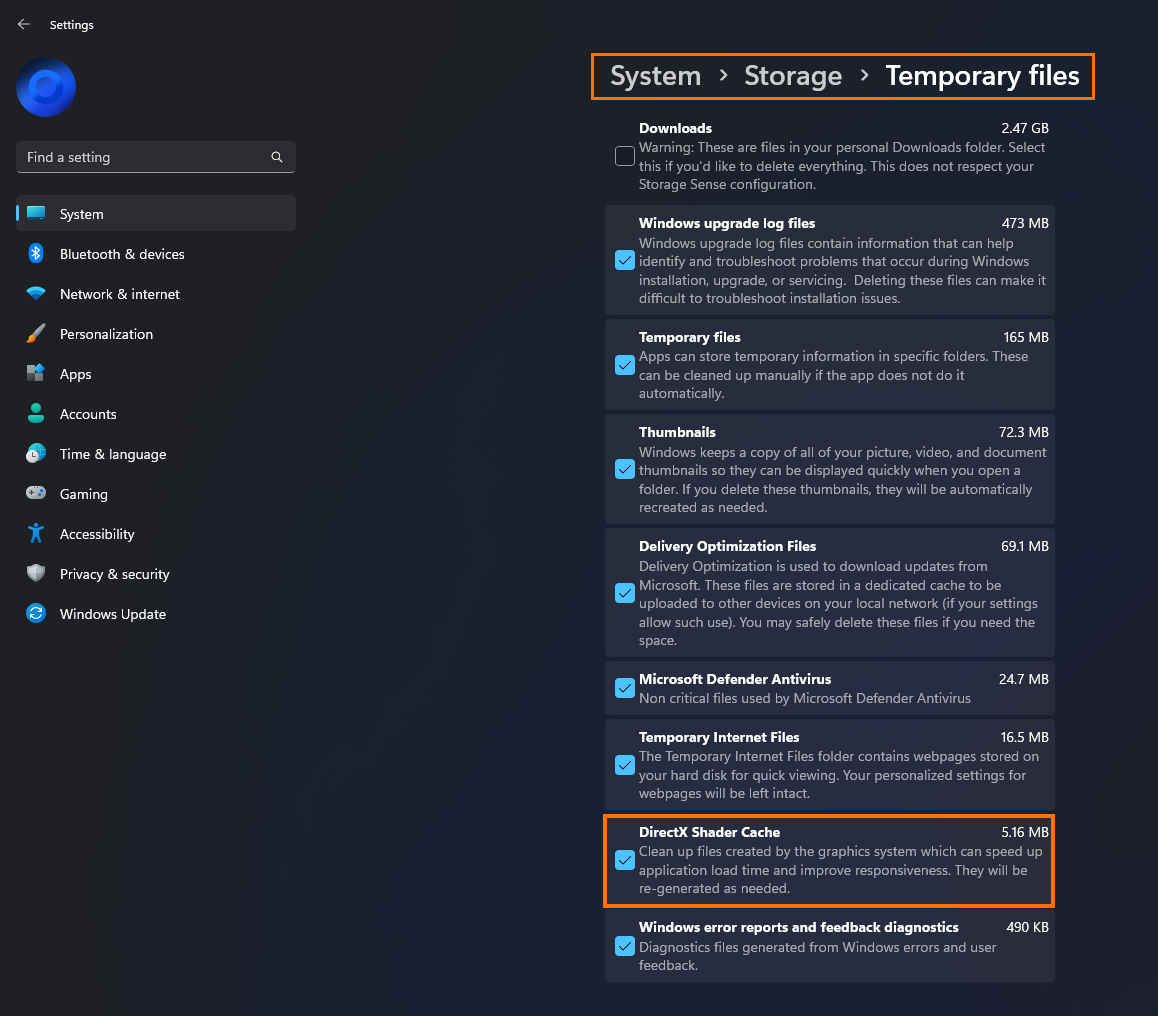
- Before you scroll back up and click Remove file double check that you aren’t clearing anything else that you don’t want to. The downloads folder for example.
- If everything looks fine you can click the Remove files button near the top and confirm the deletion process./li>
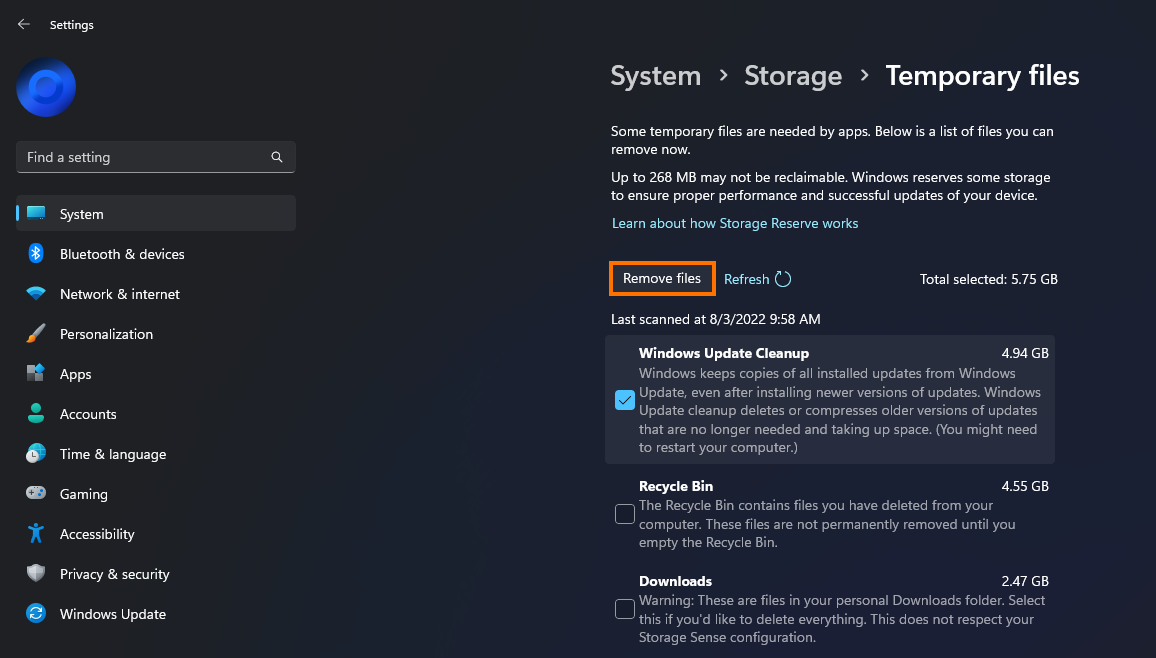
This process will take a considerable amount of time, sometimes up to 5 minutes if you haven’t done it for a long time.
Do you have to replace the DirectX Shader Cache after you delete it?
Nope! Once you delete the DirectX Shader Cache on Windows 10 or 11 Windows will automatically create a new one and fill it with the required content as you using the operating system. You won’t have to clear this often either. Generally, you only need to clear it if you are having graphical issues. I personally only clear mine when I want to free up some space on my device and clear all the other stuff, primarily Windows Update files.
Is there anything else I should know about Windows 11?
While there are almost countless things you may like to know about Windows 11 the most useful one for you is probably going to be our collection of articles about Game Pass PC. Here you will find guides on fixing just about every Game Pass PC issue to date. There are tons of them! So if you are gaming on Windows 11 check out all the guides here.