If you are using Microsoft Edge on Windows 10 and would like to prevent Audio, Video, and Screen Capturing when you are using the browser. This article will show you how to prevent any website that has these abilities from using them when you have the block in place. For instance, this will block video calls, audio calls and all screen sharing instances taking place.

Related: How to pin Downloads, Favourites, and History as tabs in Microsoft Edge.
Over the last twelve to eighteen months Microsoft Edge has seen some amazing improvements, making the browser one of the best choices to use as your daily driver. It’s fast, easy to use and has full access to the Google Chrome extension library so there’s no real reason to feel locked into Chrome anymore.
Microsoft Edge also has the best Windows 10 compatibility as well, allowing you to make changes within the Windows 10 Registry or Group Policy Editor to add or remove a range of features. Although this guide will be focusing on how to disable or enable Audio, Video and Screen Capturing in Edge, we’ve covered dozens of other Edge tweaks you’ll probably want to browse through so make sure you check em out here.
Quick steps to disable Audio, Video, Screencapture in Microsoft Edge:
- Open Start and type regedit, then press the Enter.
- Navigate to HKEY_LOCAL_MACHINE\SOFTWARE\Policies\Microsoft
- Right-click Microsoft and select New > Key and name it Edge.
- Right-click the Edge key and select New > DWORD (32-bit) Value. Name it AudioCaptureAllowed or VideoCaptureAllowed, or ScreenCaptureAllowed. (you can create all 3 if you require it)
- That’s it, you’re done.
How do you disable or enable Audio, Video, and Screen Capturing in Microsoft Edge?
Before you jump straight in and start making changes, you’ll want to make sure you have a new System Restore point set. This will allow you to go back if you make a major mistake during the changes. If you haven’t made a manual System Restore point in a while, do the following.
Open the Start menu, type Restore, then select Create a Restore Point when it appears on the list. In the new window that appears, click Create in the bottom right section of the screen, then follow the instructions given by Windows. Once you have successfully made a restore point, you can continue with the guide below.
- Now that you have a system restore point set, open the Registry Editor by searching regedit from the start menu and selecting it when it appears at the top of the list.
- Next, use the left-hand pane to navigate to the following location:
HKEY_LOCAL_MACHINE\SOFTWARE\Policies\Microsoft
- Right-click the Microsoft folder and select New > Key, then name the Key Edge.
- Next, right-click the Edge key and select New > Key. Name it AudioCaptureAllowed or VideoCaptureAllowed, or ScreenCaptureAllowed.
Note: If you only want to block or enable a specific feature just pick the one you want to add. If you want to block or enable more than one, you’ll need to use the same process to create the others.
That’s it you’re done. However, if you want to white list particular websites check out the next section.
Can you add specific websites to a white list? Sure! Here’s how.
If you want to whitelist a few websites you’ll need to do the following instead.
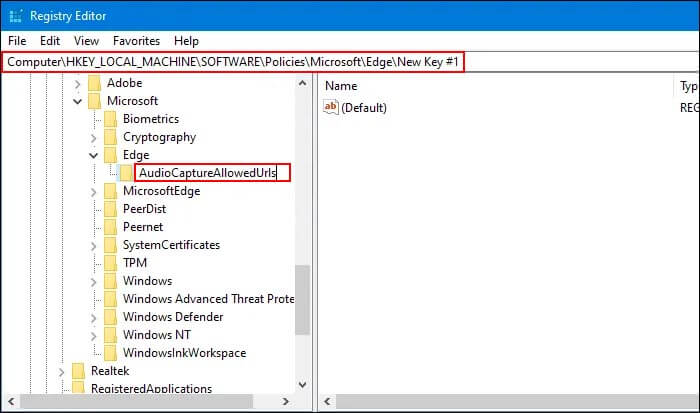
- Right-click the Edge key, select New > Key and name it AudioCaptureAllowedUrls or VideoCaptureAllowedUrls or make one for both.
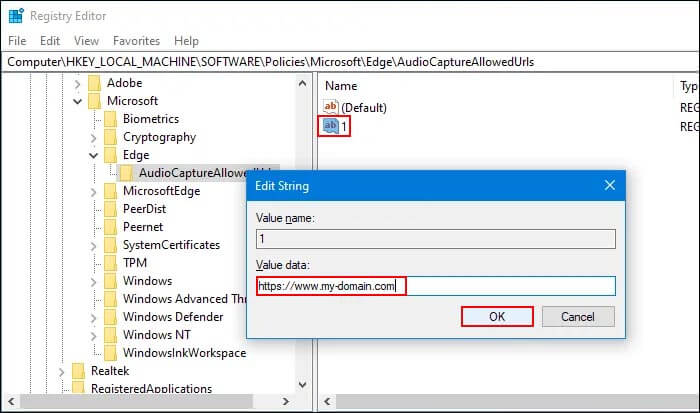
- Now, right-click on AudioCaptureAllowedUrls or VideoCaptureAllowedUrls or both, select New > String Value, and name it as 1.
- Next, double-click on 1, and enter the website URL as the Value data. Then click Ok to save the changes.
If at any stage you wish to undo these changes just follow this guide in reverse and delete all of the files you created in the Registry Editor.