If you have updated to Windows 11 you’ve probably explored a good part of the operating system by now. One thing you may have noticed is that there is no way to switch between light and dark modes automatically… This is quite a shortcoming so follow along as we show you how to add automatic light/dark mode switching to Windows 11.

Related: How to use Storage Sense on Windows 11 to free up space.
As you have probably already noticed, Windows 11 doesn’t come with an option to automatically switch between light and dark modes. Instead, you need to switch between them manually, which is annoying if you have very specific times when you prefer to use one of the options. Light mode during the day and dark mode during the night for example. As a result, you may want to add automatic light and dark mode switching to Windows 11.
As we mentioned above, you’ll need to download and install a third-party tool called Auto Dark Mode X. It is an open-source piece of software that you can download from GitHub. Once on your system, you’ll gain an extra set of options that allows you to better customise light and dark mode settings on Windows 11. Below you will find a full step by step guide on setting up and using Auto Dark Mode X on Windows 11. You can also download and use AutoDarkmodeX on Windows 10 as well should you have more than one device.
How do you enable automatic light and dark mode switching on Windows 11?
- To begin, open the Start menu on Windows 11, then search for Command Prompt. When it appears right-click on it and select Open as administrator.
- Next type the following command to download and install the Auto Dark Mode X app and press Enter:
winget install --id Armin2208.WindowsAutoNightMode
- When the command finishes you complete the steps, you can launch the application and configure the schedule to switch between the light and dark modes automatically.
Alternatively: You can Download AutoDarkModeX and install the program as you would any other program.
Setting up automatic light to dark mode schedules on Windows 11.
Now that you have the tool installed, you can set it up using the following steps.
- First, open the Start menu on Windows 11.
- Search for Auto Dark Mode X and open it when you find it.
- Next, click on Time and choose the Set custom hours option.
- Choose the time Windows 11 should switch to light mode.
- Choose the time Windows 11 should switch to the dark mode.
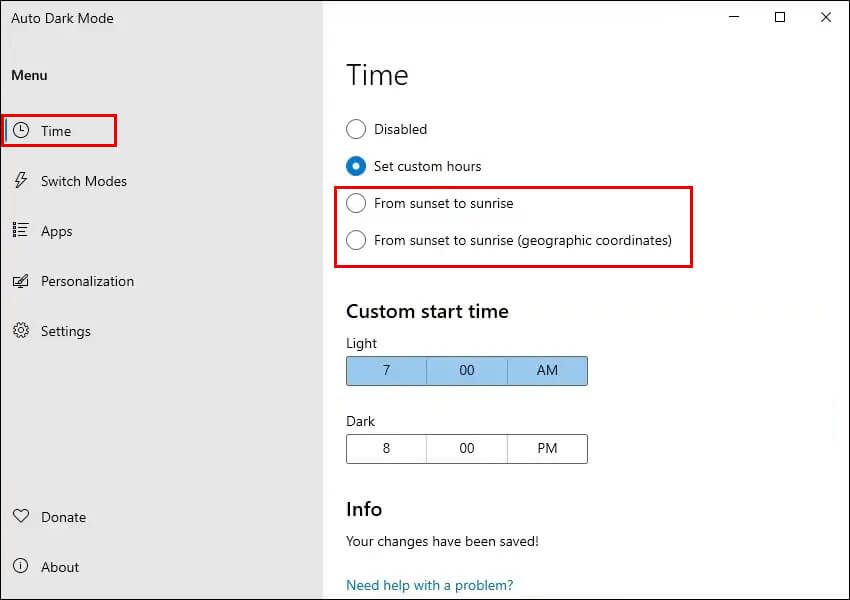
Alternatively: Select the From sunset to sunrise option to automatically switch between the two system colour modes during sunset and sunrise.
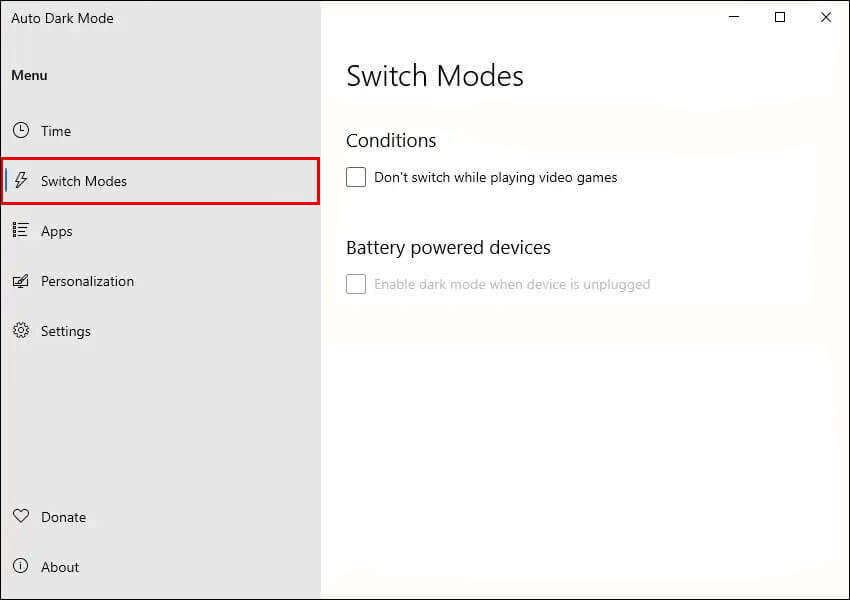
That’s the core function of the app, however, if you want to deep dive into it and set some custom settings for gaming and apps you can also do that.
- Change to the Switch Modes or apps tabs on the left and choose the one that you wish to configure. There are quite a few options here so pick the settings that best work for you.
As soon as you make a change the app will start using those settings, you don’t have to worry about saving any changes you make. I’ve been using Auto Dark Mode X for a few days now and can’t believe that Microsoft hasn’t added a simple quality of life feature like this to Windows by default. For the record AutoDarkModeX also works on Windows 10.