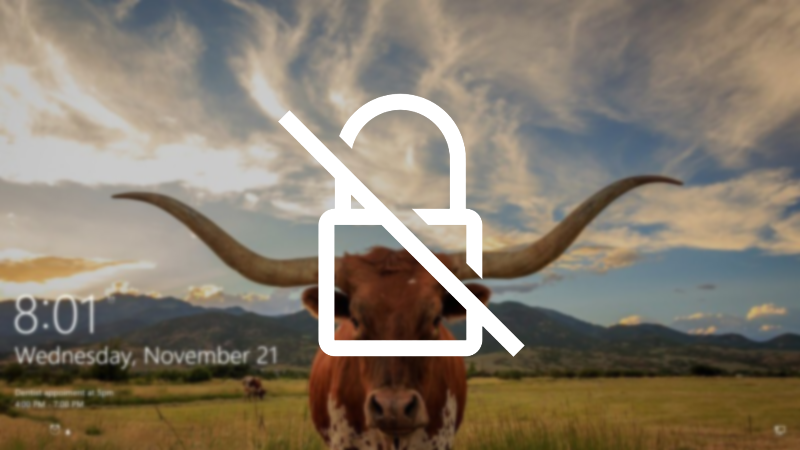
If you are trying to figure out how to disable the lock-screen sign-in process on Windows 10 to allow your PC to boot straight to the desktop, this article will guide you through the process. Over the years the process of skipping the lock screen on Windows 10 has changed several times, so follow along for the updated 2021 guide.
Related: How to create a lock PC shortcut for the taskbar on Windows 10.
Over the years Windows 10 has had, lost, and gained a lot of different ways of signing into a device, passwords, pins, fingerprint scanners, etc. For most people, any one of these options is standard procedure and works very well for them. However, there are a small group of users out there who would simply like to disable account passwords on Windows 10 entirely. Letting them bypass the lock screen and go straight to Windows.
Most people who use a desktop PC at home generally just want their Windows PC to boot straight to the desktop and load whatever it needs to load without having to wait for and type a password. In older versions of Windows 10, this was easy to enable, however, the process has changed significantly since then. Which brings us to the method of skipping lock screen sign-in on Windows 10 in 2021.
Quick steps to skip the lock screen on Windows 10 (2021)
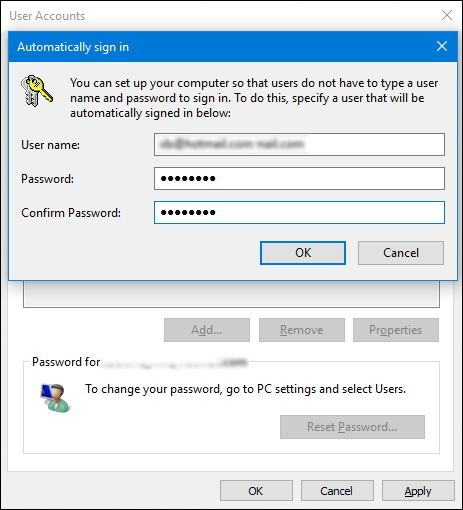
- Open the Start menu and search netplwiz.
- When it appears open it.
- Untick the User must enter a user name and password to use this computer checkbox.
- Click Apply to confirm the change, then enter your password to confirm your identity (Microsoft account password and email)
- Restart your computer.
Note: If you have a PC with multiple user accounts, this change isn’t the best idea, so I would reconsider your plans.
How to disable Windows Hello on Windows 10.
To begin, you need to disable Windows Hello, once it has been turned off it will be possible to force Windows 11 to sign in automatically.
- Press Windows Key + I to open Windows Settings.
- Next, go to Accounts > Sign-in Options.
- Here Disable the For improved security, only allow Windows Hello sign-in for Microsoft Accounts on this device (Recommended) option.
- Select Never from the "If you've been away, when should Windows require you to sign in again" drop-down list.
- Now, click your current sign-in method in the Ways to sign-in list, then click Remove.
- Finally, confirm your identity using the details linked to your Microsoft Account.
Now that Windows Hello is disabled, you can configure Windows 11 to sign in automatically using the steps shown below.
How do you enable automatic sign-in on Windows 10? Skip lock screen sign-in on Windows 10.
Thankfully, turning off password protection on Windows 10 is really easy though does obviously come with security issues. However, if you don’t really care, the steps below will show you how to skip the lock screen on Windows 10.
- To begin, open the Start menu and search netplwiz. When you find it, open it then stay on the user tab and untick the Users must enter a user name and password to use this computer checkbox.

- Next click Apply to confirm the change, then enter your email address and password to confirm your identity. (Your Microsoft account details) Finally, Restart your computer and the changes will take effect.
Again, if you have a portable device or a device that has sensitive data stored on it, you probably don’t want to enable automatic sign-in. Personally, I would only be using this sign-in system on a desktop PC at home.
How do you disable automatic Sign-in on Windows 10? (2021)
If you want to revert back to having to sign-in to your Windows 10 account, you’ll need to do the following.
- To begin, open the Start menu and search netplwiz. When you find it, open it then stay on the user tab and tick the User must enter a user name and password to use this computer checkbox.
- Next click Apply to confirm the change, then enter your email address and password to confirm your identity. (Your Microsoft account details) Finally, Restart your computer and the changes will take effect.
After your system has restarted, you’ll be required to sign in to your account using your password again.