If you have a Windows 11 Home edition computer and want to encrypt it to protect your data. This article will show you how to use Bitlocker to encrypt your computer using AES (Advanced Encryption Standard even if you have the standard Home installation of Windows 11.

Related: How to fix Microsoft Store error 0x80073D0D on Windows 11.
AES Encryption is a great way to make sure your data is encrypted with a safe and secure protection method. Unfortunately, not a lot of people know that Windows 11 Home edition has the ability to use BitLocker for this exact purpose. Although it is limited in the Home edition of Windows 11 it is still possible to encrypt your core operating system. Similar to the way most Android and iOS phones encrypt data by default.
There are some basic requirements for this but your Windows 11 computer will already meet these. Unless you have force updated to Windows 11 on unsupported hardware. If that is the case you will not be able to use Bitlocker on Windows 11 Home edition. Device encryption requires a Unified Extensible Firmware Interface (UEFI) firmware and Trusted Platform Module (TPM) version 2 with support for Modern Standby.
Note: If your computer is running Windows 11 on supported hardware you may still find that the Device encryption option is missing. This means that your device doesn’t have Modern Standby support. This is quite common, and unfortunately, will prevent you from using BitLocker encryption on your Windows 11 Home device.
Important: Make sure you have plenty of time to spare as the encryption process will take a long time to complete once started.
How do you enable BitLocker on Windows 11 Home?
To start using BitLocker AES device encryption on Windows 11 Home, you’ll need to do the following:
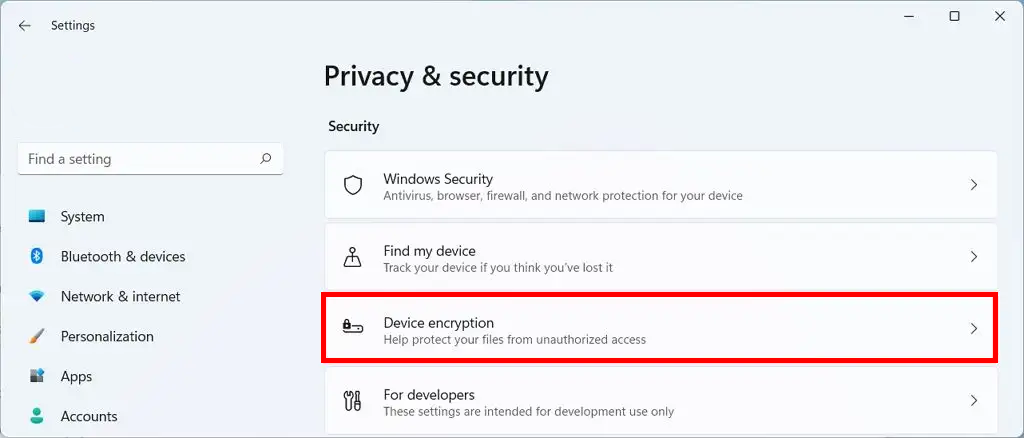
- First open Settings by pressing the Windows Key + I, then click Privacy & Security in the left-hand pane.
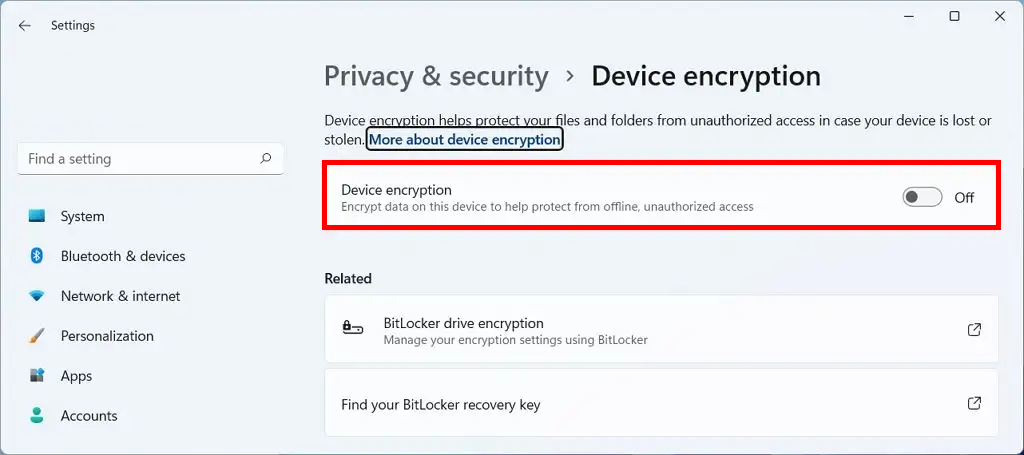
- Next click the Device Encryption option near the top of the page. This will take you to a new screen where you will need to enable the toggle.
- Once you have done this, you’ll need to wait for Windows 11 to encrypt your drive. This will take a considerable amount of time.
How do you Retrieve your Bitlocker recovery key on Windows 11?
To get a hold of your BitLocker recovery key, you’ll need to do the following:
- First open Settings by pressing the Windows Key + I, then click Privacy & Security in the left-hand pane.
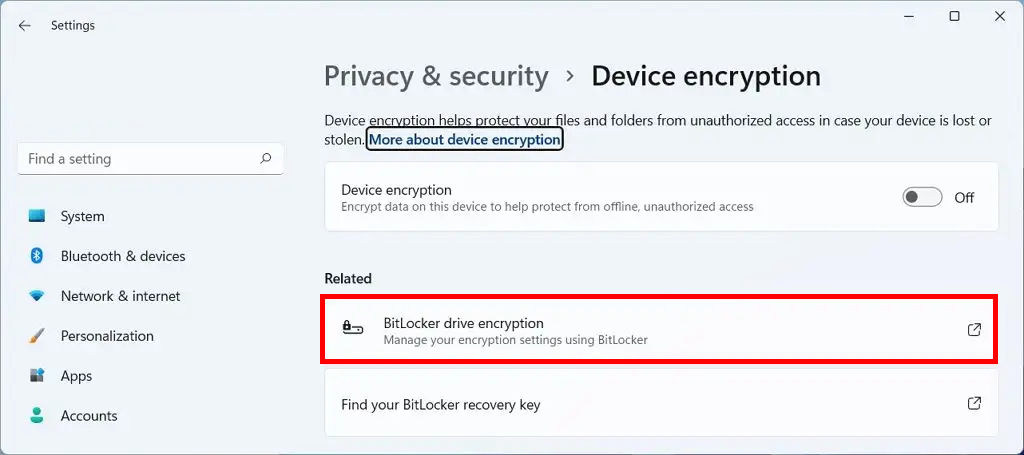
- Under the Security section, click the Device encryption page. Then under the Related section, click the BitLocker drive encryption option.
- Now under the Operating system drive section, click the Back up your recovery key option then choose to Save to a file.
- Now you can save the BitLocker recovery key to an external location (don’t keep it on the same PC) a USB stick works great for this.
Important: If you don’t have access to your computer and have never backed up the recovery key, you can download it from your Microsoft account.
How do you disable BitLocker on Windows 11 Home?
Disabling BitLocker on Windows 11 Home is as simple as enabling it and follows almost the same process.
- First open Settings by pressing the Windows Key + I, then click Privacy & Security in the left-hand pane.
- Next click the Device Encryption option near the top of the page. This will take you to a new screen where you will need to disable the toggle.
- Once you have done this, you’ll need to wait for Windows 11 to decrypt your drive. This will take a considerable amount of time.