Autoplay is a handy tool that has been a standard feature on most versions of Windows, allowing you to quickly and easily choose the desired action for all sorts of media playback. Including how certain devices respond when connected to your computer. If you’d like to enable, disable or just customize how AutoPlay works on your Windows 10 computer this guide will show you how.

How to Find Out Your Computer's BIOS Version and Update it to the Latest Release. (Windows 10)
Most devices and operating systems now have an autoplay feature that can be tweaked and customised to your liking. Allowing you to configure the settings to open your favorite image viewer app when you insert a medium with photos or launch your preferred media player automatically for when video files are detected. Below you will find three different ways you can enable or disable the autoplay feature in Windows 10. Feel free to use the option you are most comfortable with, as all three options allow you to enable or disable the service.
How to Disable or Enable AutoPlay From Windows 10 Settings.
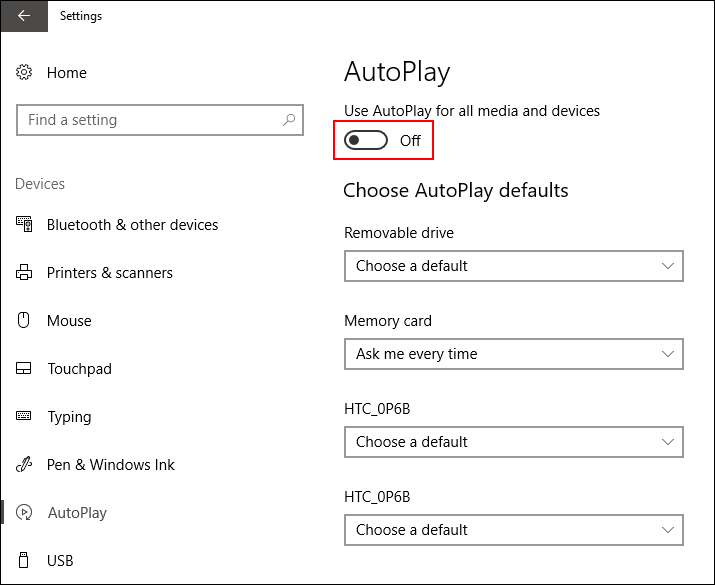
To Disable the AutoPlay feature from the Settings app in Windows 10, open Settings and go to Devices > AutoPlay. Next, turn Off the option: Use AutoPLay for all media, which can be found on the right-hand side of the page.
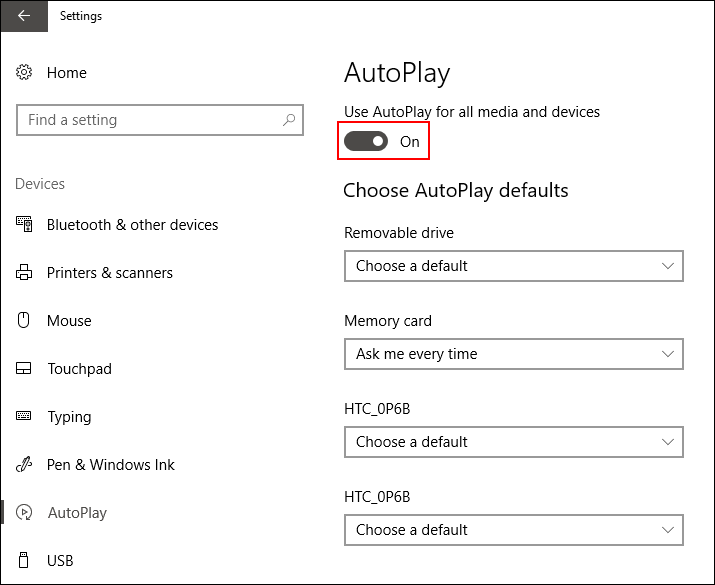
To Disable the AutoPlay feature from the Settings app in Windows 10, open it and go to Devices > AutoPlay. Next, turn On the option: Use AutoPLay for all media, which can be found on the right-hand side of the page. To customize how AutoPlay works for specific devices, use the drop down box underneath the Choose AutoPlay Defaults heading.
Configure AutoPlay Using Windows 10 Control Panel.
For the people who prefer using the Windows Control Panel, go to Control Panel > Hardware and Sound > AutoPlay. To Disable AutoPlay uncheck the option Use AutoPlay for all media and devices.
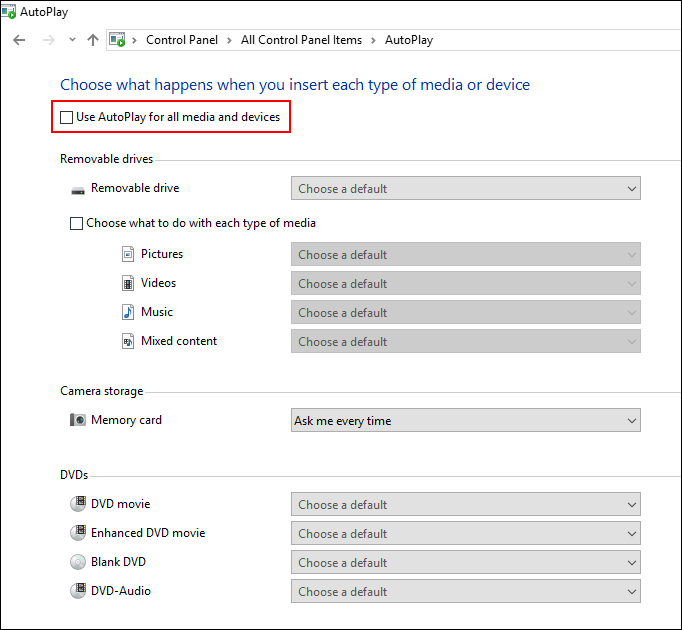
To Enable AutoPlay from the Control Panel, check the box Use AutoPlay for all media and devices. Now select the desired action for each media type under each subheading listed. (if you want a quick way to reset all your settings to default, use the Reset all to default button)
For the Crazy People Who Like to Use the Windows Registry.
If you prefer using the Windows Registry because you aren’t a newb, you can use the following steps. Don’t forget to make a system restore point just in case you make a mistake and need to revert back to a working Windows state. I’ll assume you know how to do that since you’re using this option.
- First, open the Run tool and type regedit into the box.
- Next, go to the following Registry key.
HKEY_CURRENT_USER\Software\Microsoft\Windows\CurrentVersion\Explorer\AutoplayHandlers
(you can cut and paste the address into the address bar at the top if you want an easier way to get to the location)
- In the right pane, modify or create a new 32-Bit DWORD Value called DisableAutoplay.
- Once that’s done, double click on the newly created entry and set its value to 1.
Note: Even if you are running 64-bit Windows you still have to create a 32-bit DWORD value.
- Finally to make the changes take effect you will need to sign out of your account or restart your computer.
Personally, I’d just stick to the Settings or Control Panel options for Enabling or Disabling AutoPlay features in Windows 10. There’s no need to complicate life.