If you have been using Zoom for a while and would like to improve your understanding of some of its core features, this article will show you how to quickly and easily make sure annotations are enabled so you can start using some of Zooms more advanced core features to make meetings more interactive.

Related: How to translate messages from posts, conversations, and chats in Microsoft Teams.
If you are one of the millions of people who’ve had to spend time working from home over the last 12 months, you’ve probably had to make quite a few adjustments to the way your office is set up and the software you’re using to stay in touch. More than likely you’re either using Microsoft Teams or Zoom to stay up to date on all your work projects.
For everyone using Zoom, there are a few features and in-depth settings that you can’t access directly from the Windows, Android, and iOS client. Which forces you on to the Zoom website to implement some major changes. One such change is the ability to use annotations which can only be granted by the host of any meeting. Annotation allows you to sketch on the shared screen while the Whiteboard lets you add text to a blank screen that everyone in a meeting can see.
Quick steps for enabling annotations in Zoom meetings.
- Login to your Zoom account (from your browser)
- Go to Settings. (the link will take you straight there)
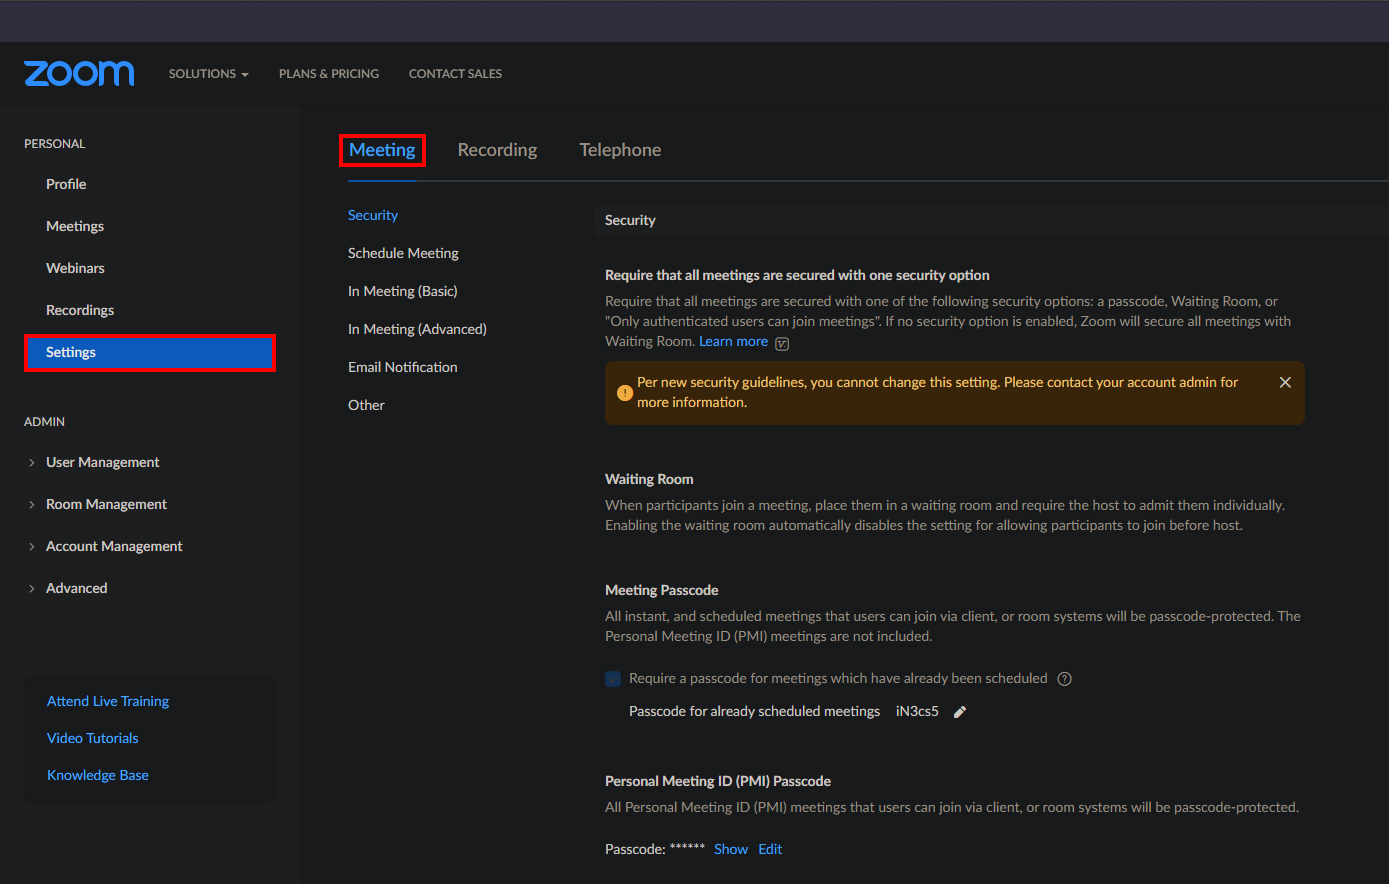
- Change to the Meeting tab
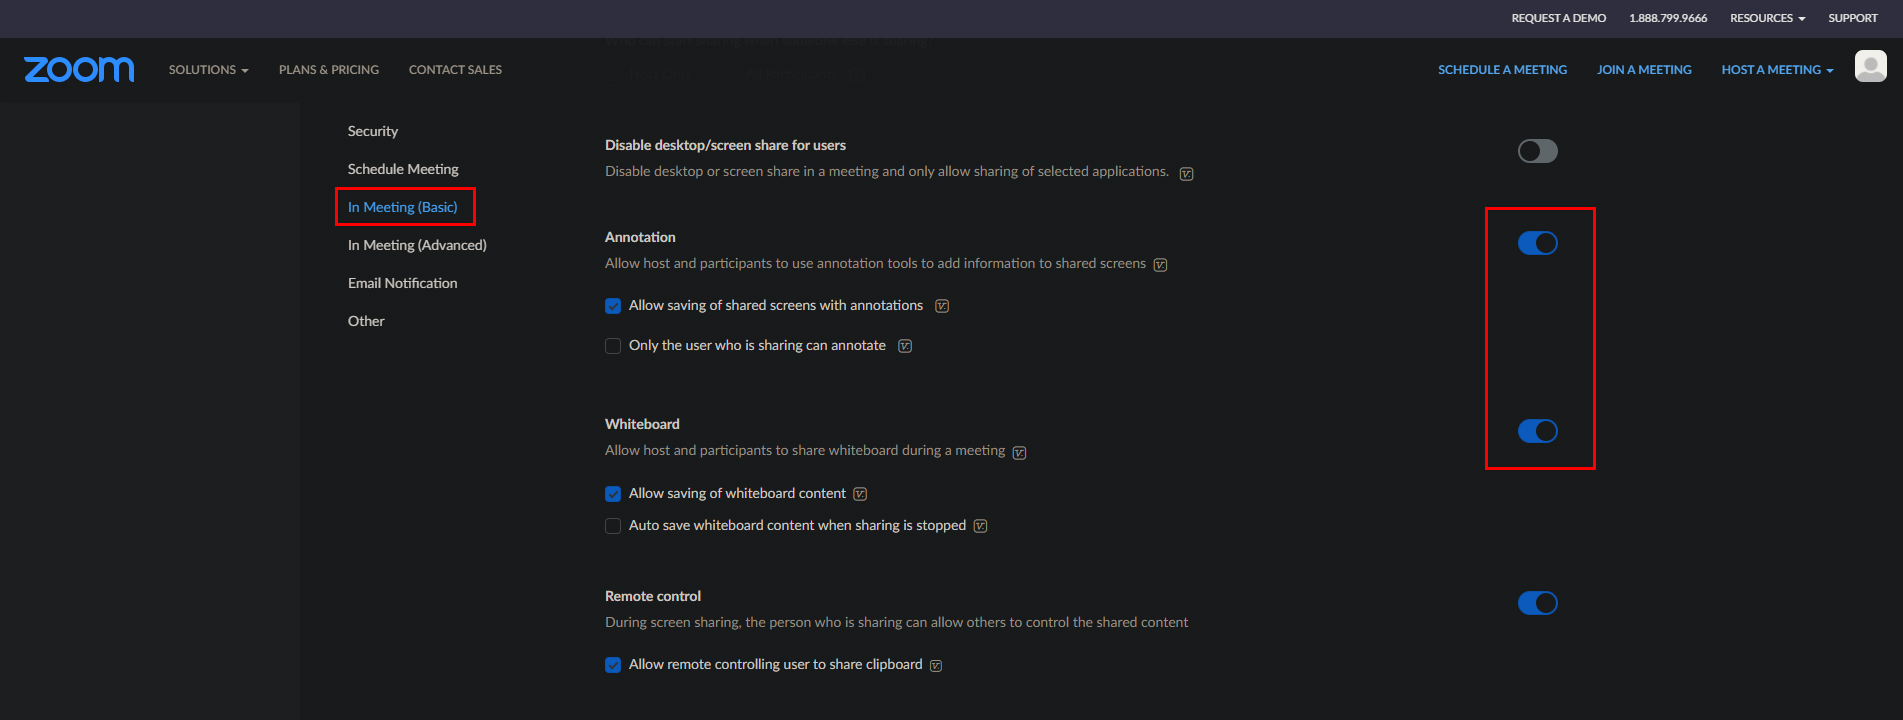
- Scroll down to In Meeting (Basic)
- Enable the toggle for Annotation.
- Open the Zoom app on your device.
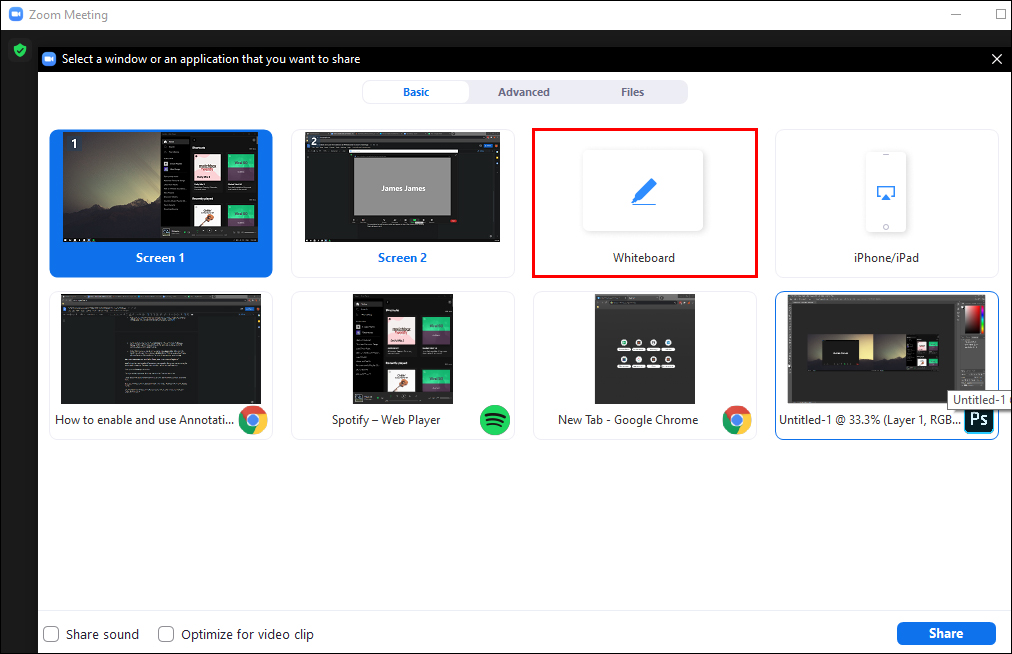
- Click Share Screen and choose the whiteboard or another screen.
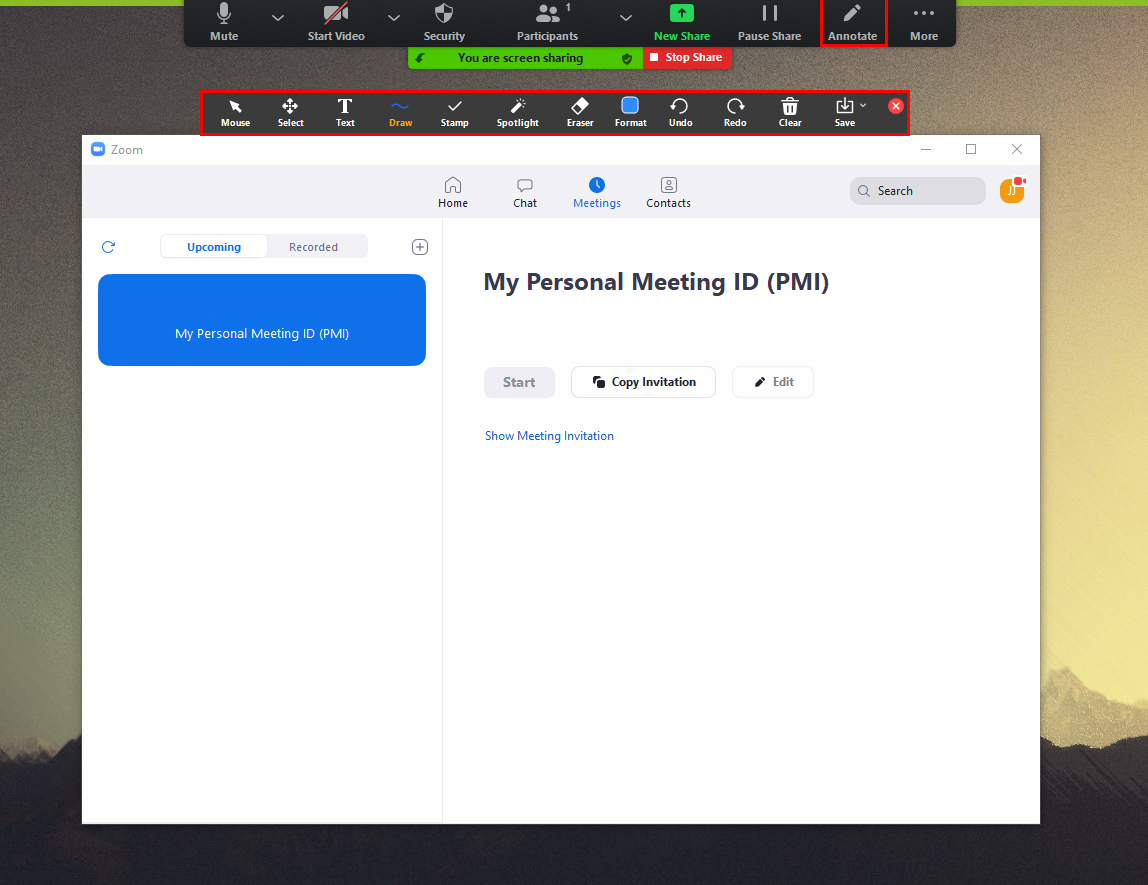
- Now select the Annotate option from the menu bar (top right)
- Annotate and draw whatever you want.
Note: You can’t annotate from the Whiteboard option.
As with everything, if you don't want people to have access to annotations or the whiteboard, you can disable these features following the same steps. Just flip the toggle for them to Off instead of On.
How do you enable and use the Annotate & Whiteboard features in Zoom?
To enable annotations in Zoom, you’ll need to do the following from the Zoom website before you’ll be able to get access from the Zoom app.
- First head on over to the Zoom website, sign in to your account, then change to the settings page. You can find a link straight to the settings area here.
- On the Settings page change to the Meeting tab, then scroll down to Meeting (Basic). Refer to the screenshot below for the exact spot as it may get a little confusing having menus inside menus.
- Under this section, you should see a heading called Annotation. Make sure the toggle to the far right of the setting is Enabled(blue). For most people, this feature will probably be enabled by default, however, it’s important to check anyway.
Now that Annotations are enabled in Zoom, how do you start using them?
Now that you have confirmed that Annotations are enabled in Zoom, you can start using the feature during meetings. This time around you’ll be able to use the Zoom app.
- First, open the Zoom app, start a meeting, then click the Share Screen icon at the bottom of the screen. This will bring up a list of shareable screens and other options, of which you have two main choices.

- From this list, you can select Whiteboard and a new blank screen will become available for you to draw/write on.
- Alternatively, you can select one of your other screens then click the Annotate icon near the top right-hand side of the screen.