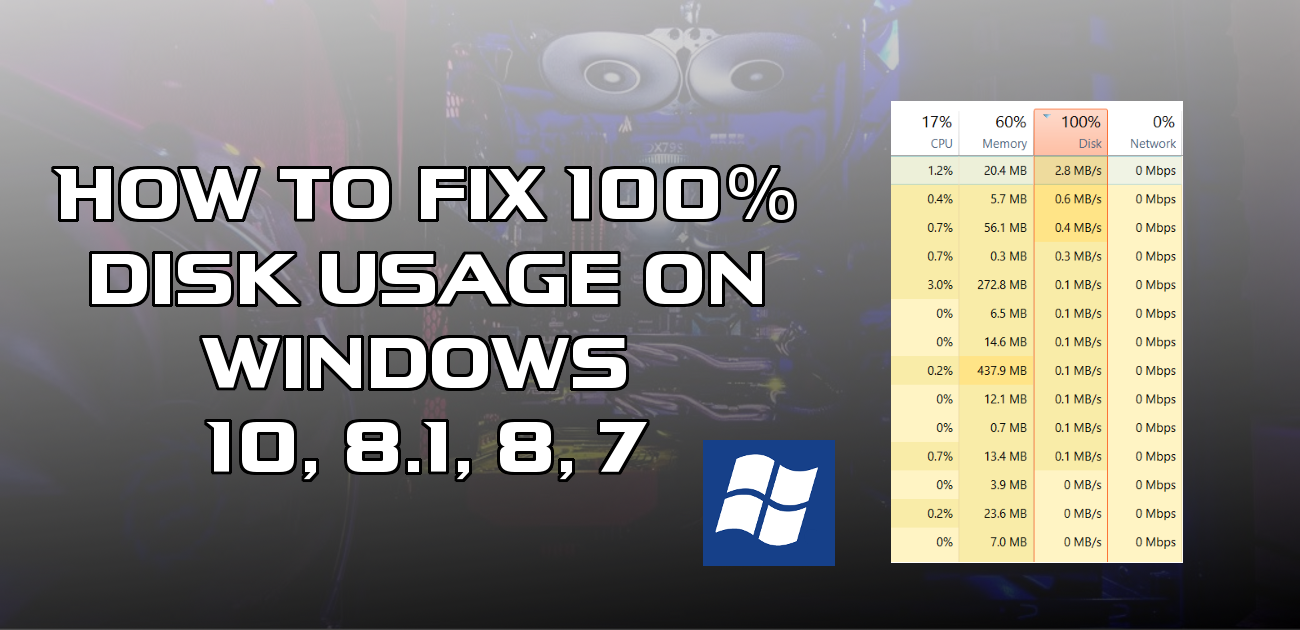
There seems to be quite a large portion of Windows users, particularly Windows 10 users, who are having issues with boot times and general lag across the operating system, even when running fairly high-end equipment. If you are one of these users suffering high disk usage, sometimes up to 100%, Downloadsource has a few things to try that should fix the issue.
How to Change Photoshops Language From Anything to English Without Reinstalling.
If your computer is running quite slow and seems to take forever to boot, one of the first things you should check is the disk usage. Especially if you are running Windows 10. This is quite a common problem on Windows and is generally easy to identify, however, is a little more complicated to fix.
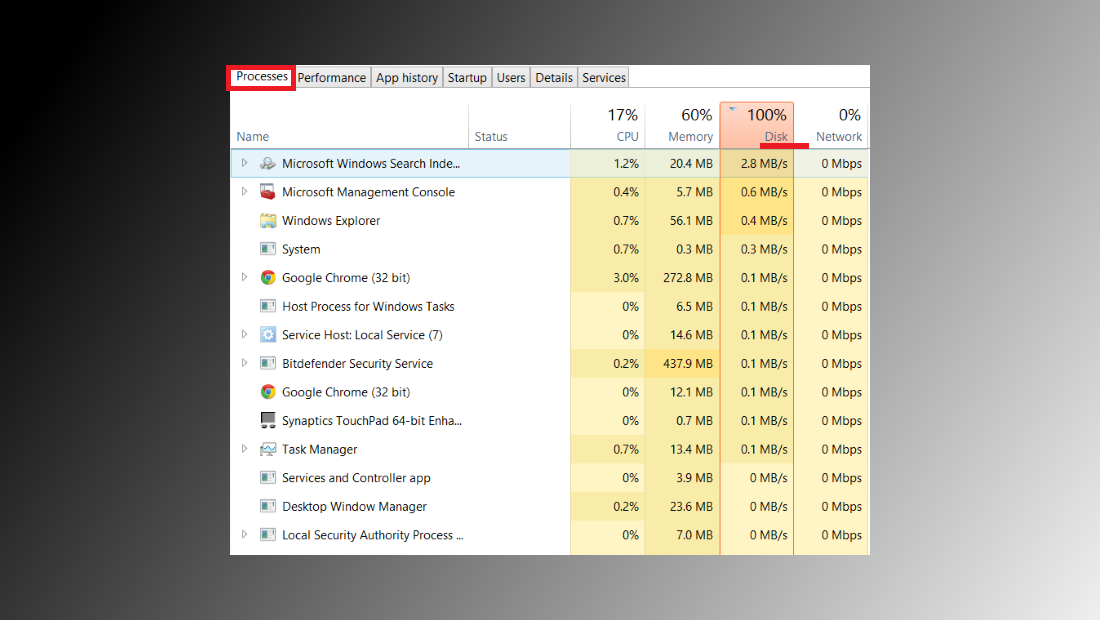
To find out how much strain your HDD is under, you will need to open the Windows Task Manager and perform the following steps. This can be done in several ways, either by pressing Ctrl+Alt+Delete or right-clicking on the Taskbar and selecting Task Manager. Once you have Task Manager open, you will see a panel of information displaying the percentage of usage each component of your PC is under. If Disks is showing between 80% and 100% under normal conditions, without anything major running, you have a problem.
Now that you have identified the problem, there are several things we can do to attempt to fix it. Some of these steps might seem a little complicated, however, if you follow the method closely, you have nothing to worry about. That said, before attempting this method, it’s still best to make a Restore Point. If you don't know how, there is a guide below that will show you step by step.
Note: Having a restore point set will allow you to revert back to a previous point on your system before any changes have been made.
How to Make a System Restore Point For Windows 7, 8 and 10.
With the restore point set, you can continue. First,o pen the Windows Run tool by pressing Windows Key + R. When the run box is open, type services.msc into the box and press Enter. This will open the Services Window. Inside this window, you need to find a service called Background Intelligent Transfer Service (everything is listed in alphabetical order, so it should be easy to find). When you have found it, right-click and open Properties. In the properties menu, change the startup type to Disabled, then confirm the change. Don’t exit the services menu just yet as we have more to do.
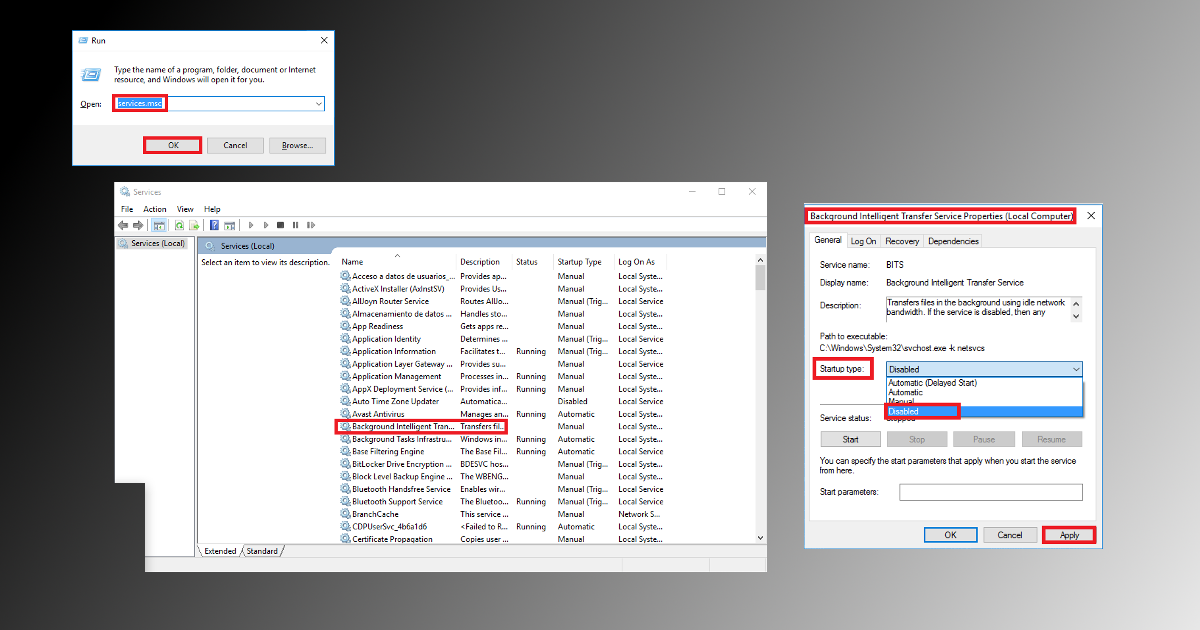
Note: Background Intelligent Transfer Services is generally in charge of organizing Windows updates, so with this Off, you will have to start Windows updates manually in future, which is well worth the trade-off for freeing up disk usage.
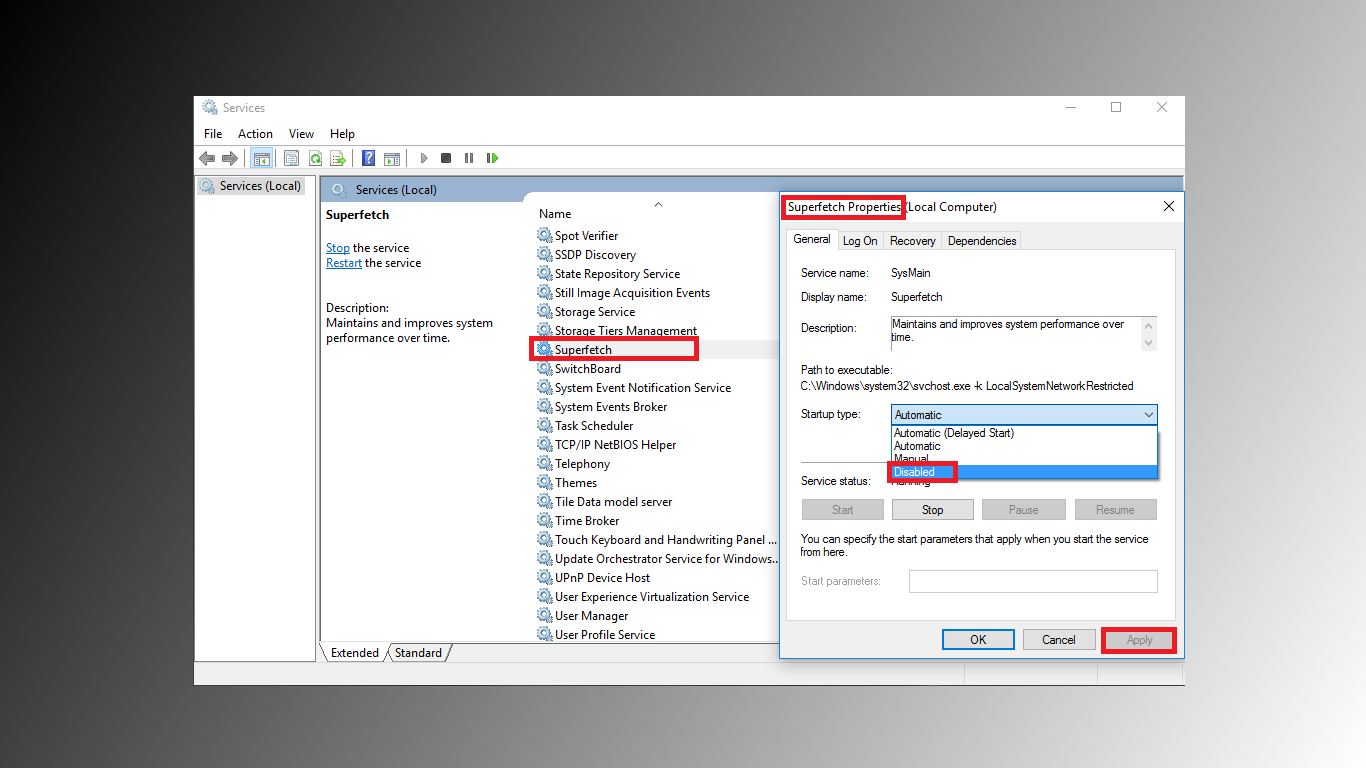
The next thing you are going to disable is located in the services menu and is called Superfetch. This is generally the main drain on your disk and if you wish to keep your Windows 10 automatic updates on, you can try only Disabling Superfetch, leaving Background Intelligent Transfer Service as it was originally.
Disabling Superfetch is done in the exact same way as Background Intelligent Transfer Service, by right-clicking, going to Properties and changing the startup type to Disabled, then confirming. Superfetch is supposed to improve your system over time as stated on the side of the menu tab, however, whatever its intended function was, it seems to be doing the opposite.
Another option you can disable from the services menu is Windows Search. You can do this using the same method which you used for Superfetch and BITS. After making these changes, you should see the change in disk usage take place almost instantly. When I made the changes on my own computer, it went from 99% to around 12-15% within a few seconds, even before a restart.
Making Sure These Changes Don’t Revert Back After a Restart.
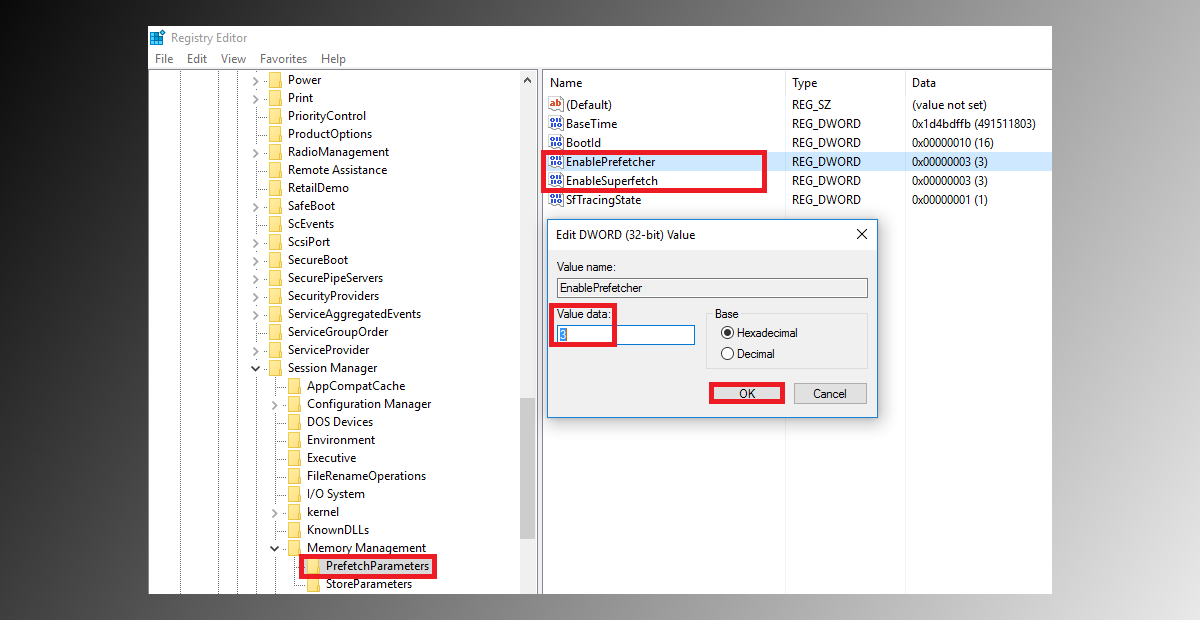
The next step in the process is to make sure that the changes you have just made stay that way. Disabled. To do this, you will have to open the Windows registry editor. To open the Windows registry editor, bring up the Run tool once again by pressing Windows key + R, then type regedit and confirm with the Enter key. You will see a popup before it opens, which you will have to confirm with Yes
In the left-hand column, navigate to the following key (folder)
HKEY_LOCAL_MACHINE\SYSTEM\CurrentControlSet\Control\session Manager\Memory Management\PrefetchParameters
In this PrefetchParameters key (folder) you will see 6 files, the ones we are going to change are called EnablePrefetcher and EnableSuperfetch. Simply double click on them to bring up their properties. In the Properties change the Value data from the default of 3 to 0, then confirm the change by clicking Ok. You have now confirmed that the changes you made in the above step will remain in place, even after you restart or shutdown your machine.
Note: This solution works for most users, however, there are still people who have the problem persisting after these changes. if it does continue, it's worth checking if your disk is starting to fail, which might also be causing some of the problems.