If you've recently updated to Photoshop version 24.5 and have been testing out the new Generative Fill tool powered by AI, you may have encountered really disappointing low-resolution results. While this is an annoying issue, this article will guide you through the steps to solve this issue and enhance the resolution of your Generative Fill images in Photoshop.

The general fill feature in Photoshop is amazing, but there is a major issue that hasn't been widely discussed. When you zoom into an area created by the generator fill tool in Photoshop, you'll notice a significant difference in resolution compared to your original photo. This is because the generative fill tool in Photoshop only generates an image with a maximum size of 1024 pixels on the longest side, and then stretches it to fit the entire image. This means the tool is essentially useless because no one is working with 1024 sized images anymore…
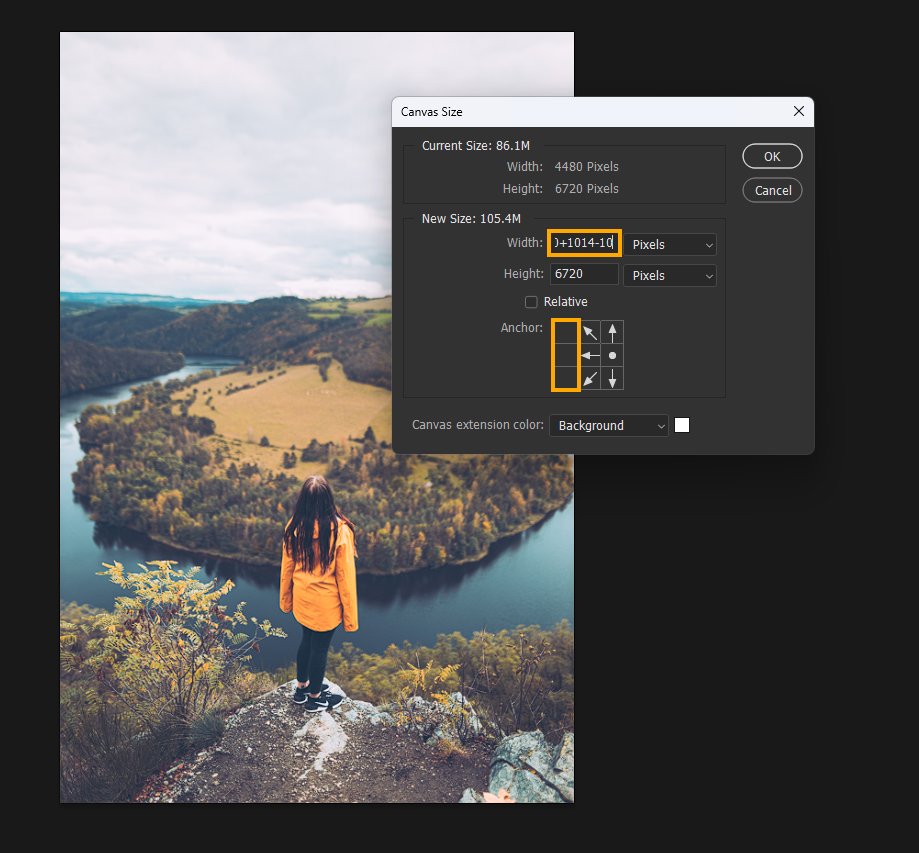
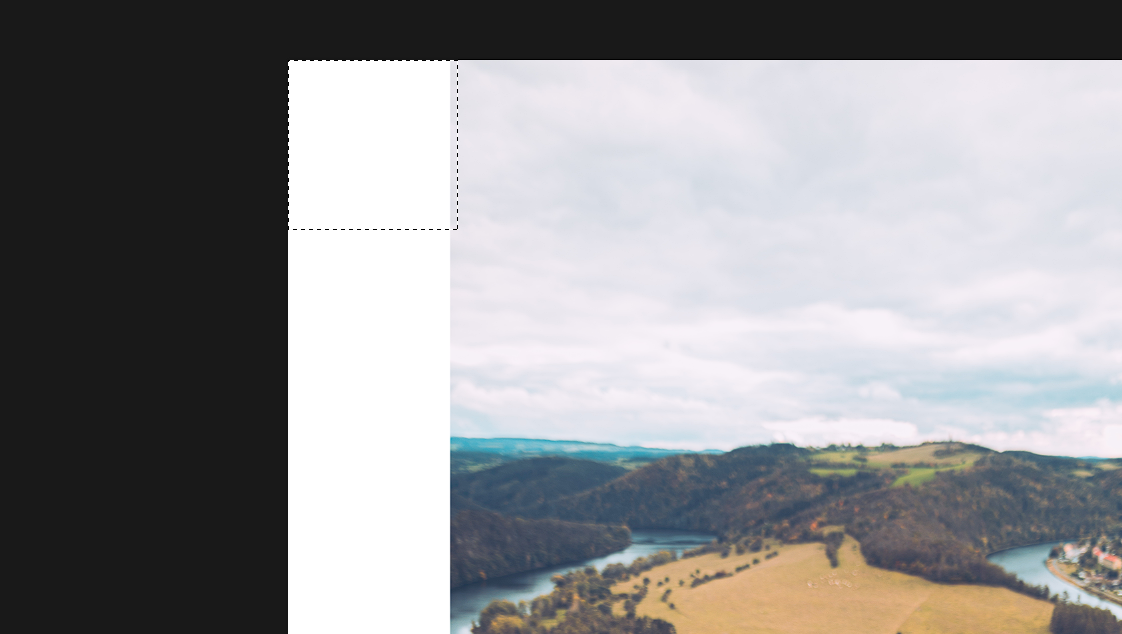
So, how do you fix this issue? The first is to expand the canvas. You can do this piece by piece by going to "Image" and selecting "Canvas Size." Add 1024 pixels to either side of the image. Here's a useful trick: you can add equations to Photoshop's input boxes, including the canvas size box. Instead of simply typing "1024," you can type an equation like "+1024-10" to have a 10-pixel overlap. This overlap helps avoid seams and generates better results. Click on the icon to add the extra space to the left of the image. Below is a full step-by-step guide to what we mean.
Step 1: Expand the Canvas
To begin, we need to expand the canvas to accommodate the generated fill. Follow these steps:
- Open your image in Photoshop.
- Go to the "Image" menu and select "Canvas Size."
- Add 1024 pixels to both sides of the image by using an equation in the input box: +1014-10, to create a 10-pixel overlap. If you only want to expand one side use the anchor tool to pick a side.
- Once you have done that click Ok and you’ll see your image canvas expand.
Step 2: Make Resolution-Appropriate Selections
Now, let's ensure the selections are of the desired resolution. Follow these steps:
- Select the "Rectangular Marquee" tool.
- Under Style choose "Fixed Size"
- Set the dimensions to 1024 by 1024 pixels.
- Click on one of the corners to create a 1024 by 1024 pixel selection.
- Take into account the overlap when making the expansion (e.g., if you set the overlap to 10 pixels, adjust the selection accordingly).
Step 3: Generate Fill Image
With the appropriate selections in place, let's generate the fill image with a higher resolution:
- Click on "Generator Fill" in the toolbar.
- Leave the prompt blank.
- Click "Generate" to create the fill within the selected area.
- Now repeat the process to cover the remaining areas of the image.
TIP: The "Rectangular Marquee" tool will allow you to quickly select and adjust the selection for the next area. Just click the top right-hand corner again and it will select the section.
- Click on "Generator Fill" and generate the fill image within the newly selected area.
- Continue this process until you have completed the entire desired section.
While this process is a little more involved, it effectively addresses the low-resolution issue encountered with Generative Fill in Photoshop. Hopefully, it doesn’t take too long for Adobe to figure out whatever it is that they are trying to figure out.