If the crowded start menu has long bothered you, you will be glad to know that the Windows 10 Creators update addresses the issue. There is now an option to hide all those annoying untidy apps that crowd your start menu, so let us show you how to do.
How to Change Windows 10 App and Program Permissions After the Creators Update.
The Windows start menu is probably one of the most important and well-liked features about Windows. If you recall the saga that followed when Microsoft removed it from an earlier version of Windows, then you know how passionate people are about it. After the uproar, it didn’t take long for Microsoft to put the start menu back into all versions from that point onwards.
Even after the start menu was replaced, the current Windows 10 start menu is still something that people like to complain about. A lot of users are frustrated with the tile-based system and the list of programs and apps that take up space on the left-hand side. Thankfully though, Microsoft have listened to some of the feedback they received and have decided to make an option to hide left-hand App/Program list. Unfortunately, custom images/icons for the tiles haven’t been added and you still can’t hide the text underneath tiles (unless you shrink them to their smallest size)
Related: Unofficially, there is a way to fully customize Windows 10 start menu tiles.

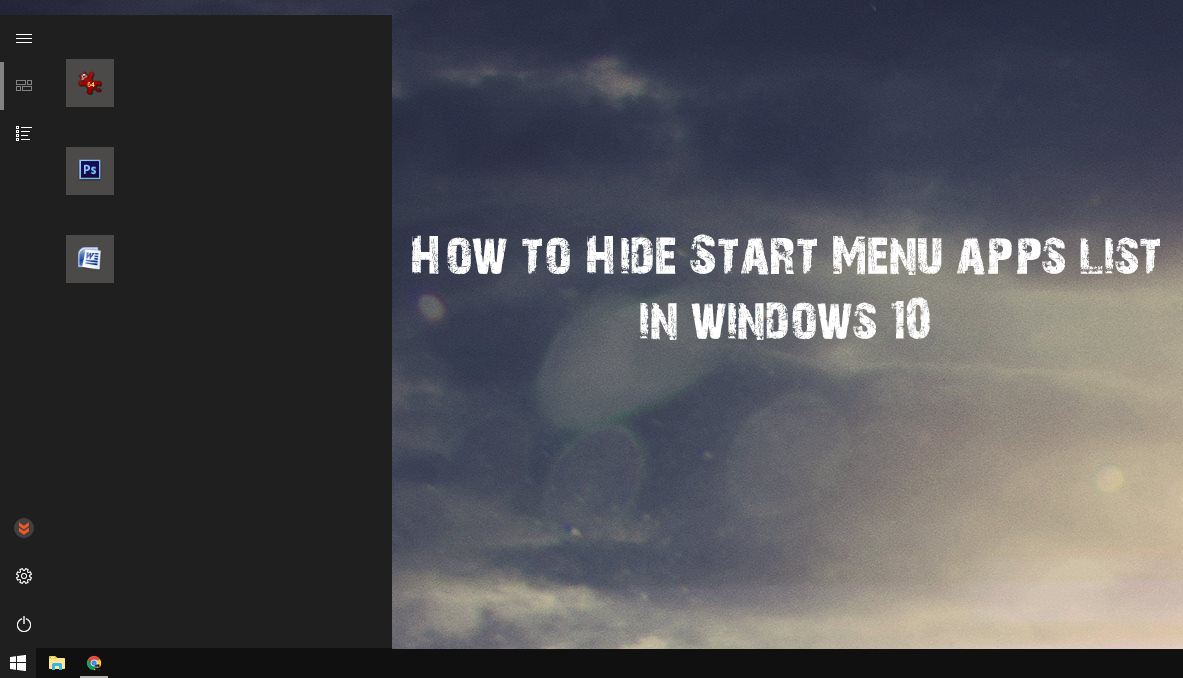
How to Hide the App List on the Windows 10 Start Menu.
The process is super easy, just a little hard to find the setting for if you don’t know where to look. Just follow the steps below:
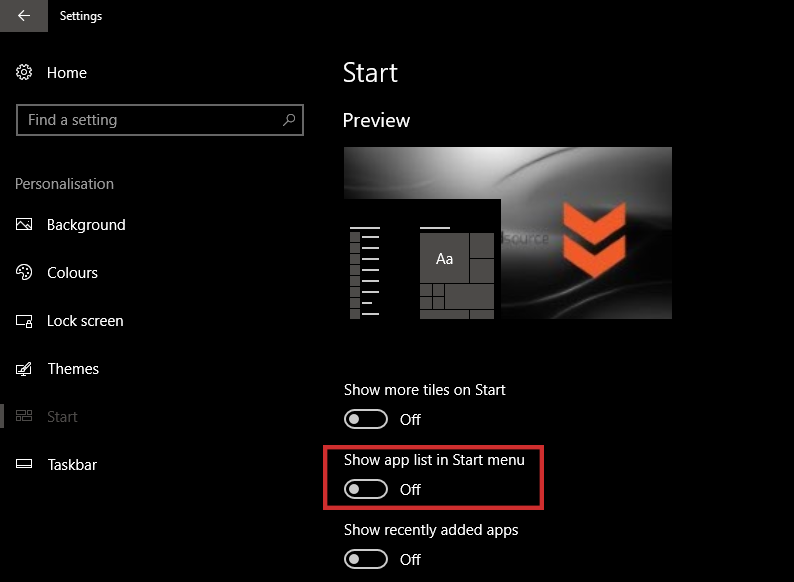
- First, go to Start and open the Settings app using the small Cog icon on the left.
- Next, select Personalization, then from the menu on the left select Start.
- Now, find the setting that says Show app list in Start menu and change it to Off which will hide all the apps on the start menu.
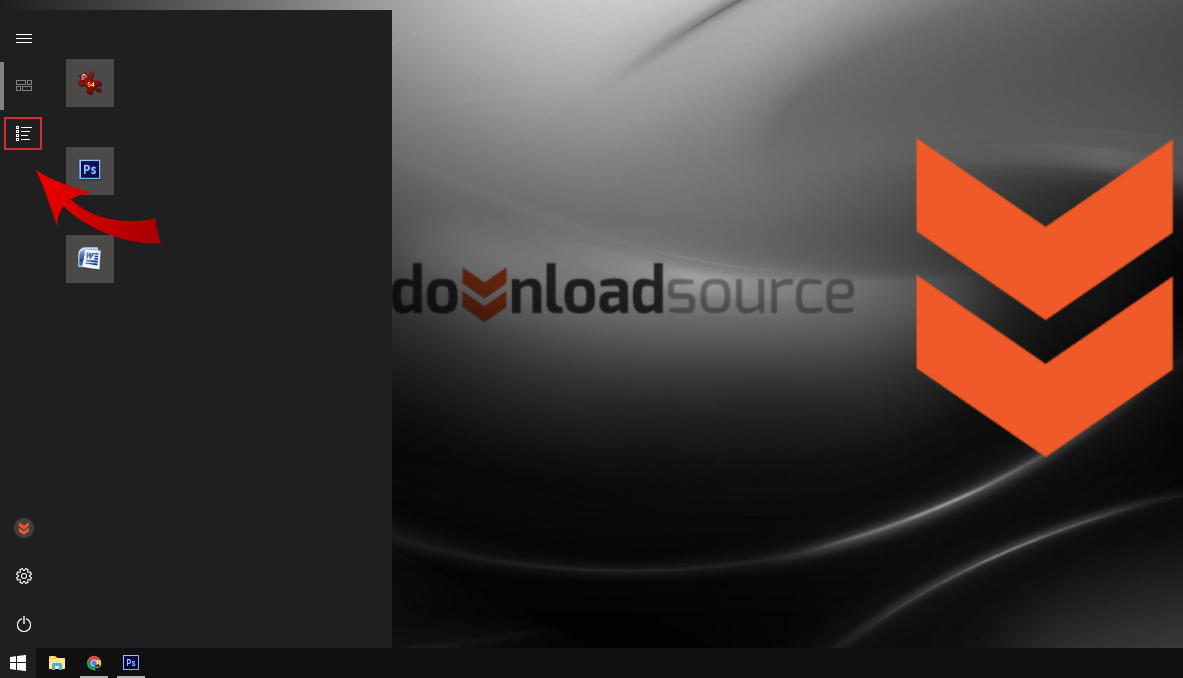
The good news is that although the app list is hidden, it isn’t gone from the start menu, it’s still in a really user-friendly location. You will now see a new icon, 3 icons down from the top on the left, clicking this icon will expand the list of all the apps and programs installed on your computer.
If you don’t like the streamlined look of the hidden app bar, you can always revert back to the old look by going back to the same location as previously shown and changing the toggle once again.
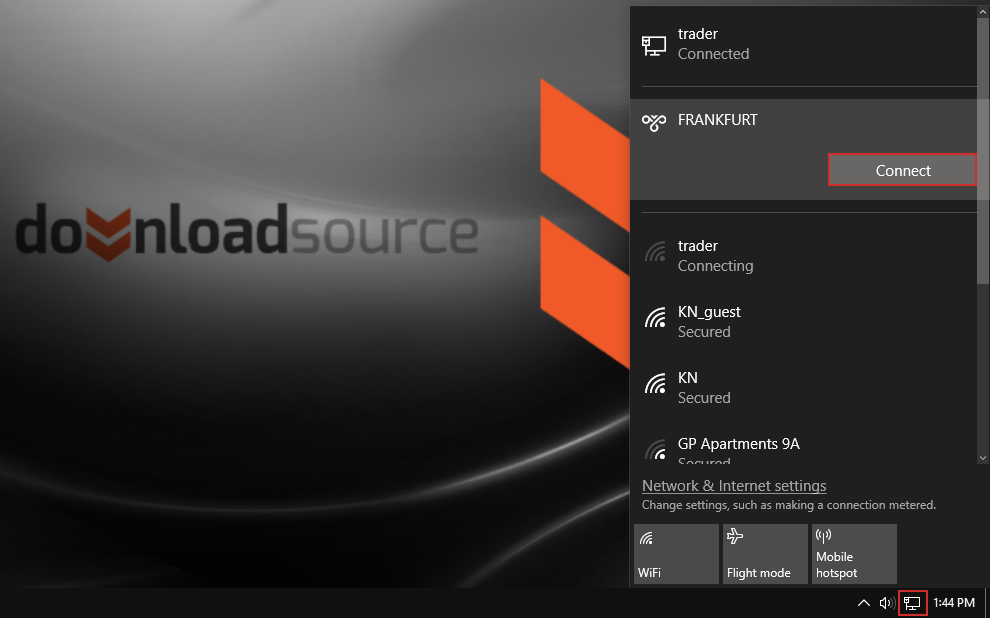
On a totally different note, there is another feature that you may find really useful and it's about time Microsoft added it to the operating system. Connecting to a VPN is now a lot more simple, you can now connect simply by left-clicking on the network icon in the right-hand corner of the taskbar, finding your saved VPN on the list and clicking Connect.
Check out the screenshot below to see the new simpler method. Although Microsoft still doesn't offer an automatic connection option, this is a step in the right direction. If you would like to know how to make your VPN connect automatically with a workaround, you can find out how in the below guide:
How to Make Windows 10 Automatically Connect to a VPN at System Boot.