If you have a Steam Deck and are thinking about installing Windows 11 to make it a useful dual-boot device. This article will show you how to install Windows 11 on your Steam Deck and keep it configured so that you can still use it as intended to play games. It’s not as complicated as you might think but you will need a few extra tools and an SD card.

Related: The Best Pokedex app for Android | Pokédexus.
The Steam Deck is one hell of a powerful device and puts out some serious gaming performance for such a tiny piece of hardware! So much so that a lot of people are starting to install Windows 10 & 11 on their devices allowing them to use their Steam Decks as portable PCs. While there are a few things you need to consider to do this, they aren’t as complicated as you may be thinking.
While dual-booting Windows 11 and SteamOS is possible, it's not recommended because of storage limitations, however, you can install Windows 11 on a MicroSD can boot from that, which I personally find better anyway and I’m sure you will as well. As we mentioned you’ll need to get a few things in order to begin.
TIP: While Windows 11 is good, it’s advised to stick with Windows 10 on the Steam Deck for now. It’s just generally more stable and gives better performance. That said, the installation process is exactly the same for Windows 10 & 11.
What you'll need to Install Windows 11 on a Steam Deck.
- A Windows 11/10 PC for downloading/creating the Windows ISO image.
- A microSD card (128GB or larger) to install Windows 11 onto.
- 7-Zip or another file compression software I like WinRAR.
- Rufus (to create the bootable drive)
- A USB-C Dock, USB keyboard, and mouse (recommended)
- And of course a Steam Deck
First, we create a bootable microSD card drive.
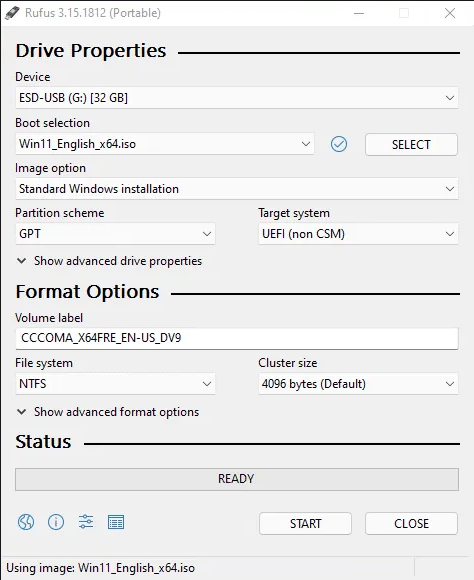
The first part of installing Windows 11 on a Steam Deck is to install Windows 11 on the MicroSD card. For this, you will need to use Rufus. If you haven’t done this before you can check out our How to Create a Windows 11 USB drive with Rufus that bypasses TPM and Secure boot. Just make sure that you select the following options when you configure the bootable device.
- Disable data collection (Skip privacy questions)
- Prevent Windows to go from accessing internal disks
- Remove the requirement for Secure Boot and TPM 2.0
Once you have created your bootable Windows 11 MicroSD card you can move on to the next steps.
Download Steam Deck drivers for Windows 11.
The next step is to download and install all the required drivers from Steam Support: Steam Deck. Now do the following.
- Using File Explorer, copy all the drivers you just downloaded and create a new folder in the root of the microSD card drive and paste in the drivers.
- Next, select all the driver .zip files and extract them to that location.
- Once the extraction is done, you can safely eject the microSD card from the Windows PC.
Installing Windows 11 on your Steam Deck.
Now, you are ready to install Windows 11 on Steam Deck. Make sure you follow the next steps closely. If you have a dock and keyboard/mouse, you may want to connect it at this time for an easier setup experience. Personally, I wouldn’t try this without them.
- Press the Steam button, and select Power > Shutdown to power off your Steam Deck.
- Next, remove any microSD card and insert the new Windows microSD card you just created.
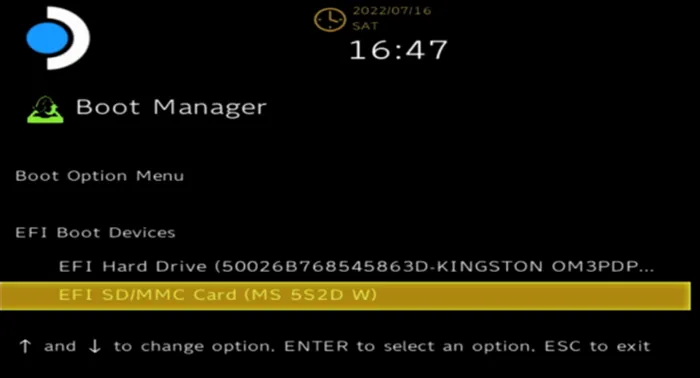
- Now, hold the Volume button down and then press the Power button to turn on the Steam Deck
- On the Boot Manager screen, use the D-pad/keyboard arrow keys to highlight the microSD and then press A/Enter to select the bootable media.
Now that Windows 11 has booted on Steam Deck. Install the drivers.
- Windows 11 installation will boot as it normally does so jump through the usual setup process.
- Once you are on the desktop and have completed the setup process you will need to activate Windows.
Once Windows 11 is installed, go to the location you stored the Drivers and install them. After you have installed all of the drivers, there’s one more optional one you may wish to acquire.
Optional but highly recommended: Install the SWICD driver to make Windows think your Steam Deck is a Controller.
This handy little driver will allow you to force Windows 11 into thinking that your Steam Deck is a controller. This saves you from having to use Steam to get controller configurations.
To get the driver just visit github.com then install it as you would any other software.
Switching between SteamOS and Windows.
To switch between SteamOS and Windows, simply press the power button for a few seconds to enter the BIOS and select the operating system you want to boot from the menu. And that's it!
Can you use the Steam Deck as a fully fledge PC?
Pretty much! However, you should grab yourself a proper Steam Deck Dock that will give you more USB slots to allow you to connect more devices. This will give you the ability to easily connect a monitor, mouse, keyboard, and wireless headset. It will also give you extra slots to use USB sticks etc.