If you have recently updated to Windows 11 and would like to enable auto-hiding for the taskbar to make your desktop look super clean. This article will show you how to quickly and easily turn on Taskbar auto-hiding. A feature that has moved from the taskbar deep within the Windows 11 Settings menu.

Related: How to fix problems with WiFi & Network on Windows 11.
The Taskbar on Windows is one of the most used and most customised components of the operating system. It’s where people store their most used programs and apps, and access a range of different common tools. Sound options, network options, notifications, battery, etc. Sadly on Windows 11 a lot of these customisation options have been removed, including the option to move the taskbar to different screen positions left, right, top, etc.
Luckily it’s still possible to enable the auto-hide taskbar option on Windows 11, though the location for the option is no longer stored on the Taskbar’s right-click context menu. The option to enable auto-hide for the Taskbar on Windows 11 has moved deep within Taskbar Settings. On a side note make sure you check out our guide on getting the old right-click option back on Windows 11.
Quick steps to enable Taskbar auto-hide on Windows 11.
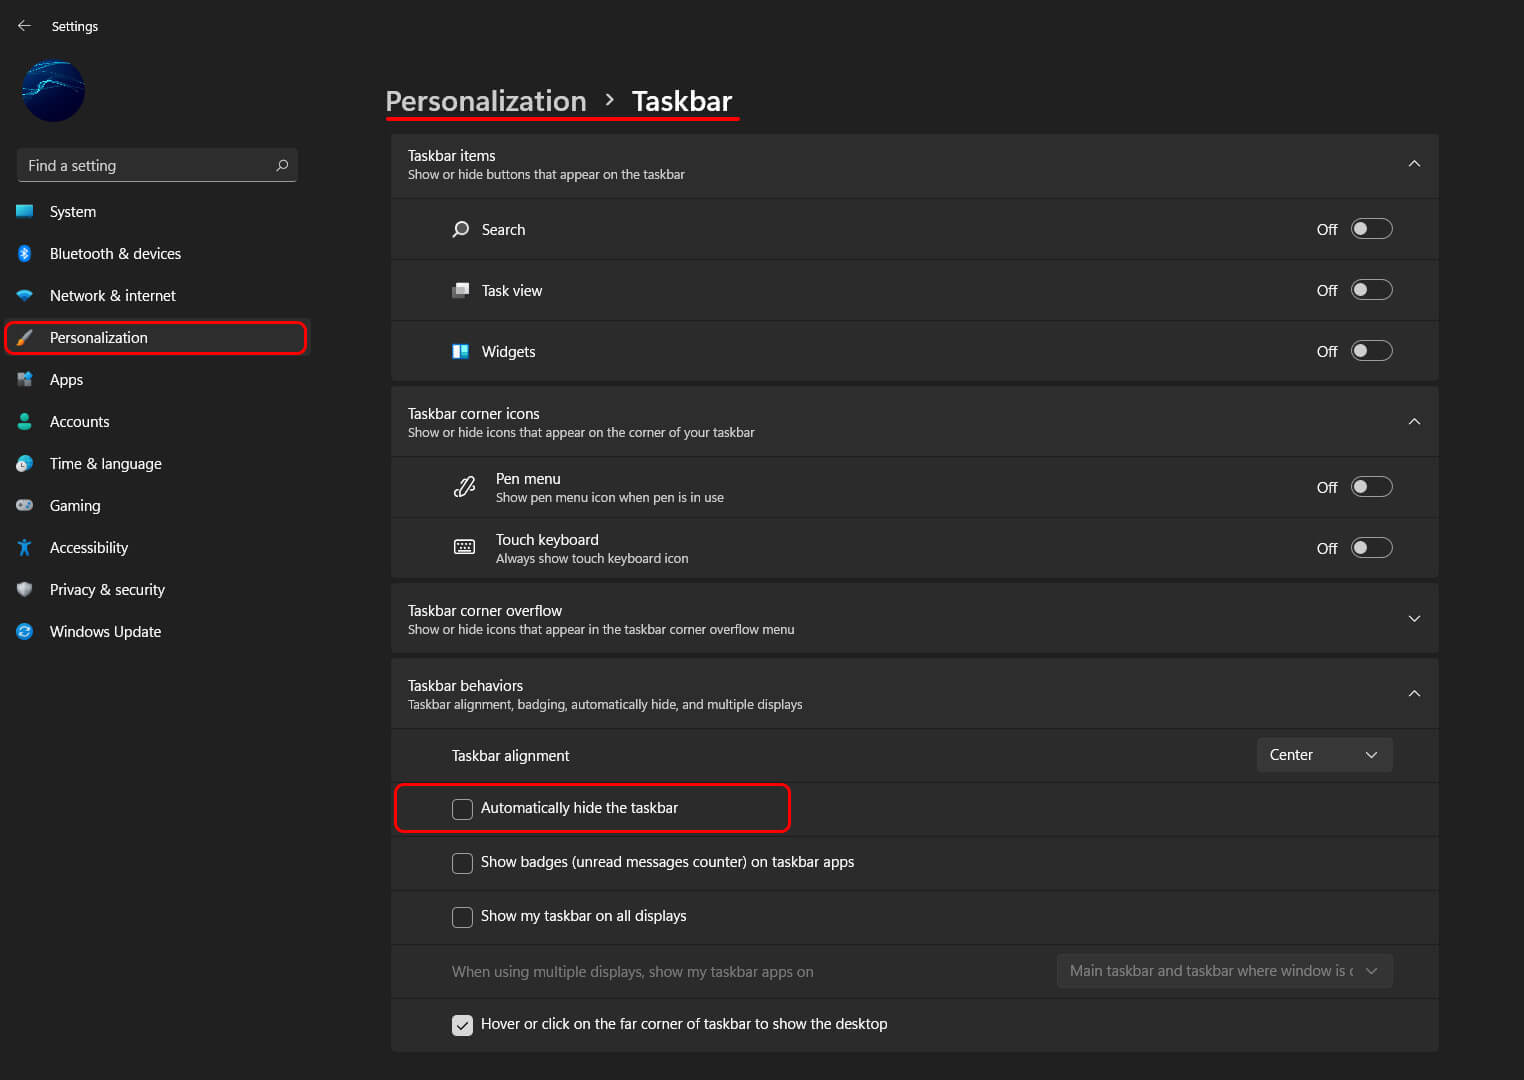
- Open Settings, then click Personalisation in the left-hand pane.
- Next click Taskbar near the bottom of the list.
- Expand Taskbar behaviours.
- Make sure the Automatically hide the taskbar icon is enabled.
- The change takes effect instantly so you can now exit Settings.
How do you enable auto-hide for the Taskbar on Windows 11? Where is the Taskbar auto-hide option on Windows 11?
As we mentioned above the option to enable auto-hide for the Taskbar on Windows 11 is no longer found on the Taskbar, instead, it has moved to the settings menu. To find and enable it, you’ll need to do the following.
- First, open Settings on Windows 11 using your preferred method, or simply press Windows Key + I.
- Next, change to the Personalisation menu in the left-hand pane.
- Here click Taskbar, near the bottom of the central list.
- This will take you to a new screen where you will need to click Taskbar behaviours.
- Finally, in this section, place a tick in the Automatically hide the taskbar checkbox and the Taskbar will automatically start hiding itself moving forward.
After you have made the change you can go back and change it at any time. If this is the first time you are using a hidden taskbar, it does take a little while to get used to. Don’t expect to like it straight away. I had the same response with centralised icons on the Windows 11 Taskbar. But after a few days of using them, it’s business as usual.
Other ways to Personalise Windows 11? Customising Windows 11.
If you are looking to do some more customising on Windows 11, make sure you check out the following guide which will take you through some of the most common changes that people first make when instaling Windows 11. The steps shown in this guide will work even if you haven’t activated your copy of Windows 11 yet. For the most part, however, if you have an activated version of Windows 11 you can find all the usual options under Settings > Personalise, then go to their usual places. This part hasn’t really changed that much from Windows 10.
How to personalise Windows 11 with or without activating it.