If you are sick and tired of having to manually customise the column layout of each and every folder you access on Windows 10. This article will show you how to set a new default column layout for folders and subfolders on your system.
File Explorer on Windows 10 has a very intricate system in place for managing the way files and folder are displayed. By default, all folders will adhere to a default layout according to the type of file contained within them. For example, a folder full of image files will be allocated a different layout to a file full of documents.
If however, you prefer to sort the contents of your folders differently and also like to view alternative column data across all your folders and subfolders, it is possible to change the way Windows manages this process. The good news is that the process is super easy to set up and doesn’t require any crazy Windows knowledge. Just be aware that this only works for certain File Explorer views. For example, you won’t be able to make this change if you use large icons, extra large icons, small icons, view.
Related: How to Remove Shadows From Desktop Icon Text on Windows 10. (Disable Drop Shadows)
How Do You Force File Explorer to Use the Same Column Layout For All Folders?
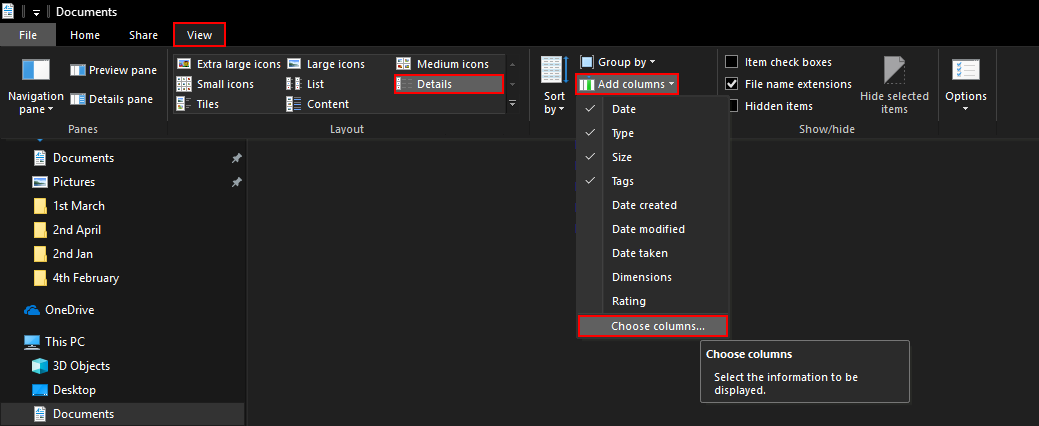
To begin, open File Explorer, click View, change to Details, then select Add Columns > Choose Columns… (if you don’t change to Details, you won’t be able to access the Add Columns menu) In the small window that appears, customise the columns you are using then click Ok.
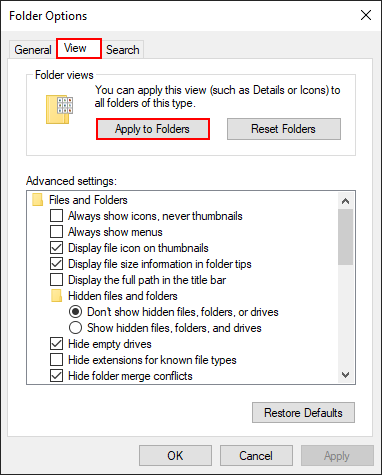
Next, click View again but this time click Options.

Here change to the View tab and click Apply to all Folders. This will change all folders of this type to your new chosen layout. However! All folders that aren’t the same type won’t be updated, so you will need to change those over to the same type in order for the change to be universal.
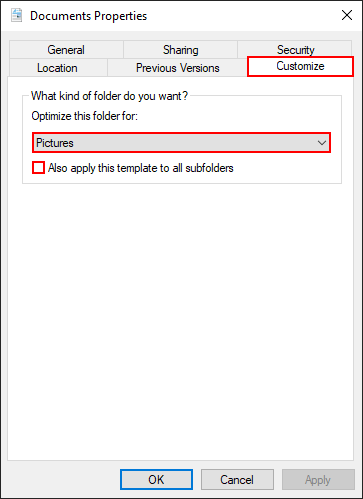
To do this right-click on a folder, select Properties, then change to the Customise tab and change Optimize this folder for to the same type as all your other folders. As soon as you do this they will update to use your previously set layout.
Note: The quickest and easiest way to do this is from the main drive. For example C: drive. This will change everything within the drive, saving you from manually changing the folders within.
Once you have made the change simply close the Windows 10 File Explorer and the changes will take effect across your system.
On a Side Note…
If you are also someone who likes to take advantage of Windows 10’s customisation options make sure you check out the following article which will show you how to remove the shadows from desktop icons on Windows 10. ‘Aka’ Drop Shadows.
How to Remove Shadows From Desktop Icon Text on Windows 10. (Disable Drop Shadows)