If you are currently using Premiere Pro and need to reduce noise in video footage because you are recording in SLOG 2 SLOG 3 or another format that requires higher ISOs. Or if you just need to save some footage you exposed incorrectly. This article will take you through the best noise reduction options currently available for Premiere Pro.

Related: How to fix Flickering in Premiere Pro when G-Sync or FreeSync is enabled.
Video noise is the visual equivalent of audio noise and is a highly undesirable grainy or speckled effect that appears on the video footage. It’s primarily caused by low lighting with high ISO settings in the camera. This is why lenses with f1.8 and f1.4 are such desirable lenses to have in your arsenal. While this is the main reason noise finds its way into footage, noise can also find its way into videos during the editing and exporting process. Cranking exposure, highlights, whites and black too much will generally create noise.
While tools like Photoshop have quick and easy noise removal tools you can use, Premiere Pro doesn’t really have anything decent to offer in the way of noise reduction. I know! It’s absolutely ridiculous in 2023…. Anyway, the good news is that there are plenty of different plugins you can use that will dramatically reduce noise especially noise associated with formats like SLOG 2 and SLOG 3.
TIP: For the most efficient use I suggest using Neat Noise at the very end of your project creation this is because playback can be a little slower after adding the noise reduction filter. You should also make sure that the Reduce Noise option is the top effect in the Effect Controls panel. This will increase stability and prevent any crashes.
How do you reduce noise in Premiere Pro? Remove noise from footage using Premiere Pro.
As we mentioned before Premiere Pro doesn’t have any simple built-in features for removing and reducing video grain. As a result, we’ll need to use a plugin. While there are plenty of plugins available we’ll be using one called Neat Noise. Once you have installed Neat Noise on your device you’ll be able to start using it.
- First open Premiere Pro and a project you want to work with to reduce video noise.
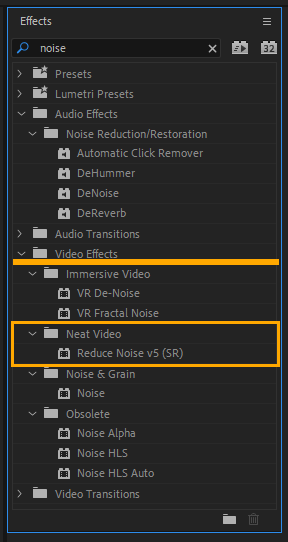
- Now change to the Effects panel and expand the Video Effects section and you’ll see a new entry called Neat Video. Expand this and you will see the Reduce Noise feature.
- Now simply drag and drop the effect onto a clip in your timeline.
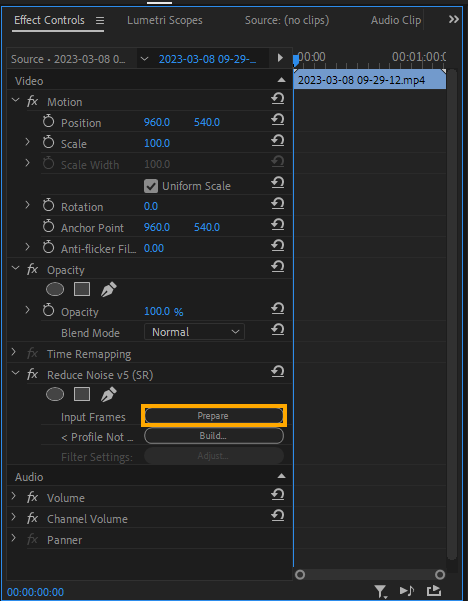
- Next, go over to the Effect Control section and you will see Reduce Noise has been applied to your image. However, we now need to give it a sample of noise from the clip to sample and work with.
- To do this skip to the point in your video with the most noise and a simple scene. Skies work best but otherwise, any simple noisy surface will do.
- Finally, click the Prepare button in the Effect Controls section to take a snapshot, then click Build. This will open a new window.
Tuning the performance of Neat Video Noise Removal in Premiere Pro.
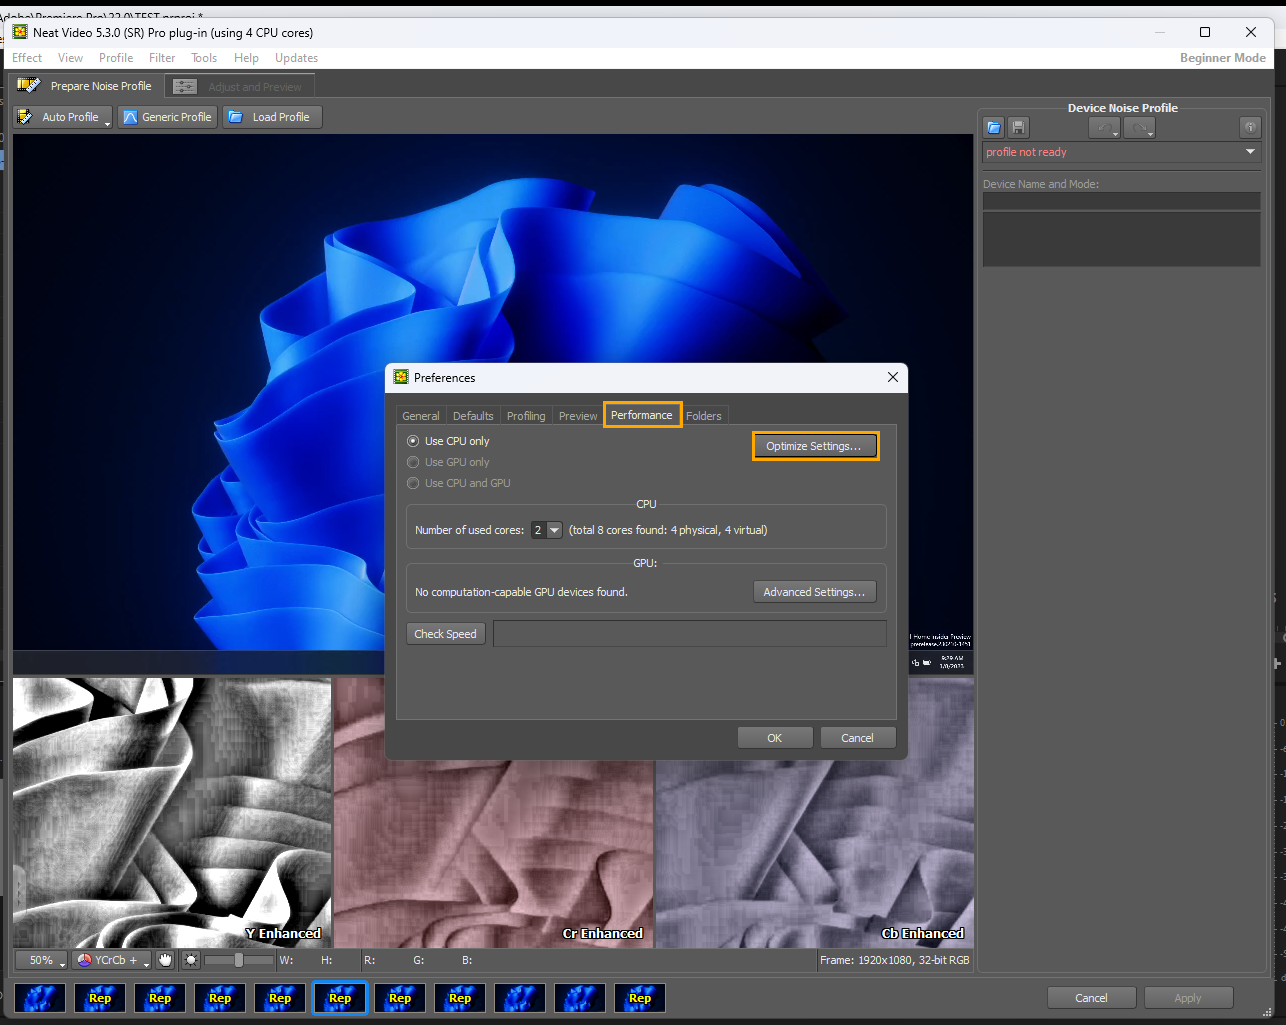
- Now that the new window is open click Tools > Preferences > Performance.
- Another new window will appear. Here click Optimise Settings and another new window will appear.
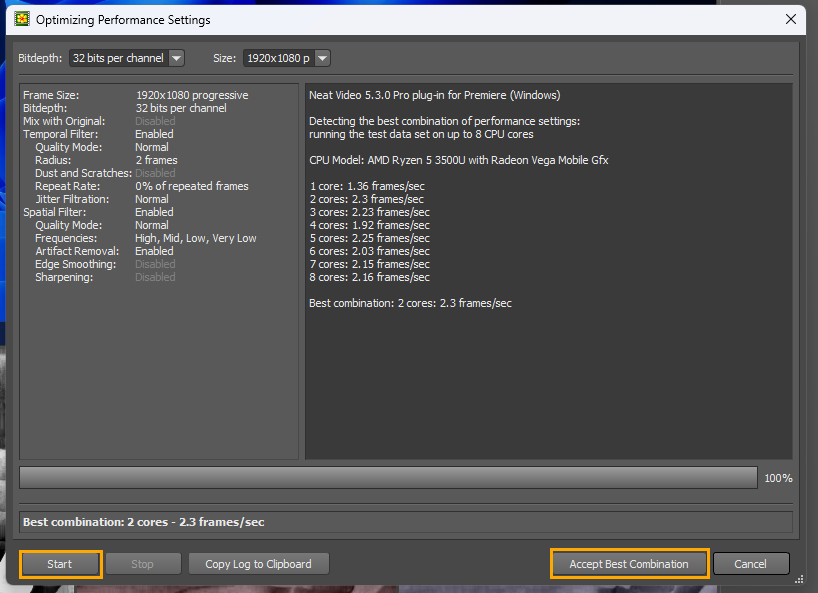
- In this window click Start and wait for the process to complete.
- When the process is complete click Accept Best Combination.
- If you don’t have a dedicated graphics card (GPU) you can skip the next step.
- If you do have a GPU you’ll see a slider with a green marker on it. Align the slider with the green mark and click Ok to confirm the change.
Auto Profiling the noise reduction settings.
- Next, click Auto Profile in the top left-hand corner and it will select a portion of the image to work with.
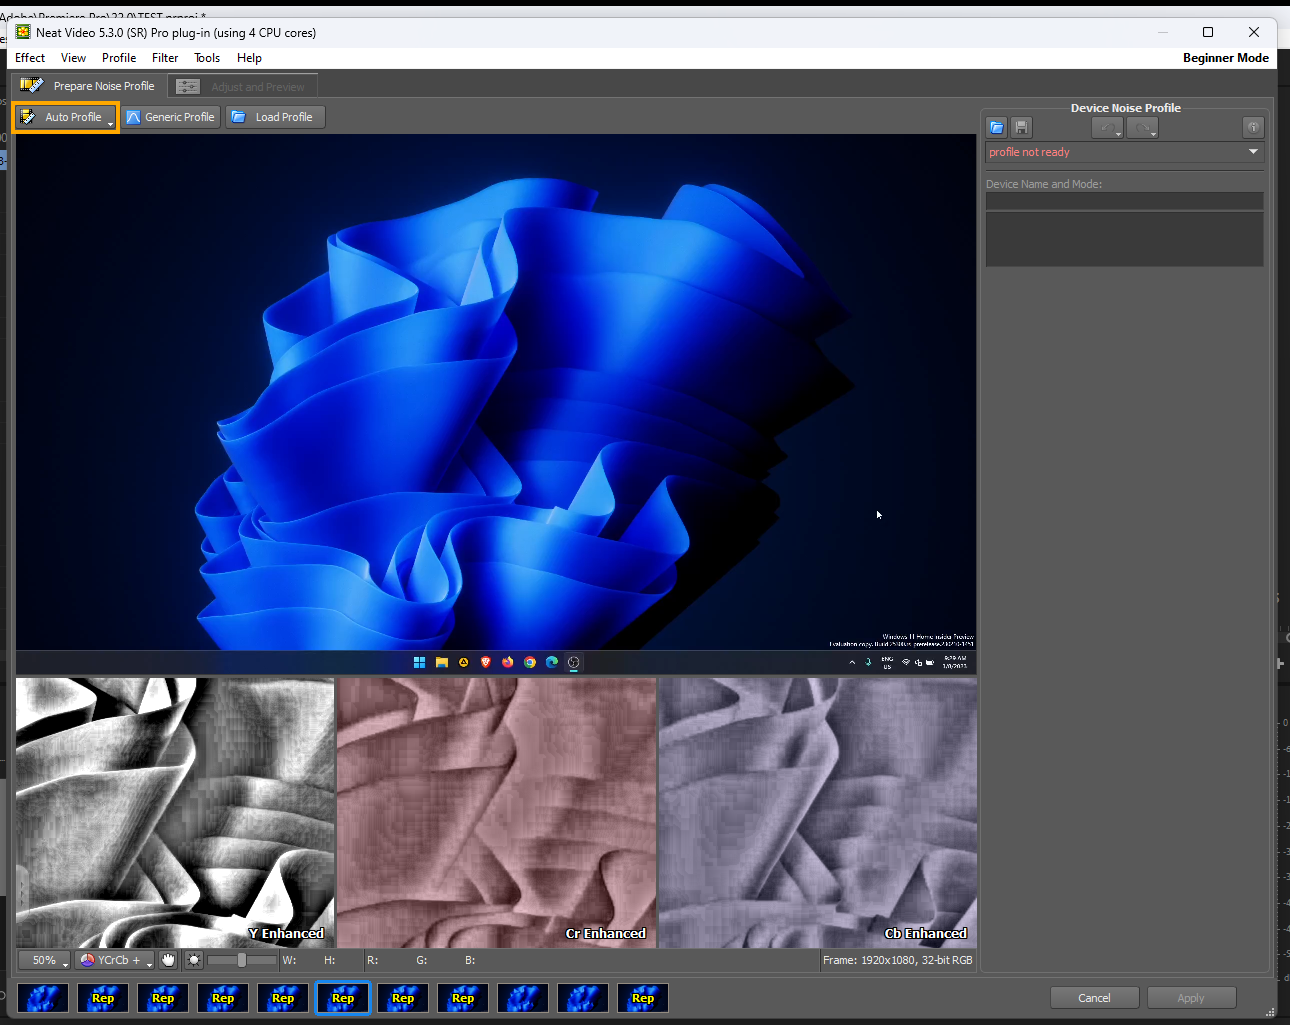
Note: Make sure this section of footage is flat with no details just noise. If the area isn’t flat and has details just adjust it into an area more suitable. Then click Build Profile in the top-left corner.
- Now that you have the exact position set you can do some fine-tuning by clicking the Adjust & Preview option at the top of the page.
- This will bring up a new window where you can manually adjust the strength and effects of the noise reduction process. 9 times out of 10 the defaults are really good, but you can manually configure things if you like.
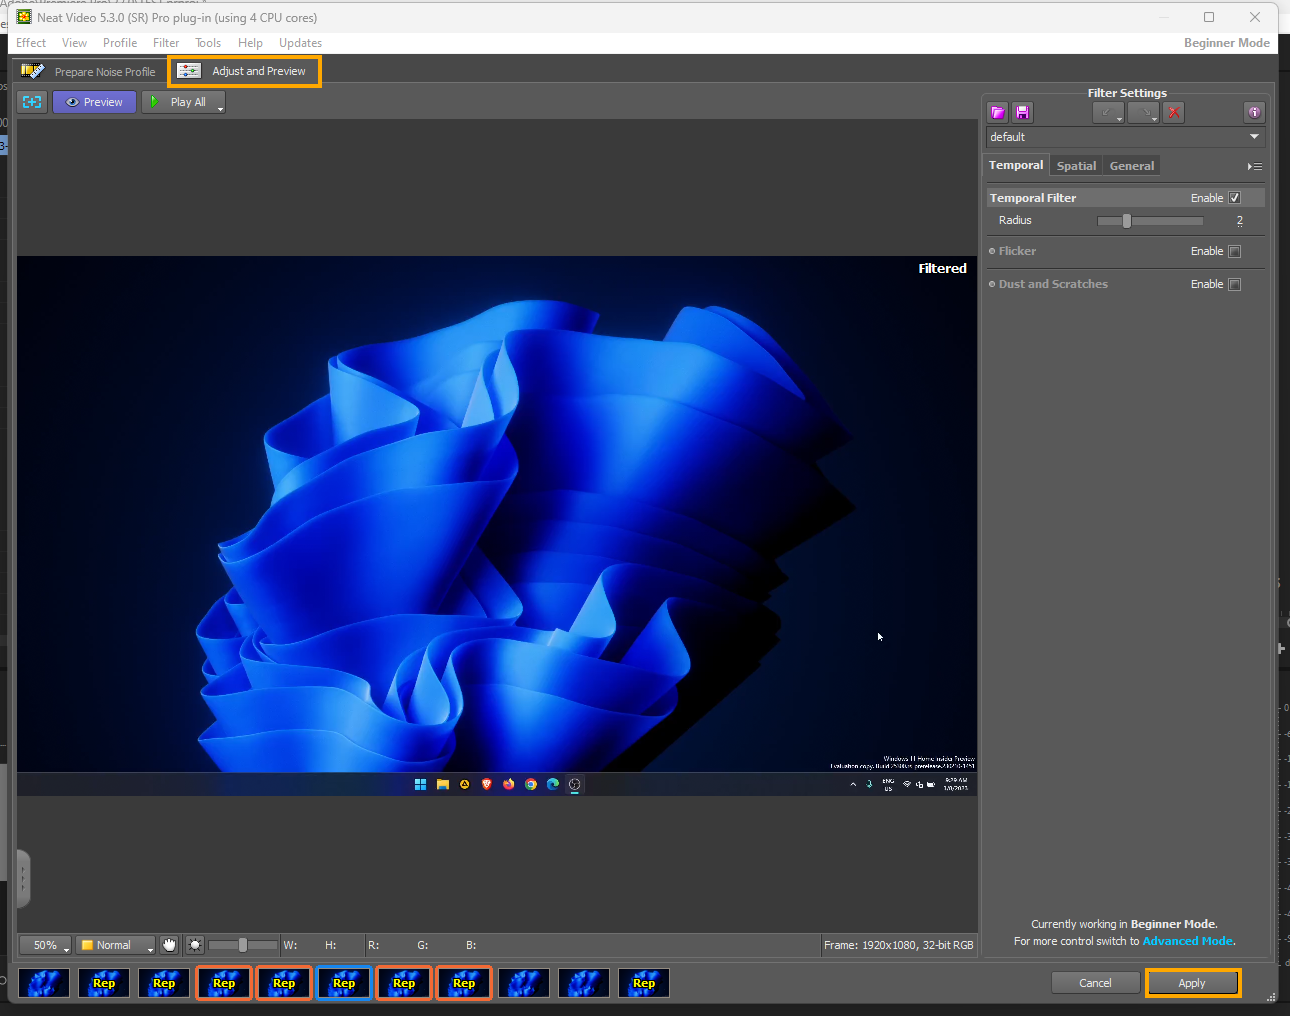
Once you have done that click Apply in the bottom right, then click Apply again on the main screen and the process will start. When it completes you will be blown away by the results! It does an exceptionally good job without destroying image sharpness.