If you have updated to Windows 11 and are looking for a quick and easy way to manage data limits on your WiFi and Ethernet connections. This article will guide you through the process, allowing you to set the maximum amount of data each connection can use over a set time period.

Related: How to change the bandwidth of Windows updates on Windows 11.
Although download and data limits are slowly becoming a thing of the past in most regions of the world, there are still places that have very limiting data plans. As someone who’s lived with data plans for a long time, I understand the importance of conserving, tracking and spending data wisely. Which is why the Windows 11 data limits option for Ethernet and WiFi connections is such a significant feature.
Although this option can also be found on Windows 10, finding and setting it up has changed a little, so follow along as we guide you through all of the steps in setting up data limits for WiFi and Ethernet connections on Windows 11. It’s important to keep in mind that this process isn’t an exact science as Windows 11 and your Internet provider may be counting data in slightly different ways. When data limits are reached, Windows 11 will show you notifications but won’t disable your connection so be very aware of this!
How do you set data limits for WiFi and Ethernet connections on Windows 11? Setting up data limits on Windows 11.
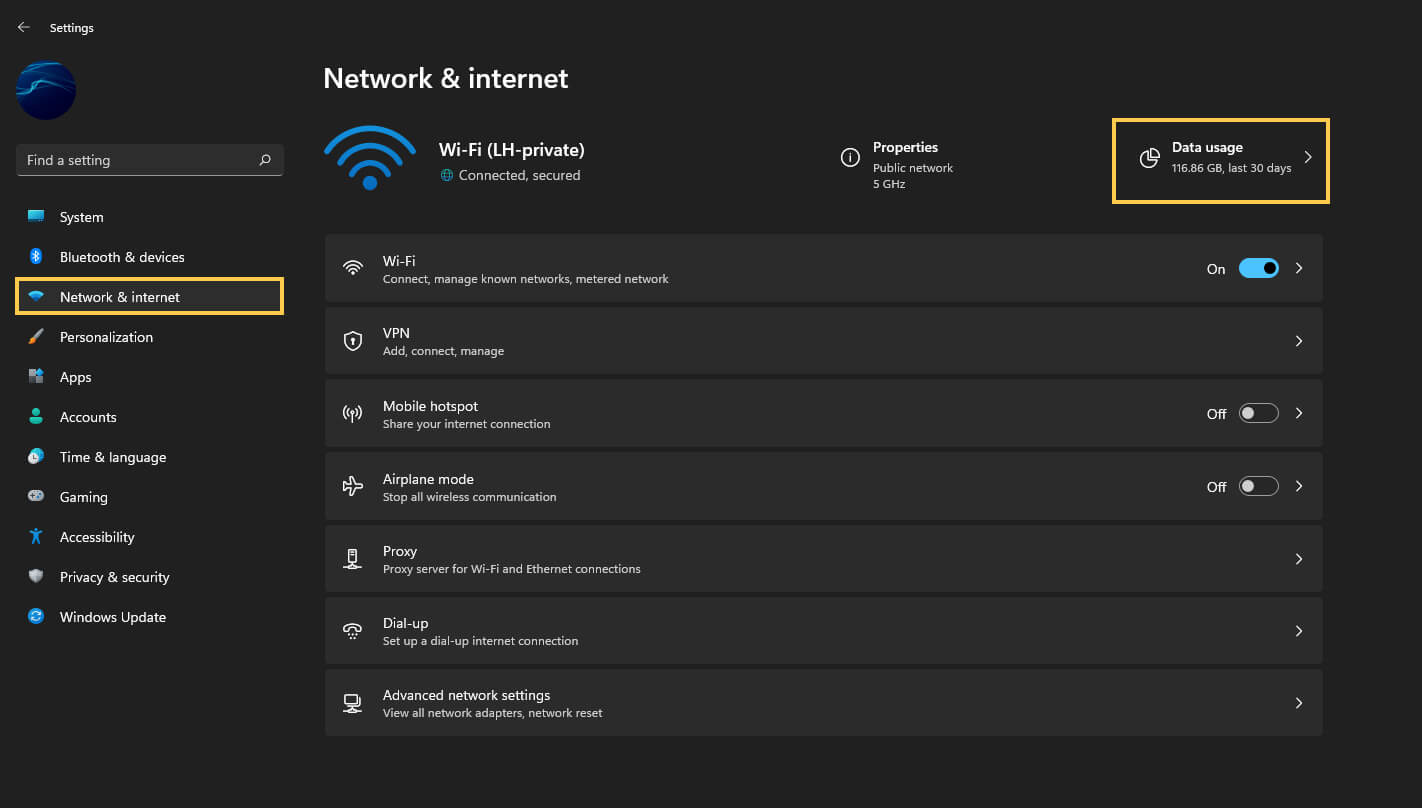
To begin, the first thing you are going to need to do is to connect to the network you want to set download limits for. Once you are connected to the network you want to set limits for do the following.
- Open settings by pressing the Windows Key + I. Then change to Network & Internet in the left-hand pane.
- Here click Data usage in the top right-hand corner.
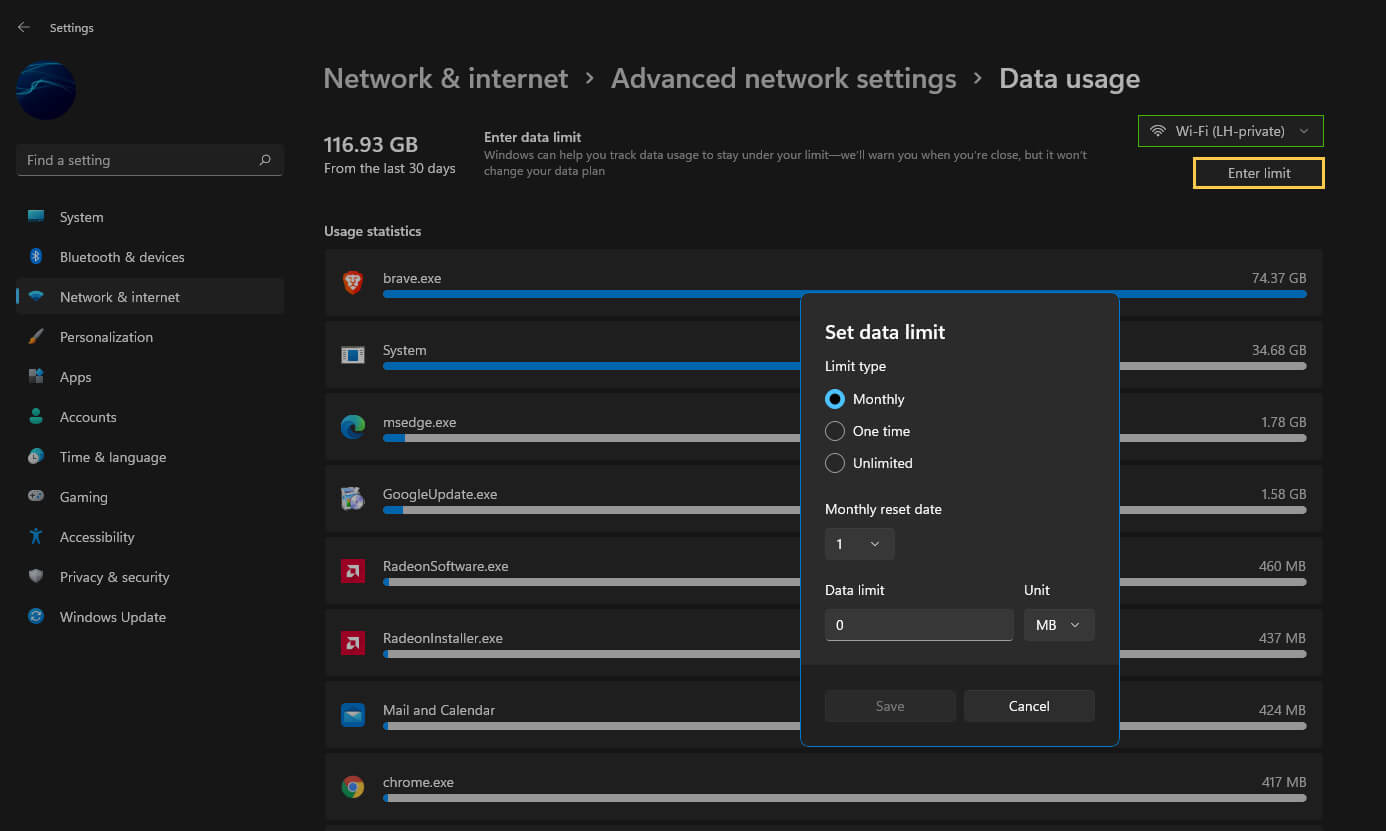
- This will take you to a new screen where you can view all the programs, apps, and services that are using data on your device. At the top of this list click Enter limit.
- A new window will appear where you will be required to enter your desired information. I would make this information line up with the day your Internet data resets.
- Once you have entered the correct information click Save.
Now that Windows has stored your preferences, you will start to see notifications regarding your data limits. Similar to the ones you will see on your Android or iOS device.
How do you set Data Limits for an Ethernet connection?
If you have multiple connections that you connect to follow the exact same process as the WiFi one. However when you get to the Data usage screen use the drop-down menu above Enter limit to select Ethernet, then enter your desired information. If you only have an Ethernet connection this will be your only option anyway.
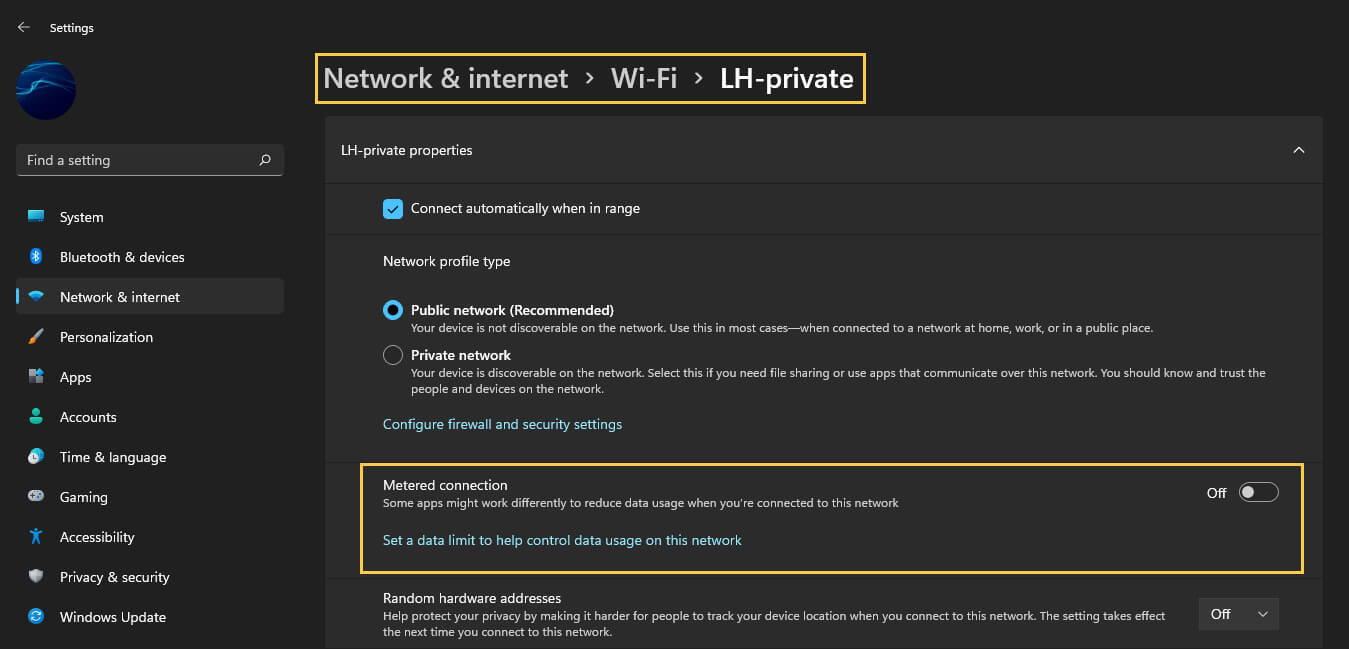
Another important way to save data on Windows 11 is to enable Metered Connections.
Enabling a Metered Connection is also a really good way to save data. Metered connections will also limit app and Windows updates to only the most important security patches. You can enable a Metered Connection on Windows 11 from Settings > Network & Internet > WiFi > Your WiFi connection. (If you are using an ethernet connection select it instead). Once you are on the connection page simply flip the Metered Connection toggle on.