iOS 17 has introduced a new privacy feature dedicated to safeguarding private browsing in Safari. This option allows you to block access to private browsing in Safari browser on iPhone and Ipads, using a password, Face ID, or Touch ID. So if this feature sounds like something you can use, follow along as we show you how to enable it.

Related: How to Activate Screen Distance Eye Protection on iPhone.
Safari is the default browser on the iPhone, and like all other browsers, it offers a private browsing mode. Private browsing in Safari allows you to visit websites and surf the internet without user information being collected or browsing activity being logged on the account or device. It doesn’t hide your activity further down the line. For that you’ll need a VPN.
As of today, iOS 17 and newer has the ability to block access to this section of the browser. Putting private browsing behind a lock and key, or in this case Face ID a Password or Touch ID. By default, Safari private browsing lock option is activated, but fortunately, you can enable or disable this feature. This allows you to access private browsing with or without needing to use Face ID or a password.
The Safari private browsing lock function is designed to prevent anyone else who uses your iPhone, from accessing the tabs that are open in the private mode of the browser. However, if you are the owner of an iPhone with the private browsing lock function in Safari enabled, it may be cumbersome to have to unlock access each time. This is one of the reasons why you may decide to deactivate this feature.
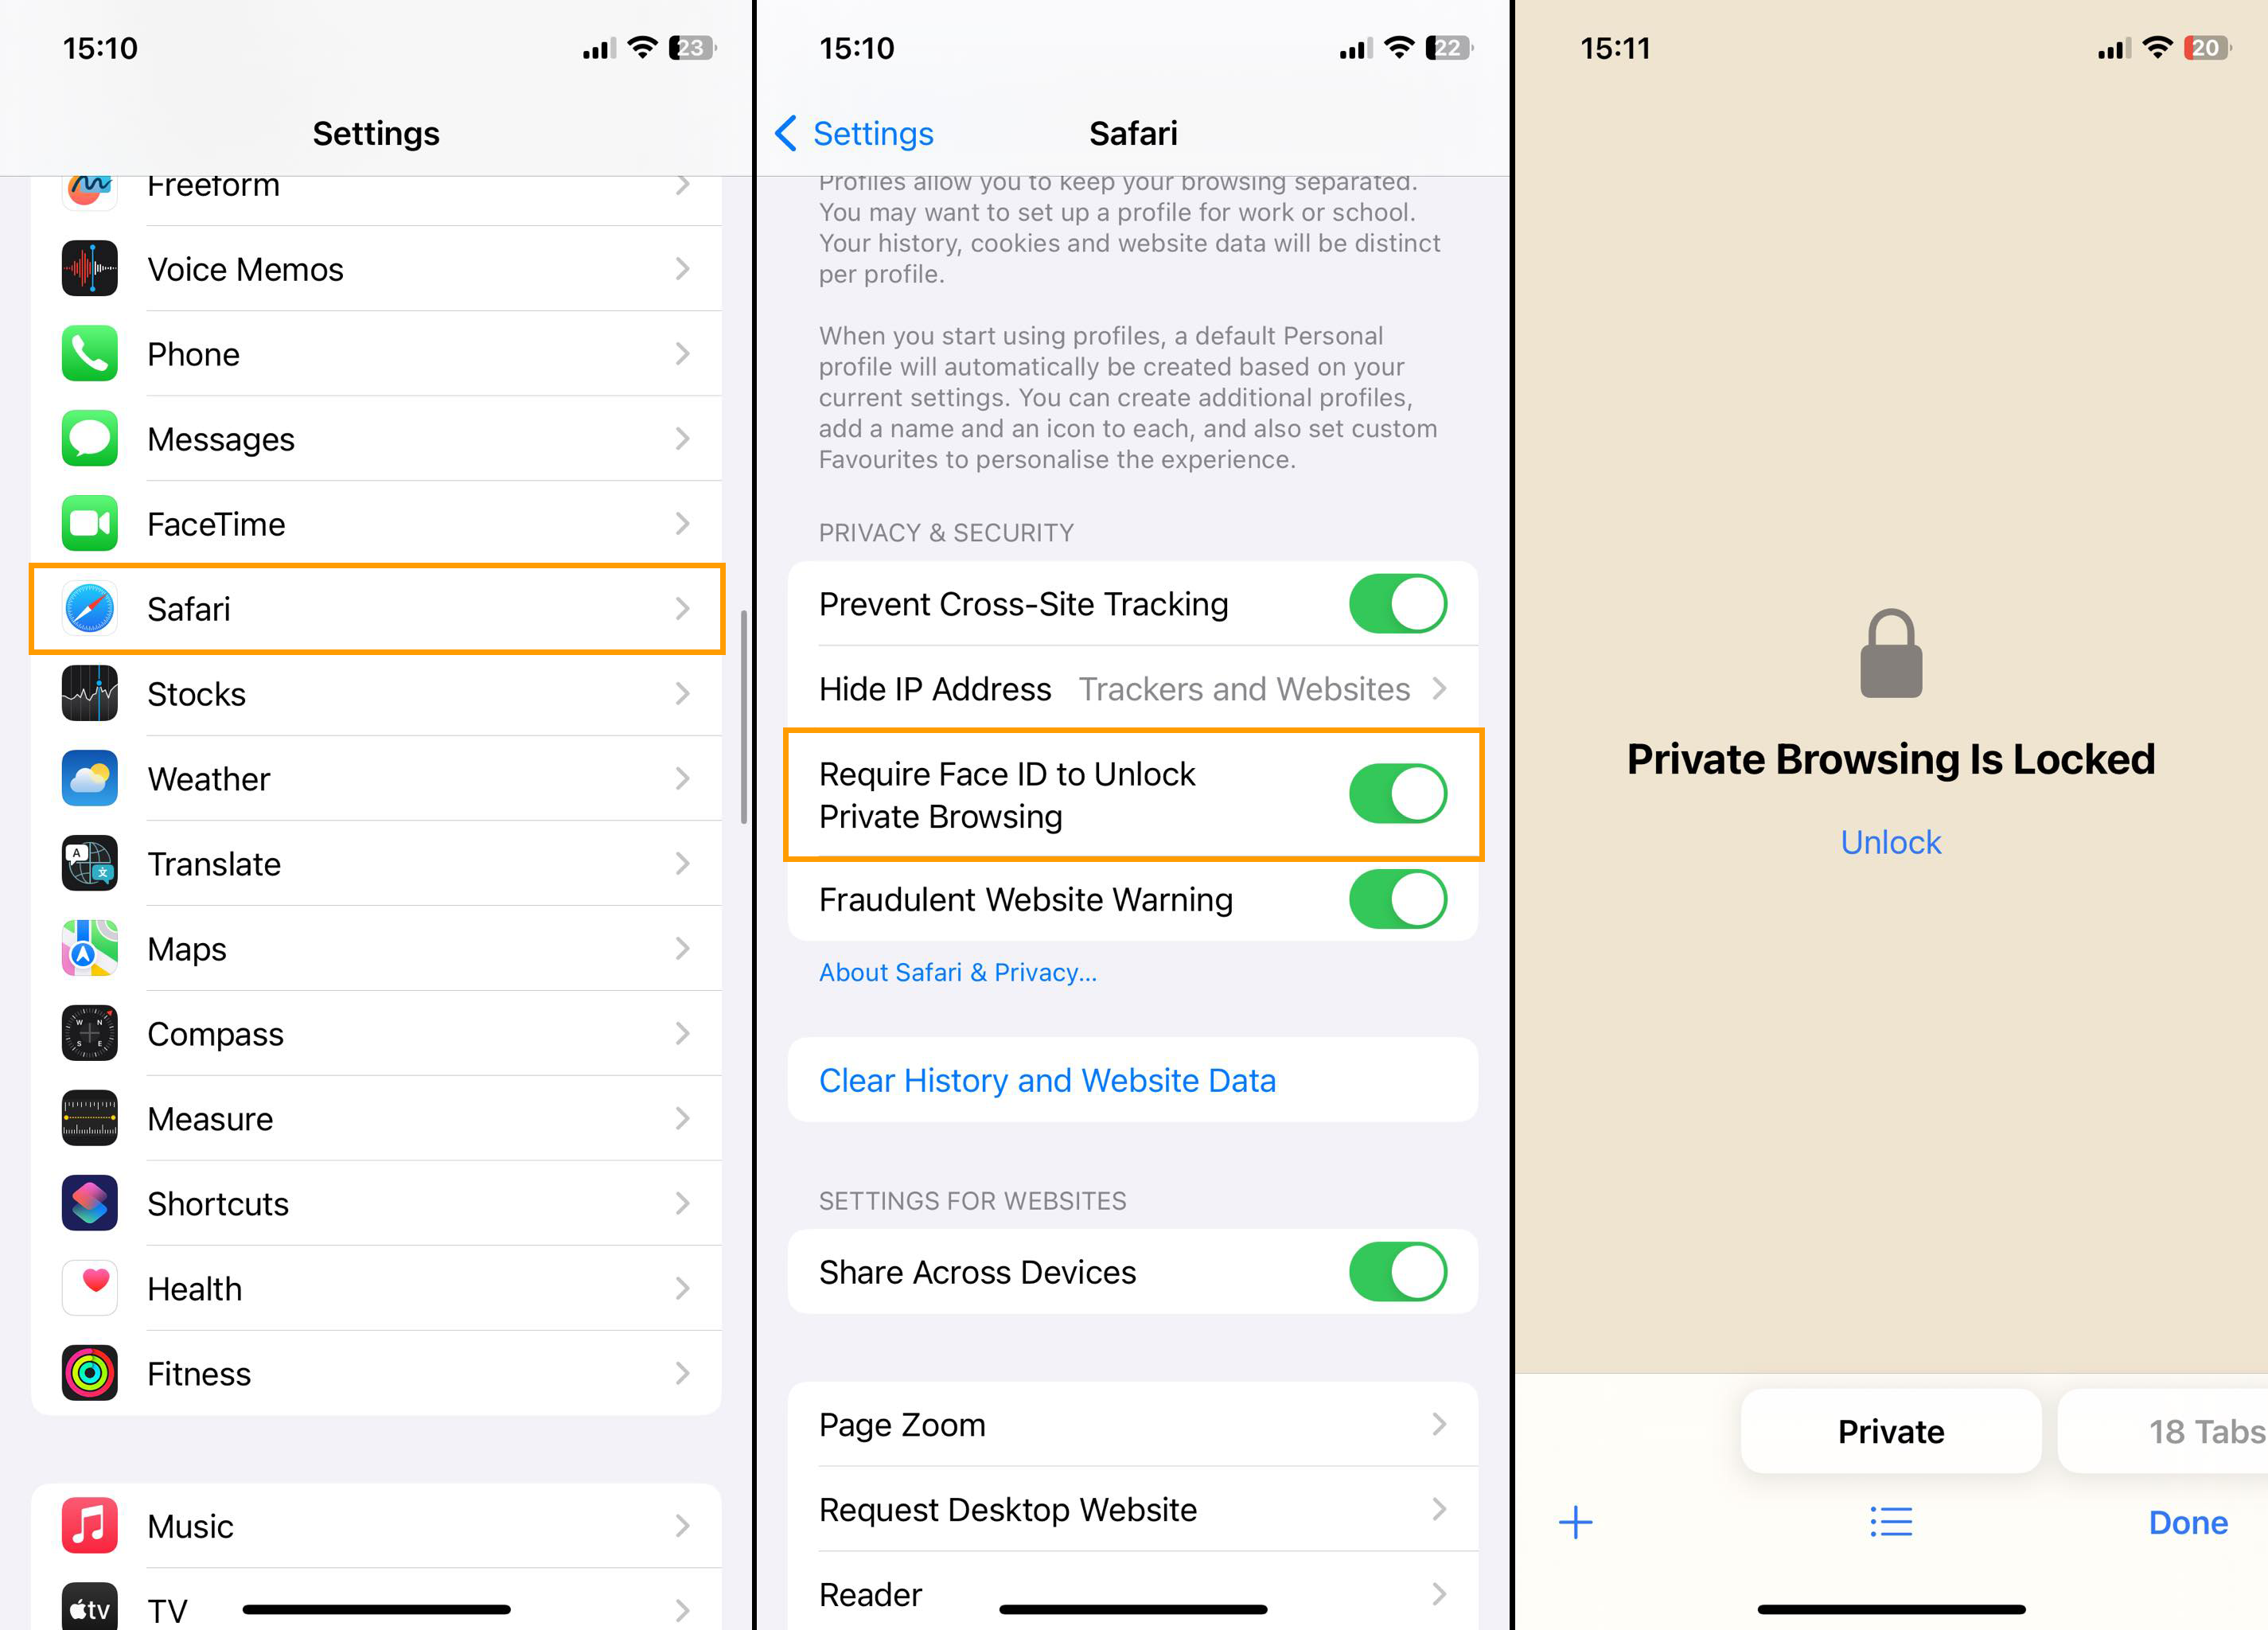
How to Enable or Disable Lock Access to Private Browsing in Safari on iPhone with iOS 17.
- Open the iPhone Settings app.
- Locate and access the Safari app.
- Scroll down to find the section: Privacy & Security.
- Under this section, you will see the setting: Require Face ID to unlock private browsing.
- Toggle the switch next to this setting to enable or disable the lock.
- If you turn off the switch for this function, when any user accesses private browsing in Safari, you will not need to enter a password or use Face ID. Access will be direct.
Important note: It should be noted that to deactivate the “ functionRequire Face ID to unlock private browsing” it will be necessary to confirm the disabling using Face ID.
There are also quite a few other iOS 17 changes you may also want to check out if you haven’t already.
How to Share Contacts, Photos, & Videos using NameDrop on IOS 17.
How to Activate Screen Distance Eye Protection on iPhone.