If you are trying to a program, app or game but keep getting the Libcef.dll is missing or not found. This article will show you several different things you can do to solve the problem and restore the missing Libcef.dll file so that everything you are trying to open opens again.

Table of Contents
Related: How to fix Premiere Pro MSVCP110.dll, MSVCR110.dll, MSVCR100.dll was not found.
Missing .dll errors are some of the most annoying error messages that you will come across while you are using Windows operating systems. They almost always come out of nowhere and don’t give you much information other than the fact they are missing. As a result finding a solution can sometimes be tricky as was the case with the missing MSVCP110.dll, MSVCR110.dll, MSVCR100.dll from Adobe Premiere Pro.
Libcef.dll is a Chromium Embedded Framework (CEF) Dynamic Link Library (dll), which is used by several programs and applications on Windows without it, they simply stop working entirely. The Good news is that there are a few solutions you can use to solve Libcef.dll is missing or not found error on Windows 11.
How do you fix Libcef.dll is missing or not found in Windows 11?
Before you jump into some of the more advanced solutions found below, the first thing you need to do is uninstall and reinstall the program or app you are having problems with. This will usually replace the missing .dll file and save you a fair amount of time going through all the other steps below. If this doesn’t solve the problem for you, keep working your way through the solutions found below.
Replace and re-register the missing Libcef.dll from another computer.
Another way to solve this problem is to copy and paste the file from another computer (running the same operating system and version) on your computer. Of course, you will need a second computer to do this so this isn’t something everyone can do.
If you have a 64-bit system, follow the steps below:
- Open the File Explorer by pressing the Windows Key + E.
- Now go to the following location using File Explorer.
C:\Windows\SysWOW64
- Once you are in the correct folder track down the libcef.dll then copy and paste it into the exact same location on the computer that the file is missing.
- Now you need to re-register the newly added .dll file. To do this open Command Prompt as an Administrator by searching CMD from the Start menu and selecting Run as administrator.
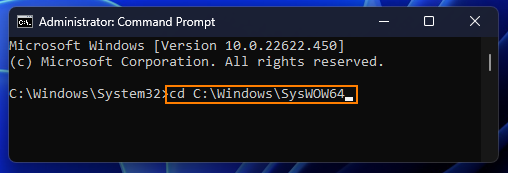
- Now type cd C:\Windows\SysWOW64 into the window and press Enter. This will direct Command Prompt to the correct location.
- Finally copy and paste the following command regsvr32 libcef.dll and press Enter. This will re-register the .dll file on your system and solve the problem.
If you have a 32-bit system, follow the steps below:
- Open the File Explorer by pressing the Windows Key + E.
- Now go to the following location using File Explorer.
C:\Windows\System32
- Once you are in the correct folder track down the libcef.dll then copy and paste it into the exact same location on the computer that the file is missing.
- Now you need to re-register the newly added .dll file. To do this open Command Prompt as an Administrator by searching CMD from the Start menu and selecting Run as administrator.
- Now type cd C:\Windows\System32 into the window and press Enter. This will direct Command Prompt to the correct location.

- Finally copy and paste the following command regsvr32 libcef.dll and press Enter. This will re-register the .dll file on your system and solve the problem.
What if you don’t have a second computer to copy the file from? Can you use an online source?
If you don’t have the option to use another safe PC. It is possible to use online sources like https://www.dll-files.com/ but, they aren’t the safest, so it’s not advised to use them. However, if you are desperate it may be your only choice.