Table of Contents
If you are currently getting error 0x8024a000 – WU_E_AU_NOSERVICE on your Windows 10 computer whenever you are using Windows Update, Windows Defender or the Microsoft Store. This article will guide you through the processes for fixing it using several different, easy to follow troubleshooting steps.
How to Stop Microsoft Teams Running in the Background After Closing it on Windows 10.
Update errors on Windows 10 are some of the operating systems most common and annoying error messages. They seem to appear randomly and often occur without any noticeable changes having been made to the operating system. Thankfully most Windows 10 update errors can be resolved without much effort, so follow along closely as this article introduces you to several easy fixes.
Before you start the more involved steps shown below. Make sure you have scanned your computer using antivirus and anti-malware software. Avast, AVG, Malwarebytes or Windows Defender get the job done. If you are also using a proxy or VPN service, disable them, then check to see if 0x8024a000 – WU_E_AU_NOSERVICE goes away. If it does, you will need to reconfigure your proxy or VPN settings. If nothing so far has worked please proceed with the options shown below.
Related: How to Stop Microsoft Teams Running in the Background After Closing it on Windows 10.
Run the Windows 10 Update Troubleshooter to Fix 0x8024a000 – WU_E_AU_NOSERVICE.
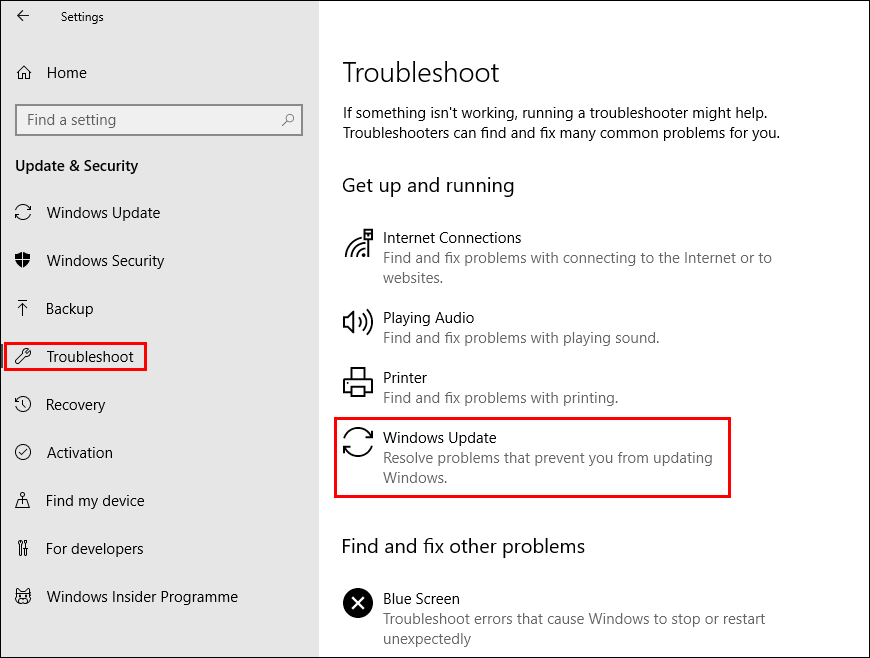
The Windows 10 update troubleshooter has been specifically designed to fix Windows update errors like 0x8024a000 – WU_E_AU_NOSERVICE. To run the Windows 10 Troubleshooter, open Settings, then go to Update & Security and click on Troubleshoot in the left-hand pane. Next click Windows Update, then click Run the Troubleshooter. The tool will take some time to complete its checks so please be patient.
Temporarily Disable Your Firewall. (Third Party Firewalls Only) to Fix 0x8024a000 – WU_E_AU_NOSERVICE.
If you aren’t using the official Windows 10 firewall and are instead using something else like Zonealarm. Take a few minutes to disable the firewall, the Restart the Windows 10 update process. If it works you’ve found your problem. If it doesn’t you’ll need to continue with the steps shown below.
Clear the SoftwareDistribution Catroot2 Folders to Fix 0x8024a000 – WU_E_AU_NOSERVICE.
If you haven’t recently updated Windows 10 (last 10 days) you can delete the Windows 10 Software Distribution Folder. This folder contains all of the latest Windows 10 update files and sometimes causes problems with future updates. Once the folder has been cleared, simply Restart your computer and check to see if the error message is gone.
How to Delete or Rename the Windows 10 Software Distribution Folder.
Delete Catroot2 Folder to Fix 0x8024a000 – WU_E_AU_NOSERVICE.
Another somewhat complicated fix for Windows Update errors is to reset the Catroot2folder. This folder is similar to the Software Distribution Folder as it contains update components and can be found at: C:\Windows\System32\Catroot2.
Important: Do not delete or rename the Catroot folder. The Catroot2 folder is automatically recreated by Windows if it is deleted or renamed, but the Catroot folder is not.
To reset this folder follow the below steps.
- Press Windows Key + X and open Command Prompt (as administrator).
- In the Command Prompt window run the following commands:
net stop cryptsvc
md %systemroot%\system32\catroot2.old
xcopy %systemroot%\system32\catroot2 %systemroot%\system32\catroot2.old /s
- After running the above commands, delete everything in the Catroot2 folder.
- Then, run the following command:
net start cryptsvc
- Finally, Restart your computer and update Windows. Hopefully, error 0x8024a000 should be a thing of the past.
Reset Windows 10 Firewall Settings to Default to Fix 0x8024a000 – WU_E_AU_NOSERVICE.
Next, you can try resetting your Windows 10 firewall settings. To do this go to Control Panel > Windows Defender Firewall, then click Restore to Defaults and follow the prompts. Once everything is reset, Restart your computer and try to update Windows 10 again.