Table of Contents
If you are trying to update your Windows 10 computer to the latest major version, one of the two major updates each year and can’t because of error 0XC190010d & 0XC190010a. This article will guide you through several quick and easy fixes you can use to force Windows 10 to update properly.
How to Stop Microsoft Teams Running in the Background After Closing it on Windows 10.
Update errors on Windows 10 are some of the operating systems most common and annoying error messages. They seem to appear randomly and often occur without any noticeable changes having been made to the operating system. Thankfully most Windows 10 update errors can be resolved without much effort, so follow along closely as this article introduces you to several easy fixes.
Before you start the more involved steps shown below. Make sure you have scanned your computer using antivirus and anti-malware software. Avast, AVG, Malwarebytes or Windows Defender get the job done. If you are also using a proxy or VPN service, disable them, then check to see if 0XC190010d & 0XC190010a go away. If they do, you will need to reconfigure your proxy or VPN settings. If nothing so far has worked please proceed with the options shown below.
Related: How to Stop Microsoft Teams Running in the Background After Closing it on Windows 10.
Run the Windows 10 Update Troubleshooter to fix 0XC190010d & 0XC190010a
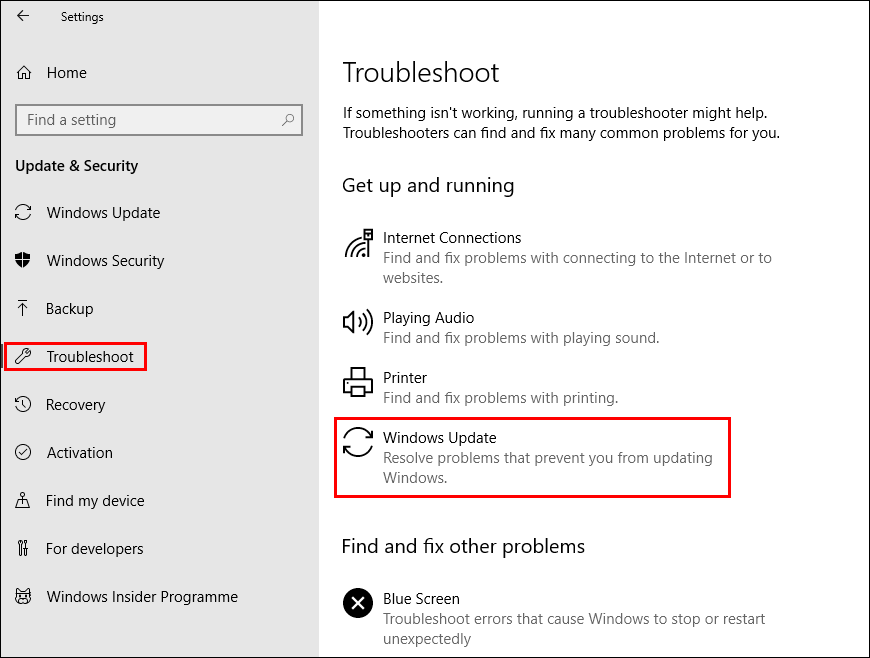
The Windows 10 update troubleshooter has been specifically designed to fix Windows update errors like 0XC190010d & 0XC190010a. To run the Windows 10 Troubleshooter, open Settings, then go to Update & Security and click on Troubleshoot in the left-hand pane. Next click Windows Update, then click Run the Troubleshooter. The tool will take some time to complete its checks so please be patient.
Temporarily Disable Your Firewall. (Third Party Firewalls Only) to 0XC190010d & 0XC190010a
If you aren’t using the official Windows 10 firewall and are instead using something else like Zonealarm. Take a few minutes to disable the firewall, the Restart the Windows 10 update process. If it works you’ve found your problem. If it doesn’t you’ll need to continue with the steps shown below.
Clear the Software Distribution & Catroot2 folders to fix 0XC190010d & 0XC190010a.
If you haven’t recently updated Windows 10 (last 10 days) you can delete the Windows 10 Software Distribution Folder. This folder contains all of the latest Windows 10 update files and sometimes causes problems with future updates. Once the folder has been cleared, simply Restart your computer and check to see if the error message is gone.
How to Delete or Rename the Windows 10 Software Distribution Folder.
Rename the CBS.log file to fix 0XC190010d & 0XC190010a.
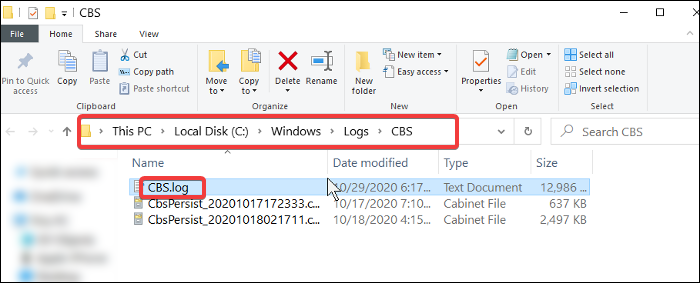
Press Windows Key then type or copy and paste the following into the start menu:
%systemroot%\Logs\CBS. This will take you to the following location:
Local Disk (C:) > Windows > Logs > CBS.
When you get here rename the CBS.log file to a CBSold.log.
Note: If you can’t rename the CBS.log file, because the file is in use or you get another error message, you’ll need to do the following then retry.
- Press Windows key + R to open the Run tool.
- Next, type Services.msc into the Run tool and press Enter.
- Here find and double-click on the Windows Modules Installer service.
- Change the startup type to Manual.
- Restart your machine.
After this change, you should be able to rename the CBS.log file. Once you have renamed it, return to the Windows Modules Installer service and change the startup type back to Automatic. Again Restart your computer.