Table of Contents
If you are a long-term Windows users, you have probably come across this issue before. After installing an automatic update, Windows likes to perform a restart. On rare occasions after rebooting, your machine will continue to cycle endlessly on the "Windows is getting ready screen". Generally resetting your machine will fix this issue, if however, you have tried this countless times and it still doesn’t work, you can follow the instructions of this guide to fix the problem.
How to Create a Fully Automatic Backup System For Your Android Devices. (Phones and Tablets)
Generally, Windows updates are a smooth automated process, not much ever happens and you probably barely notice any visible changes to your operating system. Unfortunately, from time to time Windows updates encounter random bugs and errors and can often cause the operating system to get stuck on the getting ready screen. If you are in this situation, below are several different methods that will help you troubleshoot the issue.
It’s best to work your way down the list from top to bottom for the best and fastest results. Some of the screenshots below may vary somewhat depending on the version of Windows you are running, however, the basis of the instructions are almost identical.
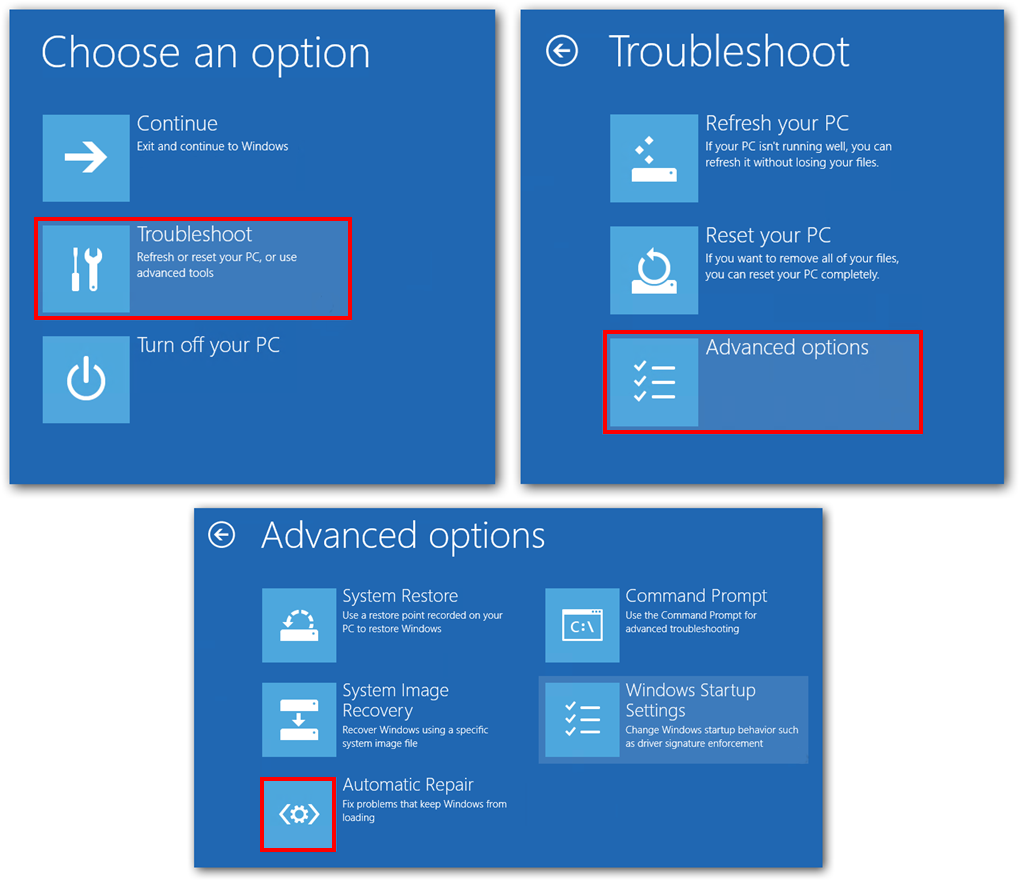
Method 1: Startup Repair.
You may have already noticed that on Windows 8 and 10 the Advanced boot menu is disabled by default. So you have a couple of options here. First, you can Enable the Advanced Boot Menu Manually or use bootable media (Windows Disk, or USB drive) As the first option is explained in the above link we will proceed to demonstrate using a bootable media device.
- First, insert your bootable media into your computer, either a disk or USB stick, then turn on the power. In the case of a disk, you will need to have the power on first for obvious reasons, then reset it.
- Next, press the F10 or F8 key to open the boot menu (whichever works on your model of PC). After this choose the option relating to your media device USB/DVD etc.
- You should now be face to face with the Windows installation menu, here click Repair your computer.
- Finally, click Startup Repair and follow all the instructions shown.
After the Startup Repair process completes, you should have your Windows system back in working order. If for some reason it still isn’t cooperating, you can move onto the next step.
Note: You should always have a bootable Windows device of some sort on hand in case you ever need to perform a task like above or reinstall Windows from scratch.
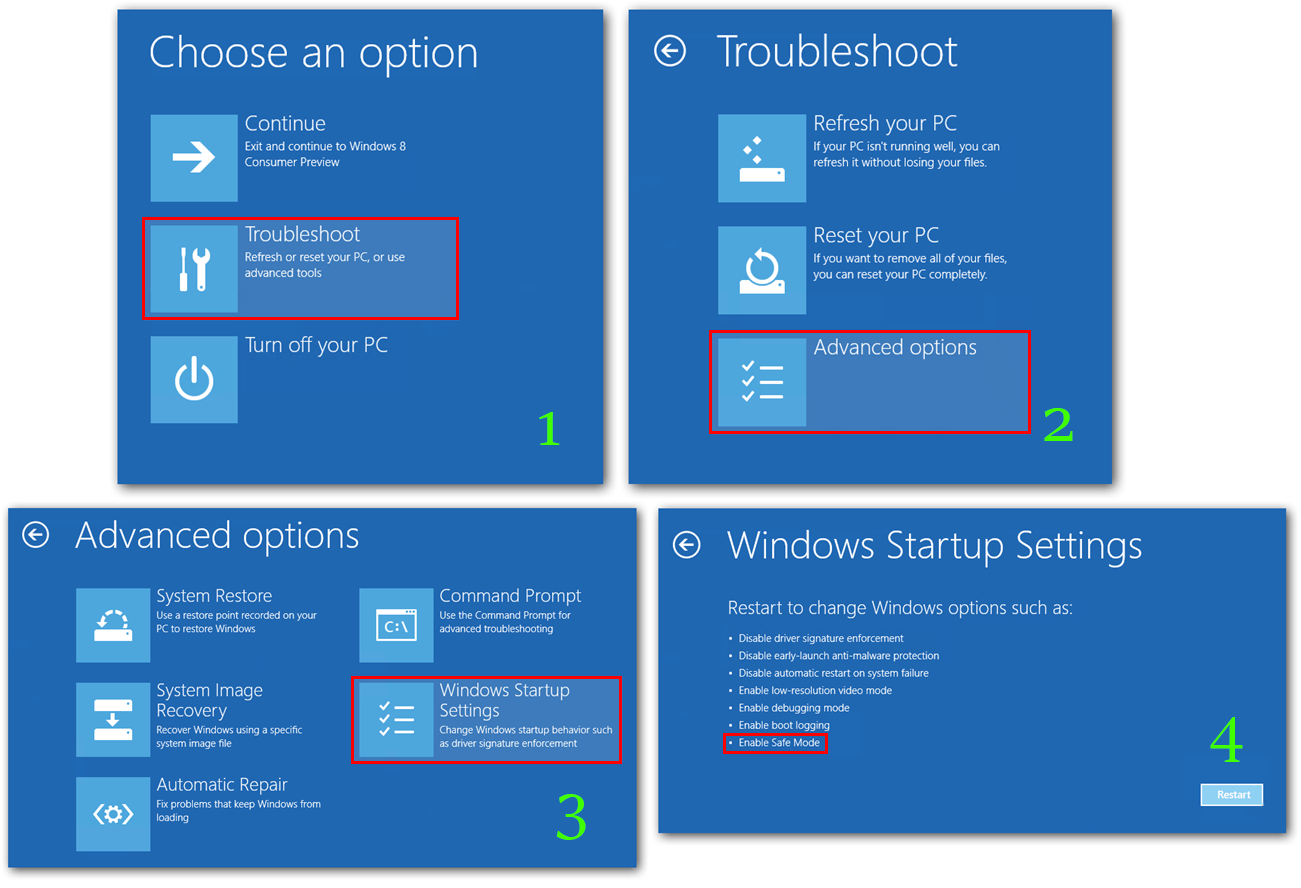
Method 2: Uninstall the Most Recent Update in Safe Mode.
It’s not very common that startup repair will fail, however, it is a possibility. If startup repair didn’t fix your issue, you can try booting your computer into safe mode instead. To boot your computer into safe mode, you will need to follow the above steps shown in method one to launch the Advanced Startup options. From the advanced startup options menu select Safe Mode.
- Once you have booted into safe mode, go to Control Panel > Programs > Programs and Features.
- Then, click on View installed update.
- Next, Uninstall the problem update, which will almost certainly be the most recent one.
- Lastly, Restart your computer and let it boot normally into Windows. Your problem should now be fixed.
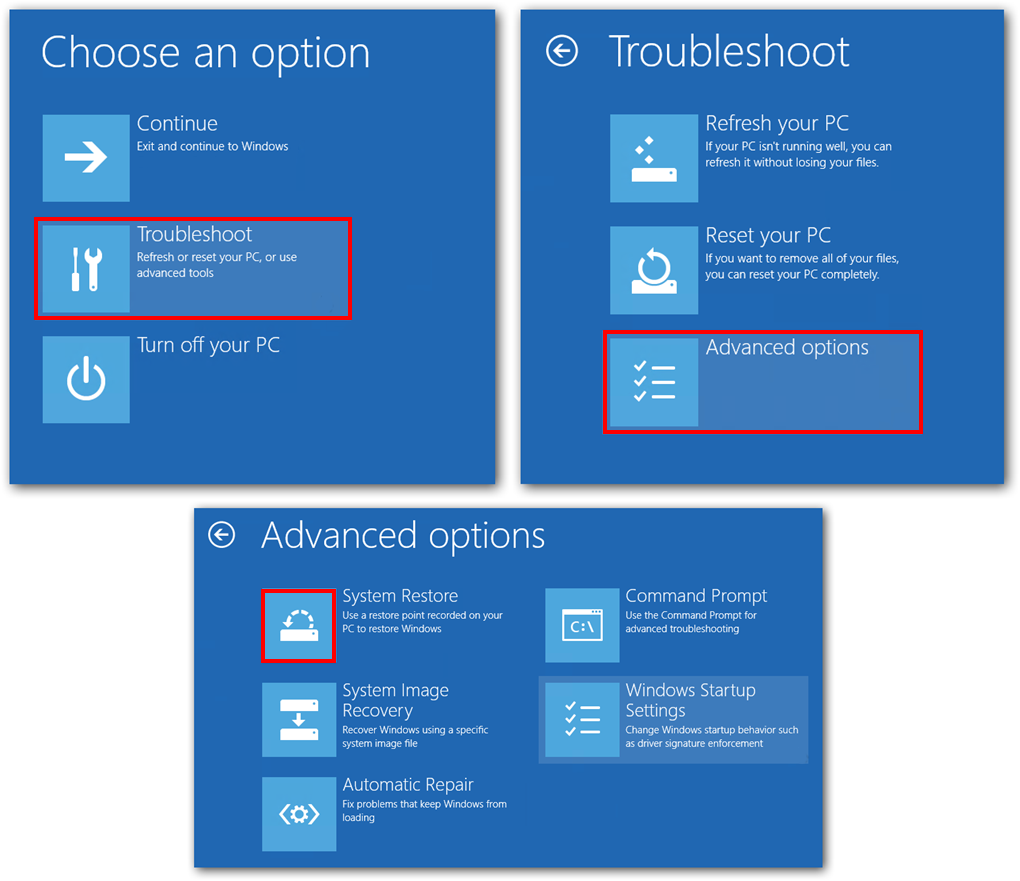
Method 3: Perform a System Restore.
If the above methods failed to work for you, you can try performing a System Restore, again using the Advanced Startup Menu to find the option. Once you have found it in the Advanced Startup menu, follow the Windows steps and select a Restore point that was working prior to the latest update.