Table of Contents
Windows 10 has been designed to run on both touchscreen and non-touchscreen devices to make things simpler and cheaper for Microsoft. This is great, however, also poses some problems when touch screen features are rolled into non-touchscreen devices the Windows 10 PC Lock screen, for example. Thankfully there is still a way to disable it.
How to Check if Your Phone is WhatsApp Compatible For 2017.
If you are using a non-touchscreen computer and are running Windows 10, it is pretty much pointless to have a lock screen. It’s just another screen you have to bypass in order to get to your login screen. Normally you would swipe it away, however, on non-touch devices, you either have to click or tap any keyboard key to go to the login screen.
There are three methods you can use to get rid of the lock screen on Windows 10 after the Windows Anniversary update. The first method is quicker but will also disable the login screen, so there will be no login option, your computer will automatically load directly to your desktop. (This is quick but not the best for security.)
Method 1: Disable All Windows Entry Screens. (Including Sign in)
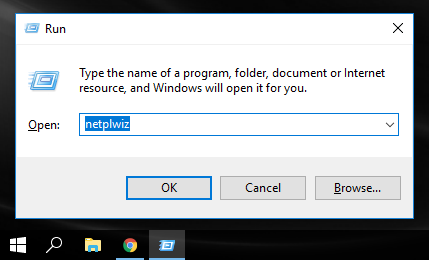
Remember this option is going to make your computer completely open and available to access. Anyone who turns it on has unlimited access. Step one: Open the Run run tool by pressing Windows key + R, when the Run window is open, type netplwiz into the box and press Enter.
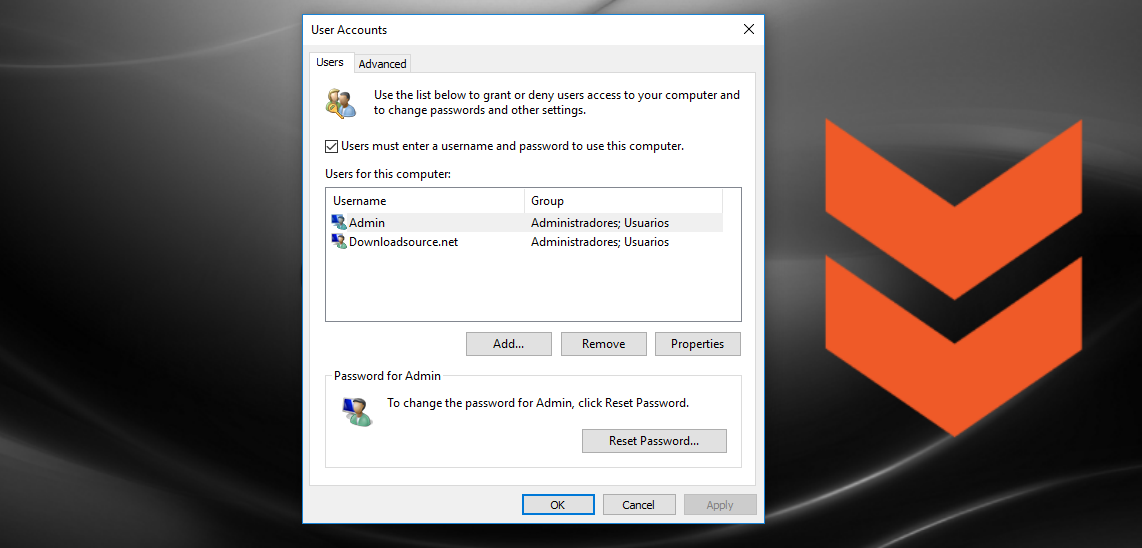
Step two: You will now be greeted by a new window, under Users for this computer select your username and then untick the box Users must enter a username and password to use this computer, now you can click Apply and Ok.
Step three: A new window will now be displayed called Automatically sign in, here enter your password twice and then click Ok.
This will now make you computer skip the login process when it is started. It will not, however, prevent the login screen from showing if your computer goes to sleep and reawakens. To remove this, you will have to go to: Settings > Accounts > Sign in options. Here just change the top option to Never.
Method 2: Disable the Non-Bootup Lock Screen.
Before we start this next step, it should be noted that there is currently no way to remove the very first lock screen that Windows shows when first starting your Computer. This method will only remove the lock screen's after you have first signed in. If you sign out again or your computer falls asleep and requires another sign in, the lock screen will not be displayed.
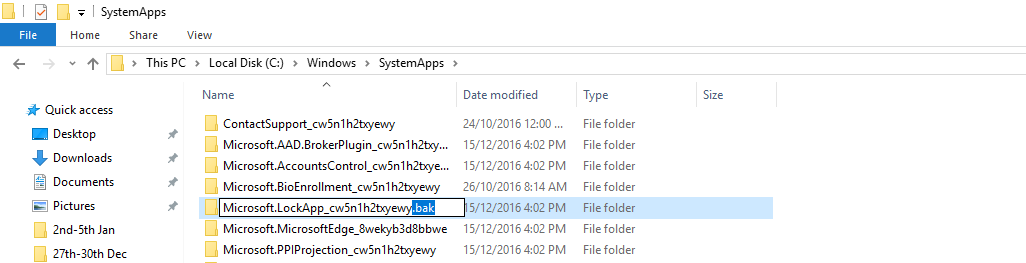
Getting started, open Windows File Explorer and go to the following location:
C:\Windows\SystemApps\Microsoft.LockApp_cw5n1h2txyewy
Do not enter the Microsoft.LockApp_cw5n1h2txyewy folder. Right-click this folder and rename it. (Do not change the name of the folder) just add .bak to the end of it and Save. Depending on your access level, you may be required to provide administrator permission. If you see a UAC pop-up, hit Continue. If you would like to get your lock screen back, simply go back to the folder and remove the .bak from the ending.
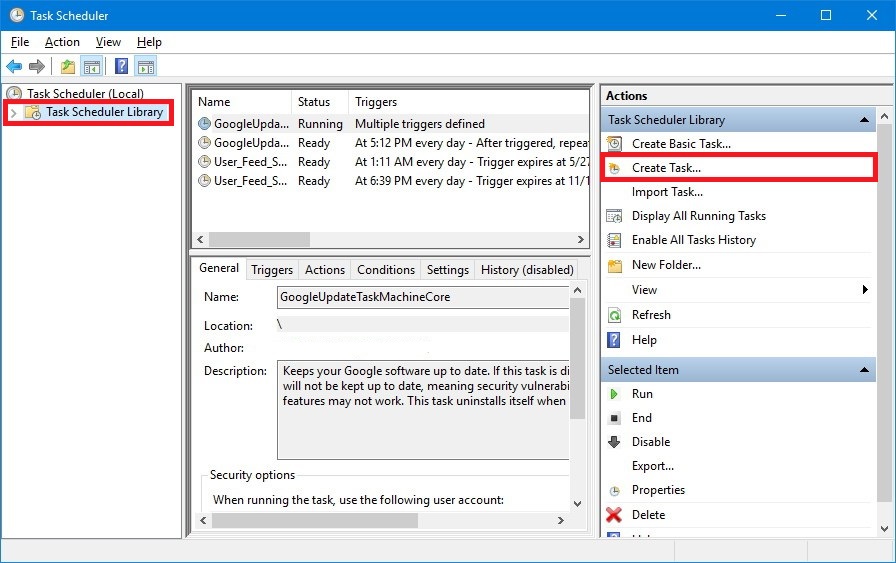
Method 3: Disabling the Lock Screen Using Windows Task Scheduler.
If method 1 or 2 aren’t quite your thing or didn’t work on your version of Windows, you can try this method using Windows Task Scheduler.
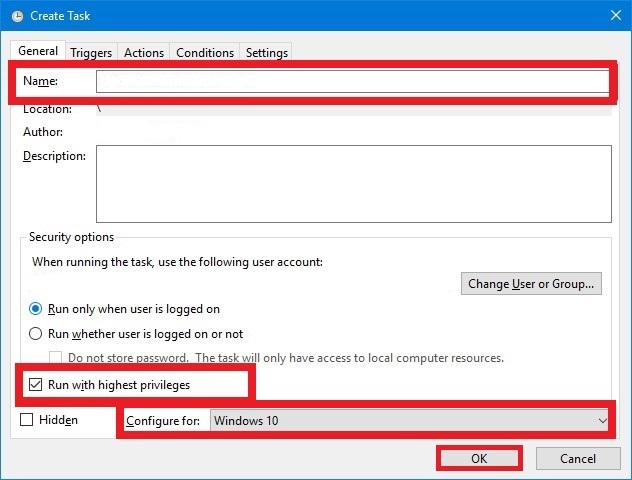
The first step is to open the Task Scheduler by searching Task Scheduler from the start menu. Once you have it open click Create New Task from the right-hand panel (it's quite small and hard to spot) With the new task window open, name the task something relevant, like Remove Windows Lock Screen you can call it Big bag of dirt if you really want though…
With the name set, go down to the bottom of the screen and make sure the box Run with Highest Privileges is ticked, and change the option to Configure For to Windows 10.
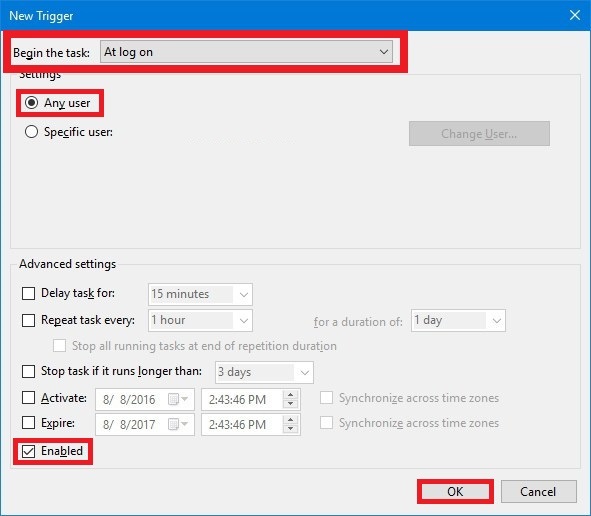
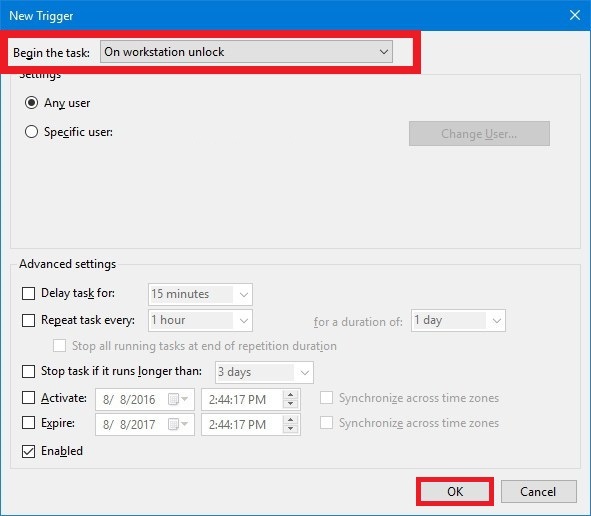
Now we can jump to the Trigger tab, here click New and select the option At log on from the Begin this Task menu then click Ok. Now create another trigger using the same method, however, this time select On Workstation Unlock from the Begin the task drop-down menu then click Ok once more.
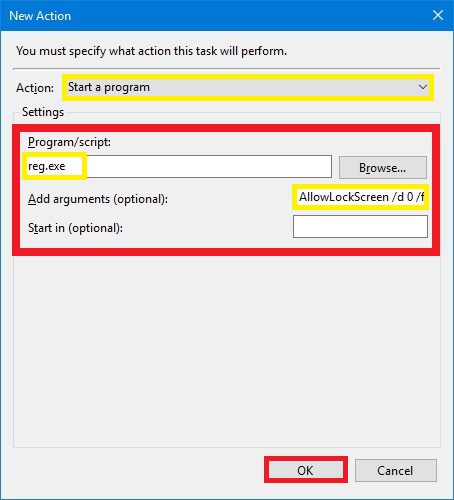
Jump over to the Actions tab click New in the Program/Script box type reg.exe then go down to the Add arguments (optional) box and enter the following and click Ok.
Add HKLM\SOFTWARE\Microsoft\Windows\CurrentVersion\Authentication\LogonUI\SessionData /t REG_DWORD /v AllowLockScreen /d 0 /f
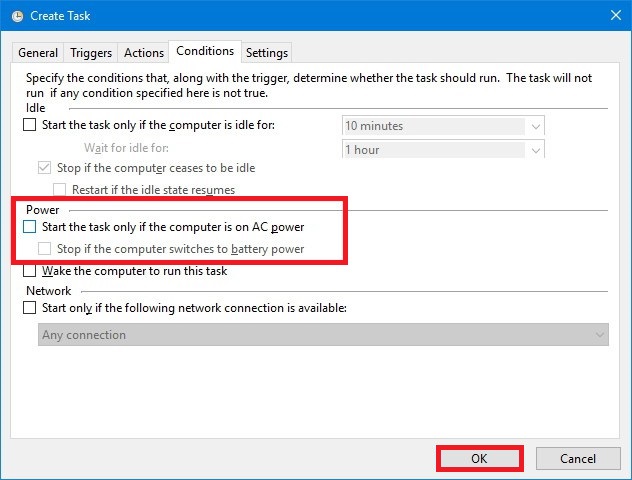
We can now move to the Conditions tab and uncheck the box Stop if the computer switches to battery mode and Start the task only if the computer is on AC power. With these unticked, the task is completed, you can now click Ok. (You may be asked to enter your login password to confirm. Remember to use your full login password and not your PIN.)
Note: Disabling or removing the Lock screen, will render using Cortana from the Lock screen impossible and prevent you seeing app notifications. If you are like me though, who really cares…