If you have used SCRCPY to view and control your Android device from your Windows 10 PC, you’ll be excited to know that it also has wireless connectivity which allows you to achieve the same awesome connection and features as before. Without the need for cords and cables. So follow along as we guide you through the slightly more complex SCRCPY Wireless set-up guide.

Table of Contents
Related: How to set custom thumbnails for YouTube Playlists.
Over the years we’ve written quite a few guides on SCRCPY and how to set it up to view and control your Android device from your Windows 10 PC. This time around, things are a little different, as we’ll be showing you how to setup SCRCPY to work wirelessly. Surprisingly there isn’t all that much quality difference between the wired and wireless versions of SCRCPY, so you might as well switch to the wireless version of SCRCPY if you have the ability. The quality you see is solely connected to the quality of your wireless connection so this may vary from case to case.
Before we get started on the process of setting up SCRCPY wirelessly, you’ll need to have followed the wired SCRCPY first. Once you can achieve a wired SCRCPY connection, you can switch to a wireless one easily. You can find our full guide and video guide on that setup process here. Once you have set up SCRCPY to work with a USB cable, you can continue with the steps shown below. If you want forward audio from your Android device to your PC, you can check out our SNDCPY guide here.
How do you set up SCRCPY to work Wirelessly? Setting up SCRCPY in WIFI Mode.
Now that you’re up to date, we can start the process of setting up SCRCPY to work wirelessly. Make sure you follow the steps closely as this can get a little tricky the first time around.
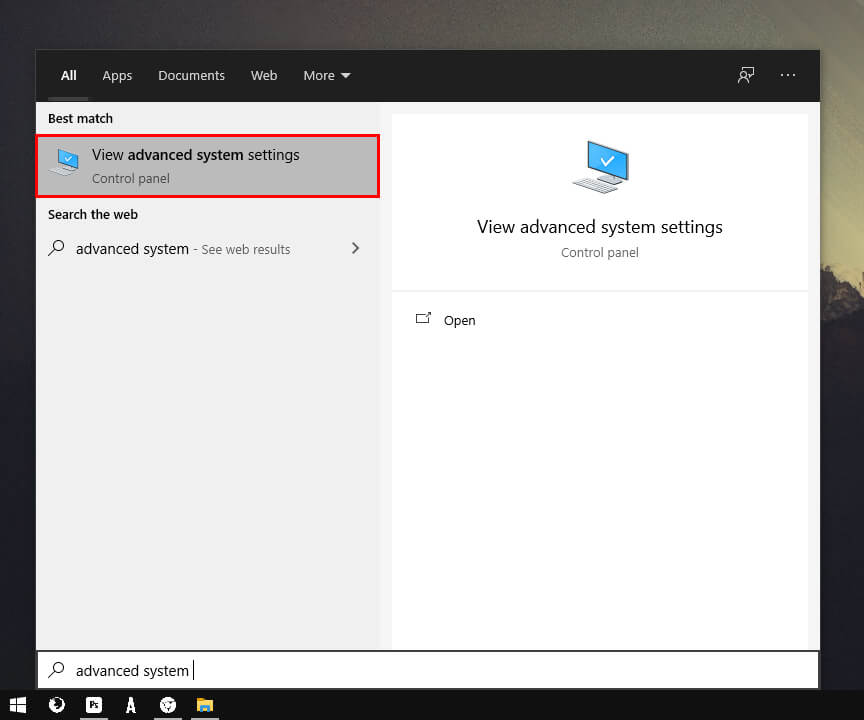
- To begin, type Advanced System Settings into the start menu then select the option when it appears.
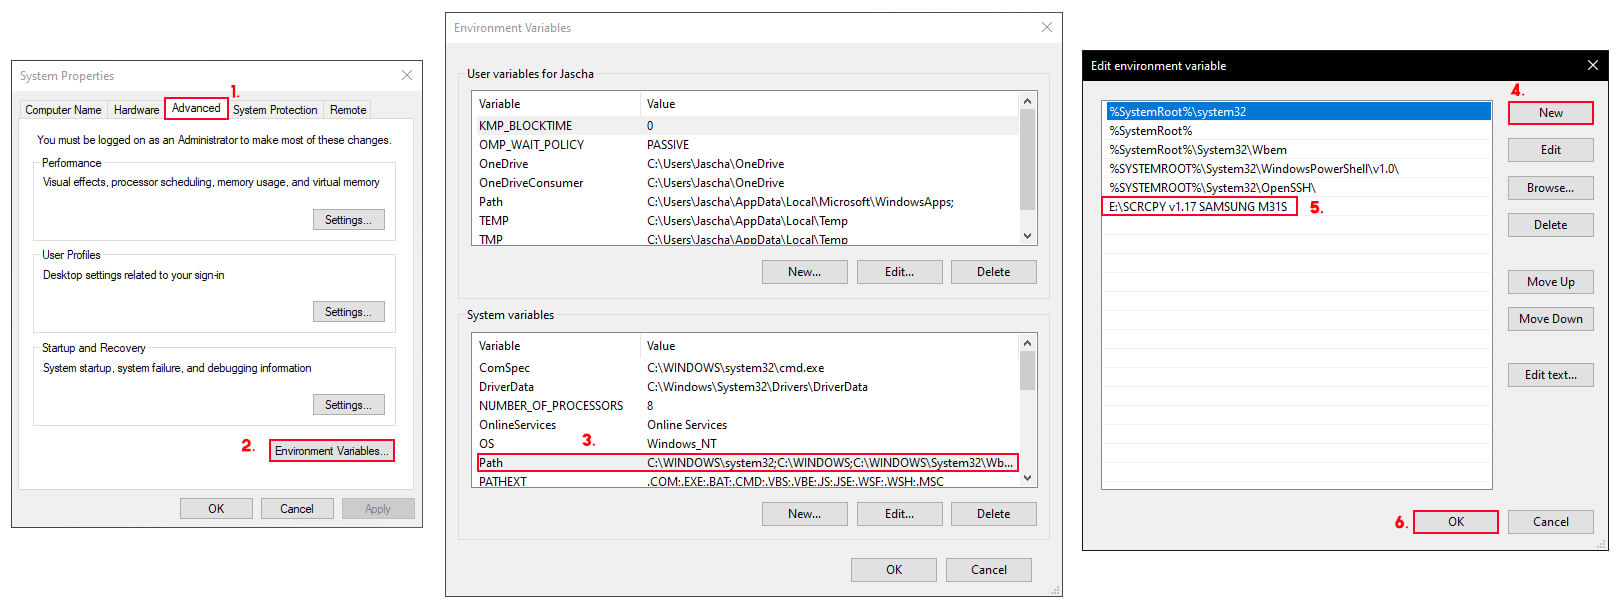
- This will bring up a new dialogue box where you will need to stay on the Advanced tab and click Environmental Variables.
- In the new window that appears double-click Path under the System Variables section. Another new window will appear, here click New, then paste in the address of your SCRCPY file (Just go to the folder that contains the SCRCPY.exe file and right-click the address bar to copy the exact location). When you’re done click Ok.
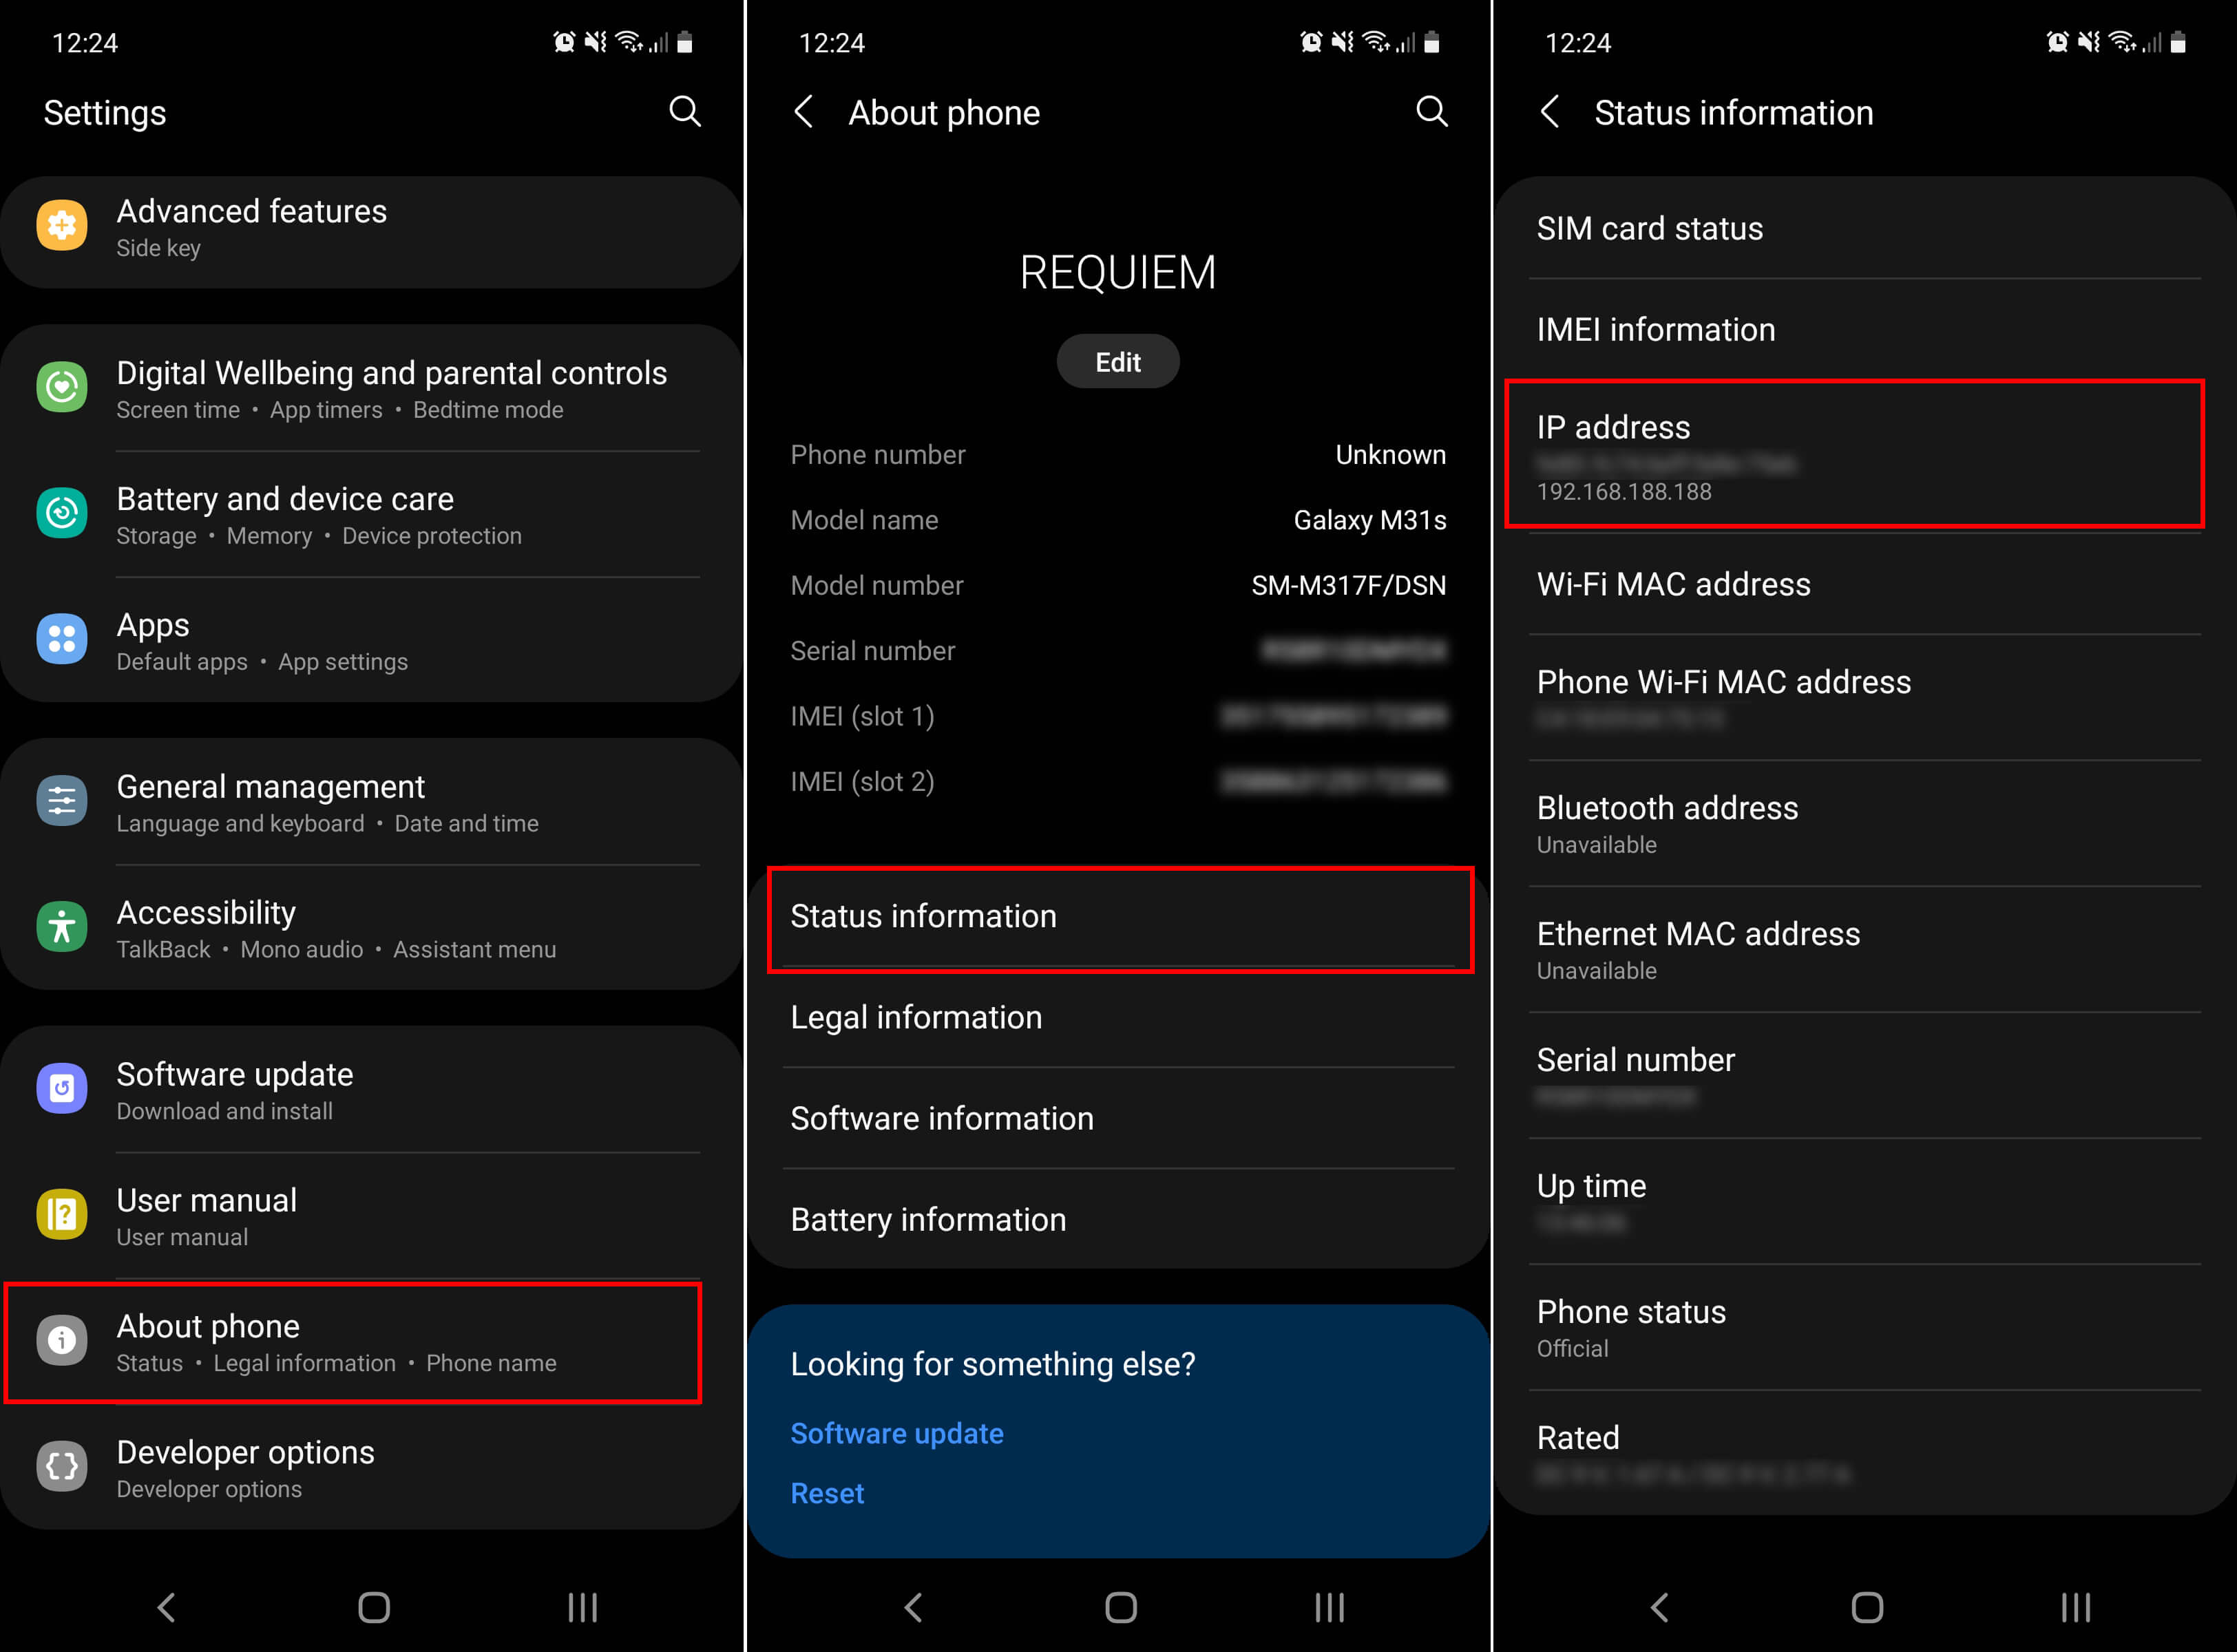
- Now on your Android device go to Settings > About Phone > Status Information > IP Address. Here you should see your phone's IP. (This step may vary a little depending on your phones brand and Android version)
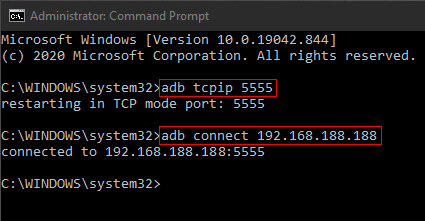
- Now that you have your phone's IP address, connect your phone to your computer and run SCRCPY. Once it is connected and you can view and control your device, open Command Prompt (as administrator) on your computer, then enter the following commands.
adb tcpip 5555
adb connect (insert your IP address here)
- It should look something like the screenshot below. If you have successfully followed everything so far, it will say Connected to (your IP address here)
- Now you can close the Command window, then close SCRCPY, and disconnect your device.
- Finally, open SCRCPY on your computer, then unlock the screen on your device and a connection will be established. Everything will now work exactly the same as on the wired version of SCRCPY. Shortcuts and all.
Note: At this stage, you can’t use SNDCPY to forward sound to your Android device with the wireless version of SCRCPY.
As mentioned above, the most important thing for SCRCPY to work without lag and latency is a good WiFi connection. If you have a connection that doesn’t get full reception, you’ll start to see connection lag.