Unlock the full potential of Stable Diffusion with a brand new, easy-to-use GUI (Graphical User Interface) for local implementation. Say goodbye to confusing and time-consuming manual installation steps and learn how to use Stable Diffusion with a user-friendly graphical user interface on Windows in this informative article.

Table of Contents
Related: How to use Midjourney - A collection of guides.
Stable Diffusion is a deep-learning text-to-image AI (Artificial intelligence) that was introduced to the world in 2022. Primarily it is used to generate images using text descriptions and prompts, but can also be applied to other tasks such as inpainting, outpainting, and image-to-image translations with text prompts.
It is a latent diffusion model, which is a type of deep generative neural network. Surprisingly the code and model weights of Stable Diffusion are publicly available and can be run on most consumer hardware with a decent GPU and at least 8 GB of VRAM. This is entirely unique to Stable Diffusion as DALL-E and Midjourney both require cloud services. They are also locked behind paywalls for the most part.
Up until recently the only issue with Stable Diffusion has been its complicated local setup process. This requires tons of manual work and setup and for most people ends up being far to complicated for them to bother with. Thankfully a small team of developers have got together and released a GUI version of Stable Diffusion which is essentially “The Best Stable Diffusion GUI” currently available.
Top-rated Stable Diffusion GUI: Generate High-Quality Images with Ease.
Introducing the NMKD Stable Diffusion GUI! This tool is a brand new, user-friendly project that simplifies the process of getting Stable Diffusion working on a Windows PC. It comes in a single package that includes all the necessary dependencies. Which makes it a plug-and-play option.
The GUI is designed to be highly customizable, allowing users to create their own Stable Diffusion models and VAE models, as well as support for inpainting, HuggingFace concepts, upscaling, face restoration, and it is actively developed Something else that is interesting is that NMKD also AMD GPUs, although this feature is still experimental.
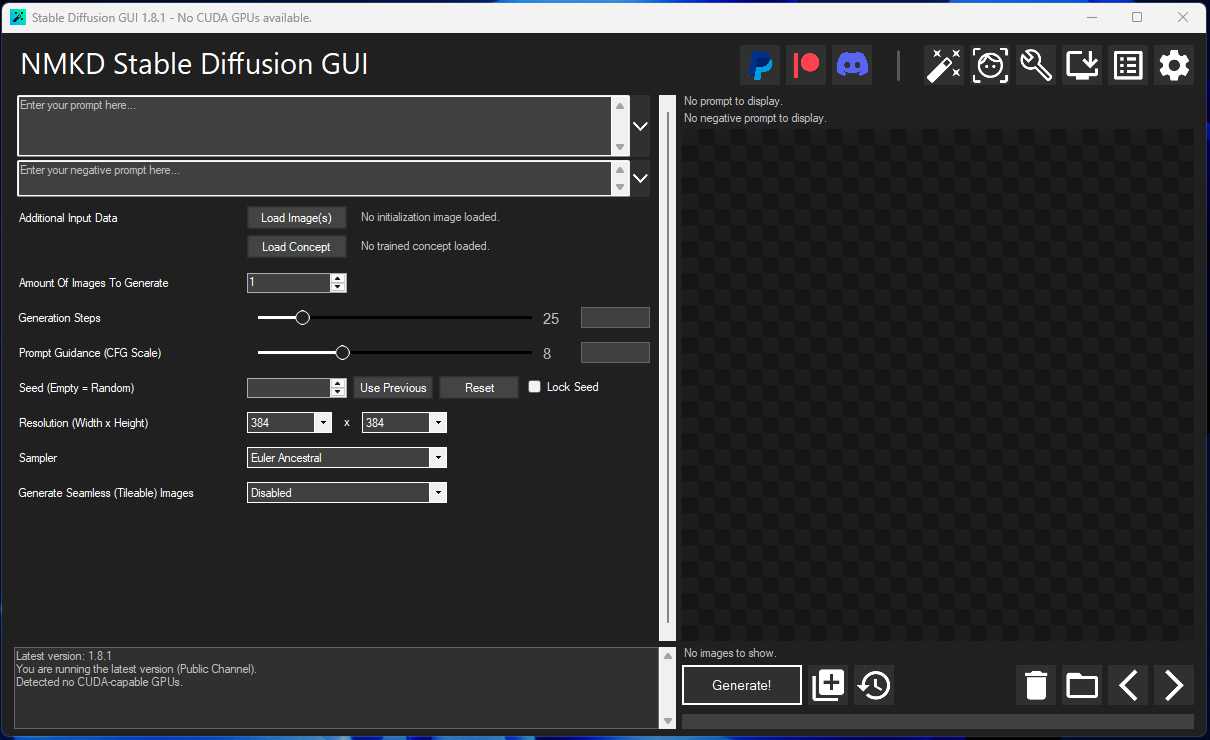
The features of the NMKD Stable Diffusion GUI include:
- All dependencies included,
- Support for text-to-image and image-to-image (image+text prompt)
- Prompting features such as Attention/Emphasis, negative prompt
- Ability to run multiple prompts at once
- Built-in image viewer that displays information about generated images
- Built-in upscaling (RealESRGAN) and face restoration (CodeFormer or GFPGAN)
- Prompt Queue and Prompt History
- Option to create seamless (tileable) images, e.g. for game textures
- Support for loading custom concepts (Textual Inversion)
- A variety of UX features
- Performance that is as fast as your GPU (1.7 seconds per image on RTX 4090, 2.6 on RTX 3090)
- Built-in safety measures that scan downloaded models for malware
So how do you use the NMKD Stable Diffusion GUI?
To start using the NMKD SD GUI, you’ll first need to download it. Which you can do using the link: Download NMKD Stable Diffusion GUI.
Once you have the NMKD file on your device which is quite big (3.5Gb) Using it is super simple, just extract it to your desired location. Then double-click the StableDiffusionGui.exe file to run it.
That’s all there is to it, now you can learn to use the interface to generate images. However, the most important thing you can do is learn how to utilize prompts to their maximum potential. Don’t be afraid to be really specific and detailed with prompts. If you want to really expand upon the results it’s a good idea to spend some time doing research in this area.