If you have updated to Windows 11 and are having problems with programs and apps auto-starting. Or just want to learn how to manage apps and programs that auto-start when Windows 11 boots. This article will show you what you need to do to manage and optimize everything that auto-starts on your Windows 11 computer.

Table of Contents
Related: How to use the Windows 11 HDR Calibration tool.
Programs and apps have had the ability to automatically start on Windows operating systems for a long time now and when used right have the ability to save a lot of time. However, apps and programs that automatically start when Windows boots can also be a major burden. How exactly? Well to put it simply, they slow down your system boot times and continue to run in the background the entire time your computer is on. Which means a significant slowdown in most things that you’ll do.
While you won’t notice this as much on really powerful systems, the average laptop will suffer with a ton of stuff running in the background which is why it is important to keep a close eye on what is starting when Windows 11 boots up and what continues to run after everything has booted. If your computer has been slowing down, this is also one of the first things you should check as a lot of software attempts to auto-run even though there is absolutely no benefit to you.
How do you change program and app auto startup settings on Windows 11?
There are three different ways you can check, organise, and manage which programs and apps automatically start when Windows 11 boots. All three work but some options are better than others as you will see when you start using the methods.
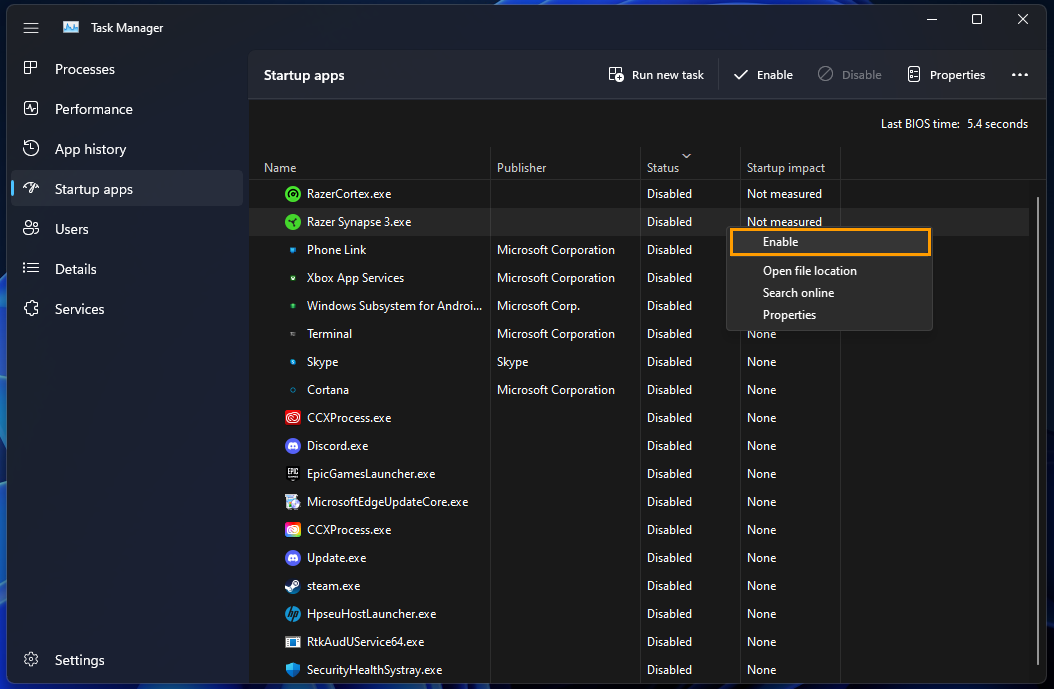
- The first and best way to manage program and app autostarting options on Windows 11 is to use Task Manager. To do this, press Ctrl + Alt + Delete to open the Task Manager, then change to the Startup apps tab on the left.
- Once you are on this page you can right-click any of the entries and select Disable to prevent that particular program or app from starting when your computer does. Or Enable, if you would like it to start automatically when your computer boots.
Enable or Disable auto startup from within particular programs and apps.
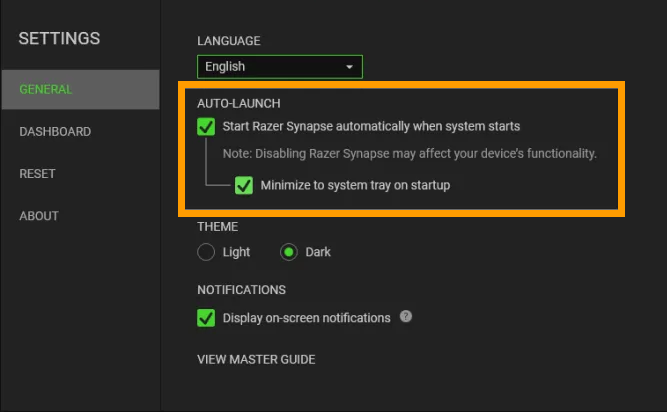
Another method you can use to change auto startup options for programs and apps is to check within the particular program or app. Not all programs and apps have this option though any that you see running in the system tray will. Simply open Settings from within the program or app and you should find the autostart option under the general settings area or the start-up area. However, some less honourable software will attempt to hide it so you may need to dig a little deeper.
Check and/or use the Start-up Folder on Windows 11 to manage software autostarting.
Another good option is to use the startup folder on Windows 11. This allows you to add and remove stuff using shortcuts and .exe files. Simply add or remove them from the folder to enable or disable auto-start. You can also use this folder if you want documents and other things to open automatically.
Now there are two different options for this so choose wisely.
Entire System
C:\ProgramData\Microsoft\Windows\Start Menu\Programs\Startup
Local Users
C:\Users\WindowsReport\AppData\Roaming\Microsoft\Windows\Start Menu\Programs\Startup