If you have updated to Windows 11 recently and are now starting the process of relearning everything that has changed on the new operating system. This article will take you through the steps required to change the name of your Windows 11 PC. Although the process hasn’t changed dramatically since Windows 10, it’s still quite easy to get lost in the new Settings app.

Table of Contents
Related: How to view or hide files and folders on Windows 11.
The update from Windows 10 to Windows 11 will probably catch some people off guard because the operating system is a weird mix between new and old. Some things are exactly where they have always been, while others have been moved or removed entirely. Thankfully, for the most part, the changes have been reasonable and a large portion of the content that has changed can still be found in logical locations.
Depending on how you’ve come to be using Windows 11 will determine what your PC’s default name is. If you are running a clean installation it will be a generic assignment of numbers and letters. However, if you have come from Windows 10 and already have a custom name that name will carry over so you won’t have to rename it if you want the old name back. Either way though, you can rename your PC at any time, the only catch is that you’ll have to re-add it to certain networks, connections like Bluetooth.
How do you rename your Windows 11 PC? How do you change your Windows 11 computer name?
Just like on Windows 10, Windows 11 has four different ways you can rename your PC. Though only two of those options are worth using. The Settings and Control Panel options are the ones this guide will be showing you how to use. We’ll be skipping the Command Prompt and PowerShell methods are they are more complicated than the average user needs to know.
Changing your computer’s name from Settings on Windows 11.
- To begin the process of renaming your Windows 11 PC press Windows Key + I to open Settings or search it from the Start menu.
- Next, go to System in the left-hand pane, then scroll to the bottom of the central pane and click About.
- On the new page that appears, click Rename this PC and enter the name you’d like your Windows 11 computer to be known by. It can be anything you like, there don’t appear to be any restrictions.
- Once you have done this, Restart your computer and the change will take effect. Just remember that if your computer is part of a homegroup or connected to Bluetooth devices, you’ll have to recreate or re-add them.
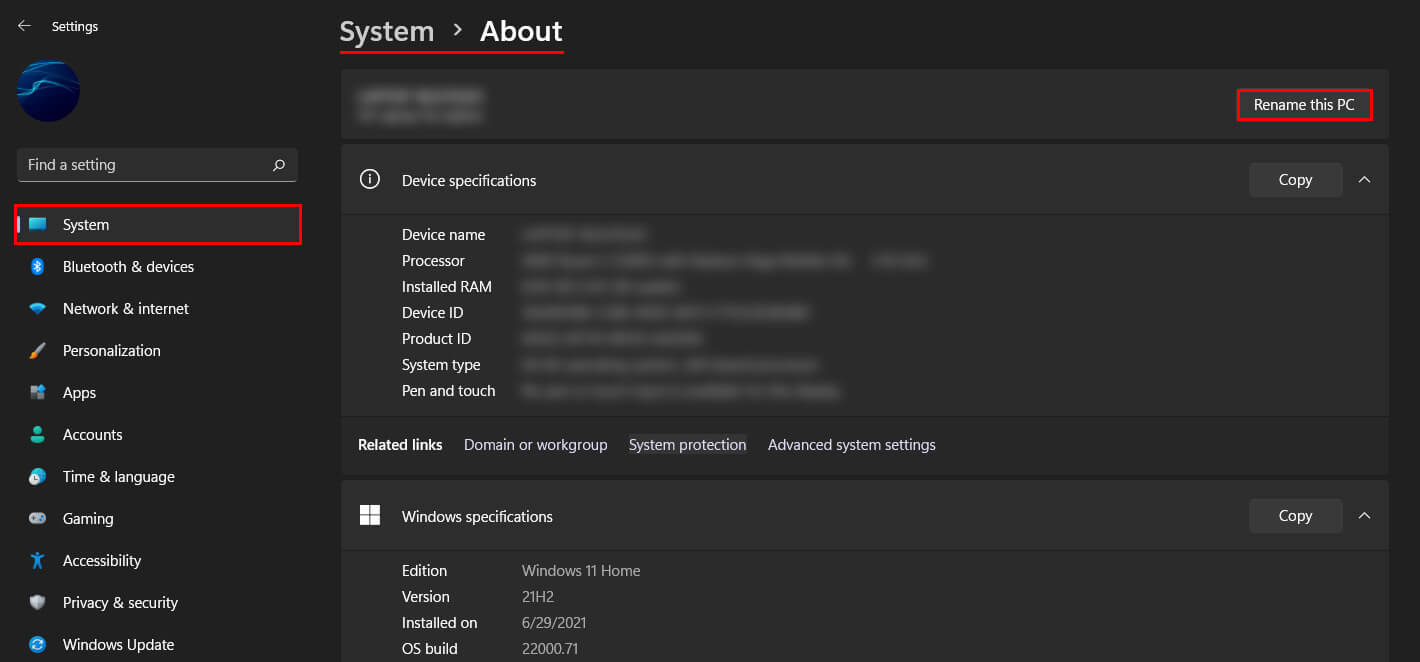
Note: You can only rename a computer once per Restart.
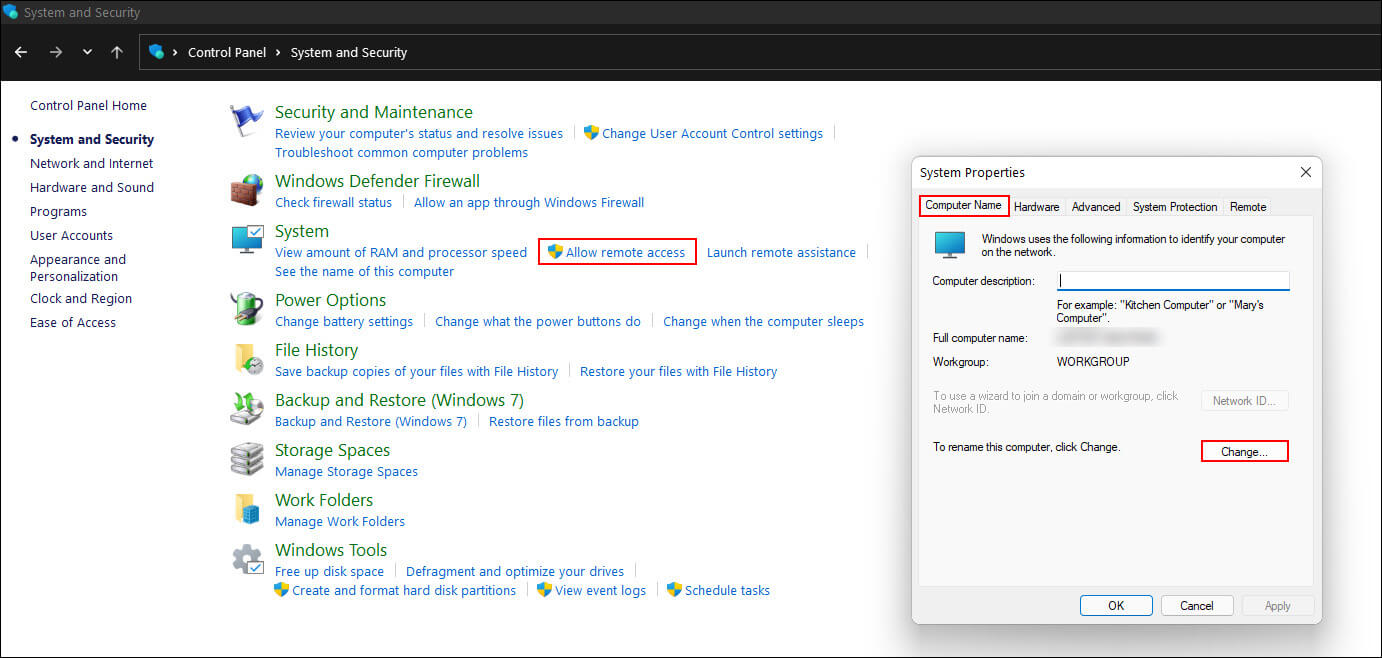
Change your Windows 11 computer’s name from the Control Panel.
If you’re more of a fan of the Control Panel (we don’t blame you, we are too) you can change your Windows 11 computer name from the Control Panel by doing the following.
- First, open the Control Panel then switch the view in the top right-hand corner to Categories. If you don’t do this you won’t see the options you require.
- Now click System and Security, then Allow remote access under the System heading. This will bring up a new window where you will need to change to the Computer name tab.
- Now simply click Change on the right and give your computer a new name. Once you have done this, click Ok and Restart your computer. When your system reboots, it will be using its new name. Just remember you can only make one name change per restart.