Table of Contents
Learn how to change your Windows 10 network settings from public to private or visa versa if the option in settings has been purposely removed or is missing for some other reason.
How to Change the Location Netflix Downloads Content to on Windows 10.
On previous versions of Windows managing network settings and networks, in general, was quite an involved task and took a fair amount of time and skill to master. Thankfully Windows 10 has made networking quite a lot easier with simple options like public networks and private networks.
On the odd chance you are trying to make a change to these settings, but can’t seem to find the option in its usual location, you can manually change them using two completely different tools. The Windows Registry Editor and the Windows Powershell tool. Unfortunately, both of these tools are far more advanced than the option within the settings app so you’ll need to pay close attention to the instructions ahead.
Note: Before you start either of the two options shown below, make sure you have made a System Restore Point. Just in case you need to revert back if you make a mistake.
How to Change Your Network Profile Using PowerShell on Windows 10.
To begin, type Powershell into the start menu and open it as Admin by right-clicking and selecting the option. Once you have Powershell open copy and paste the following command into the window, then press Enter.
Get-NetConnectionProfile
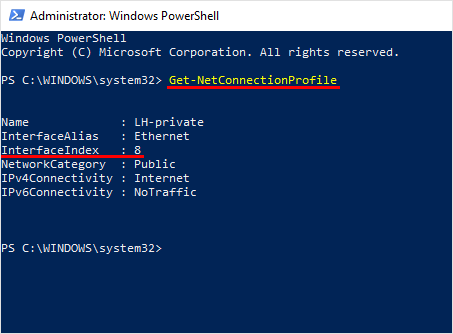
This will show you the network connections active on your computer. Copy down the Index Number as you will need it for the next command. Now that you have the Index Number paste the command below into the Powershell tool replacing with the index number for the network you want to change from public to private.
Set-NetConnectionProfile -InterfaceIndex index number -NetworkCategory Private
It should look like the example below.
Set-NetConnectionProfile -InterfaceIndex 8 -NetworkCategory Private
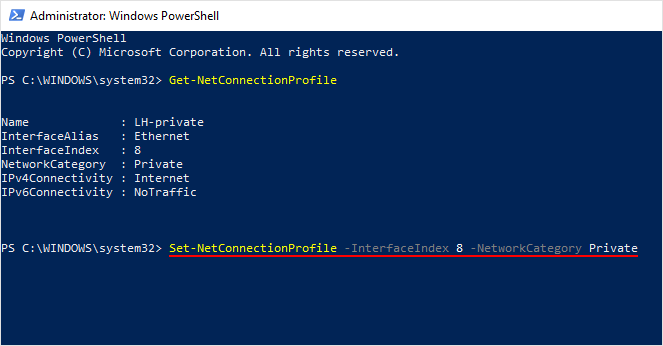
If you would like to change the network from private to public instead, simply switch Private at the end of the command to Public.
How to Change Your Network Profile Using the Windows Registry Editor.
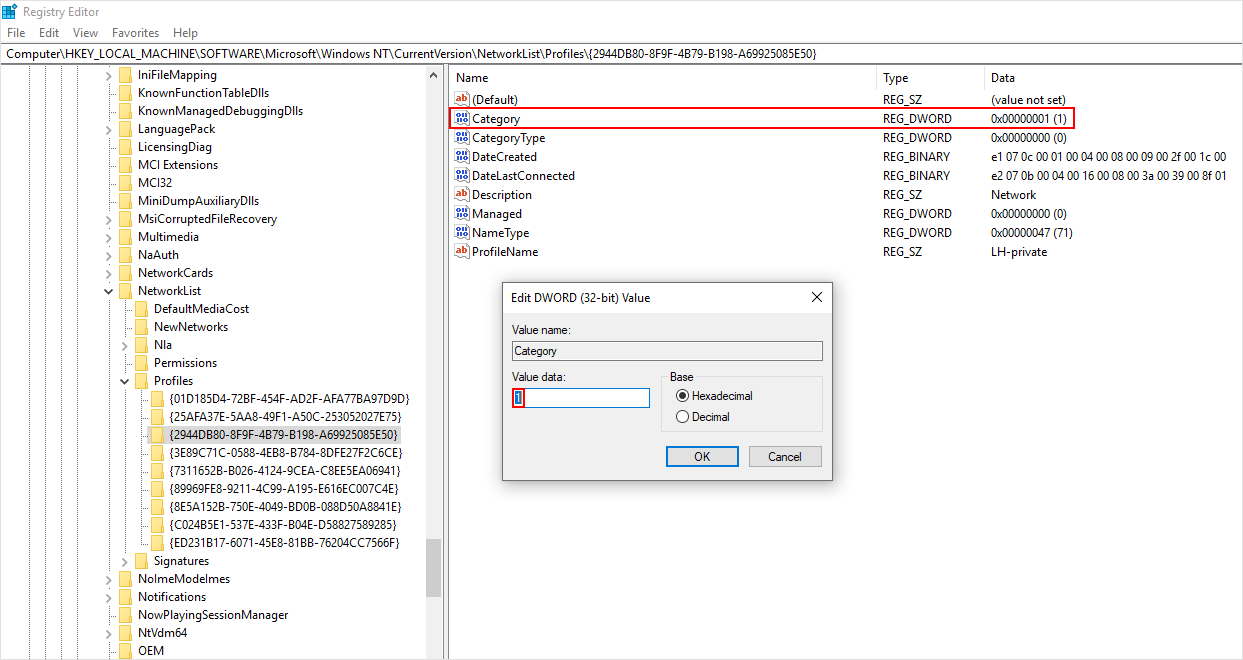
With a safe point set, open the Windows Registry Editor by pressing Windows Key + R, then type regedit into the Run tool text box and press Enter. When you have the tool open in front of you, navigate to the following location using the left-hand pane of the Registry Editor.
HKEY_LOCAL_MACHINE\SOFTWARE\Microsoft\Windows NT\CurrentVersion\NetworkList\Profiles
Now you need to click through the folders on the left below the Profiles key (folder) until you find one with a file labelled Profile Name and the name of your connection in the central pane. (you will probably only have two folders to check) I have more as I have quite a few VPN networks I connect to.
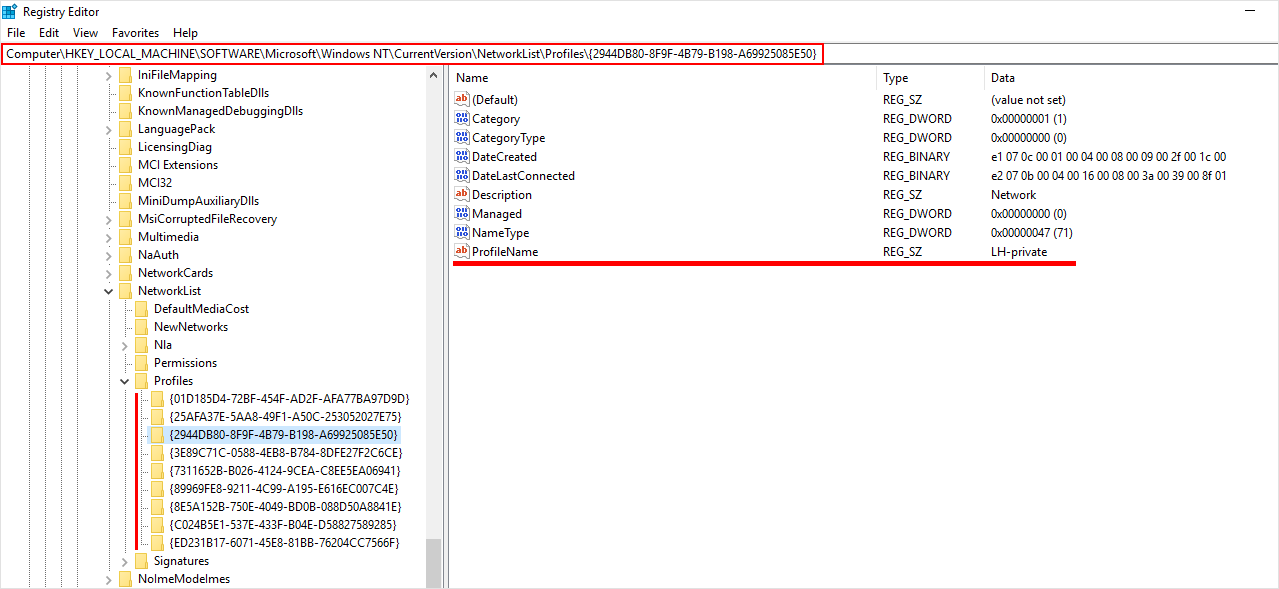
Finally, double-click on the Category file inside the folder that contains your network name and change the value from 0 to 1 to change it from Public to Private. If you want to change it from Private to Public change it from 1 to 0.