In this guide, we'll walk you through the steps involved in clearing your Nvidia Shader cache to enhance game performance and reduce stuttering. This process can help resolve issues caused by outdated or corrupted shaders, giving you better performance in some games. Keep in mind that this isn't going to boost performance in every single game you play but the games that it does work for will get a decent boost.
Takeaways:
- Clearing the NVIDIA shader cache to get a performance boost in some games to increase FPS and reduce stuttering and lag.
- What is a shader cache and how does clearing it make games run better?
Table of Contents
How to Clear Nvidia Shader Cache on Windows For Better Game Performance
Work your way through the steps shown below to help fix any minor performance issues in some games. These steps will work on Windows 10 and 11 PC and work even better when done alone with a clean graphics driver installation using Display Driver Uninstaller (DDU).
Consider it a graphics card purge for a clean slate.
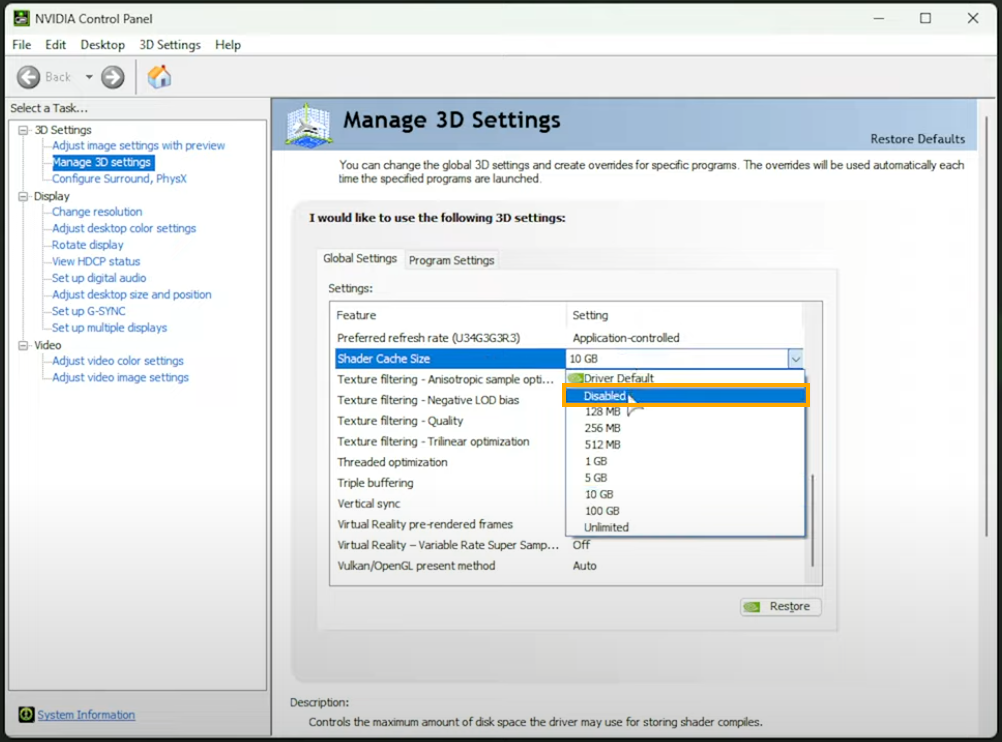
Temporarily Disable the Shader Cache
-
Right-click on your desktop and select "Nvidia Control Panel."
-
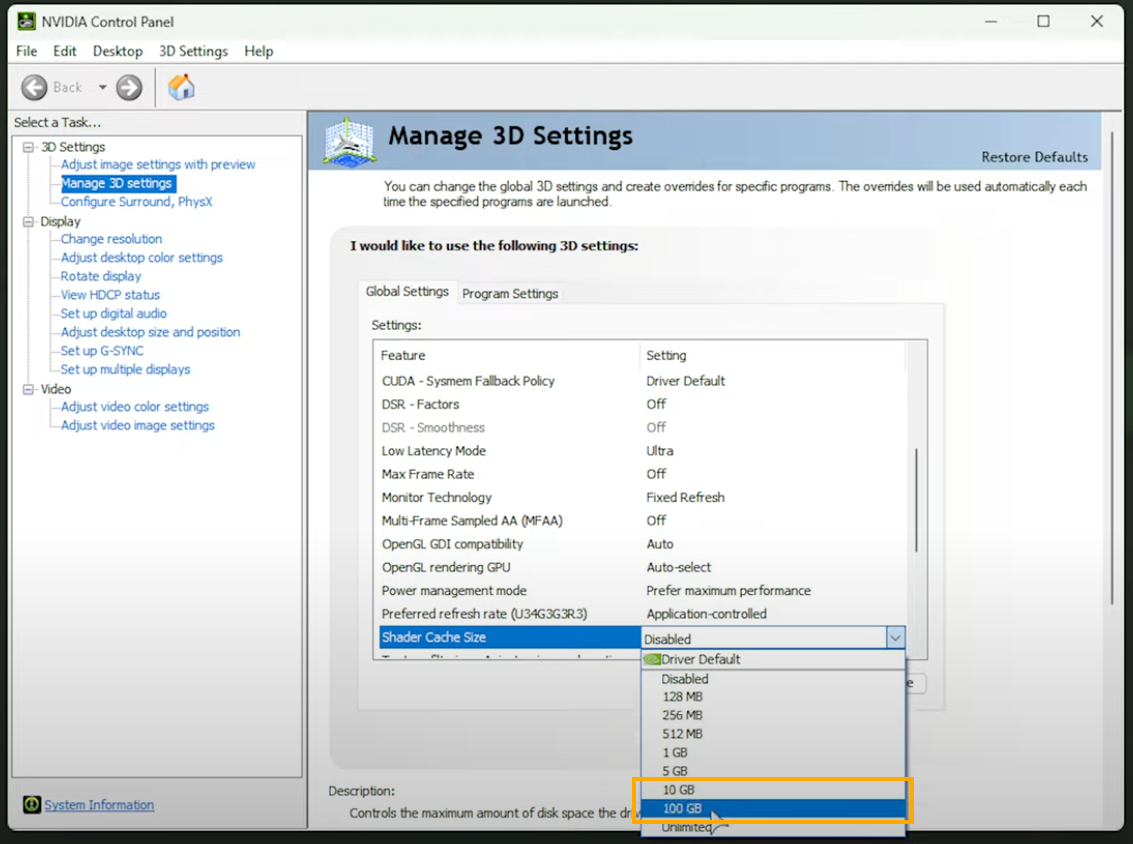
Navigate to "Manage 3D Settings" and scroll down to find "Shader Cache Size."
-
From the drop-down menu, choose "Disabled" and click "Apply."
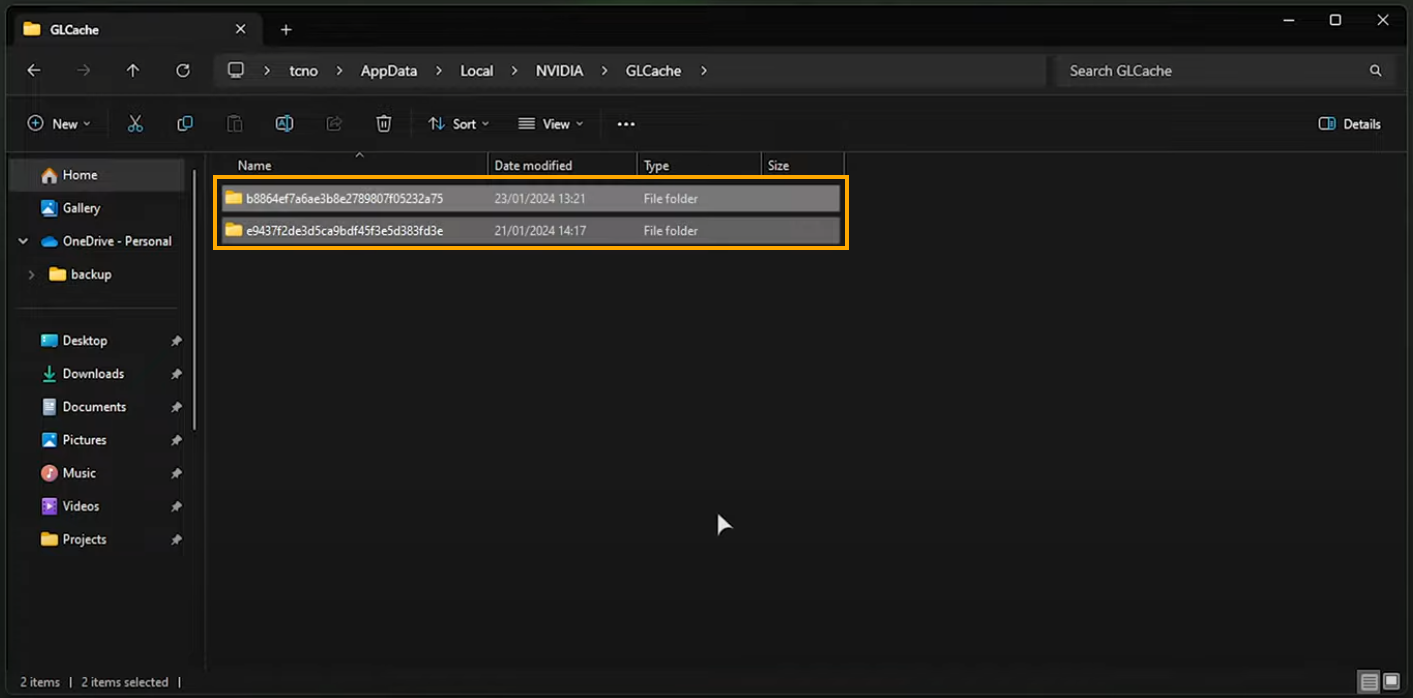
Clear Nvidia Shader Cache
-
Press "Windows + R" to open the Run dialogue, then type "%LocalAppData%" and hit Enter.
-
Navigate to the Nvidia folder, then open the "GLCache" folder.
-
Select all files (Ctrl + A) and delete them permanently by pressing Shift + Delete.
-
Confirm the deletion when prompted.
-
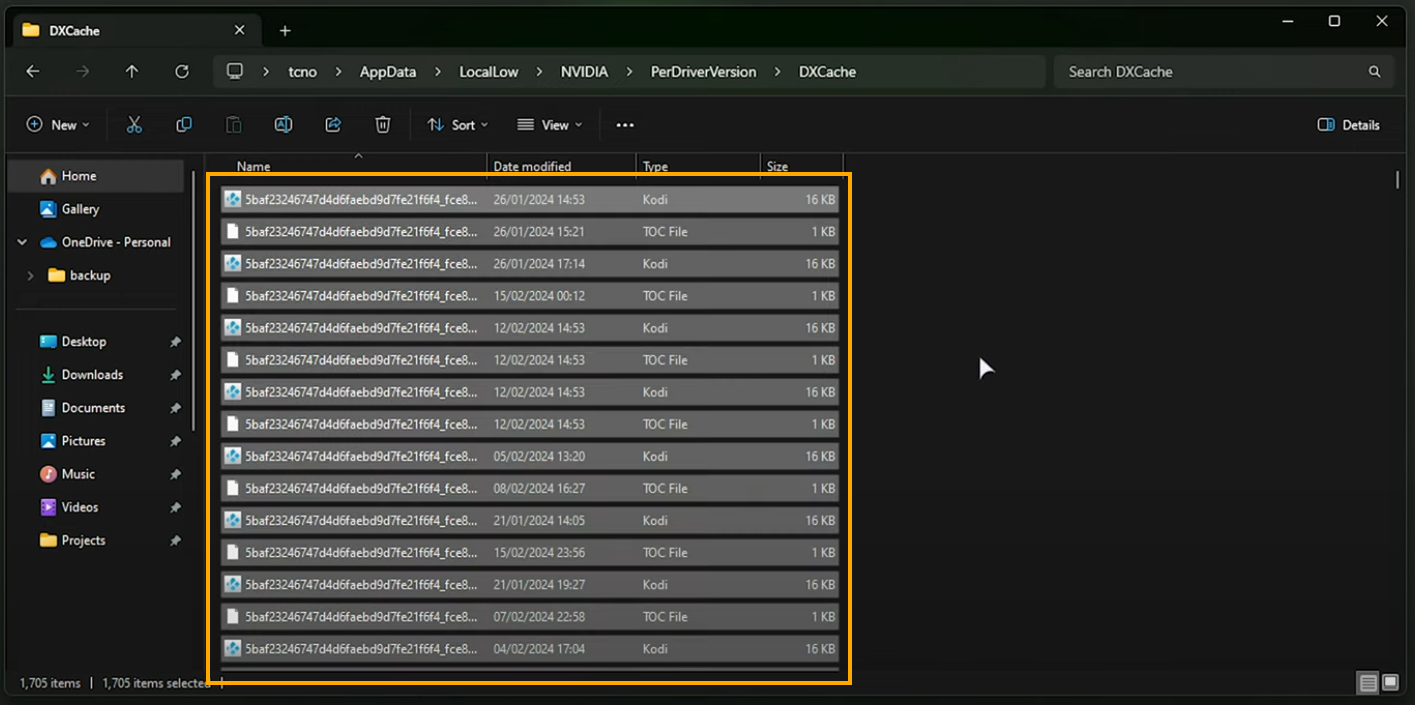
Navigate back to "AppData", then go to "LocalLow, Nvidia, P Drive, D version, DXCache".
-
Again, select all files (Ctrl + A) and delete them (Shift + Delete).
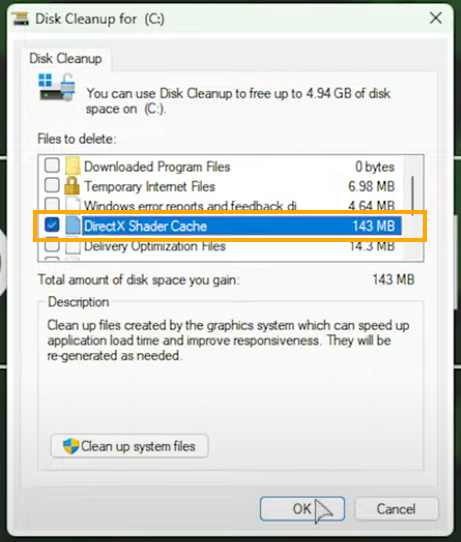
Clear DirectX Shader Cache
-
Press "Start" and type "cleanup" to open Disk Cleanup.
-
Choose your C drive and wait for Disk Cleanup to calculate.
-
Uncheck all options except "DirectX Shader Cache."
-
Click "OK" and confirm the deletion of files.
Re-enable Shader Cache
-
Open the Nvidia Control Panel again.
-
Navigate to "Manage 3D Settings" and find "Shader Cache Size."
-
Change the setting back to its previous value 10GB or set it to 100GB if you have the space.
-
Click "Apply" and close the Nvidia Control Panel.
What to Expect Once You Have Cleared the NVIDIA Shader Cache?
-
After clearing the shader cache, you may experience temporary instability or stuttering while shaders are regenerated.
-
Some games, like Call of Duty, may regenerate shaders when you launch them or navigate menus.
-
Ensure you have sufficient space on your C drive before clearing the cache.
-
Once completed, your game performance and stability should improve.
That's it! Follow these steps to clear your Nvidia Shader cache and optimize your gaming experience. If you encounter any issues, feel free to reach out for further assistance. Happy gaming!
What is a Shader Cache?
When playing games, shaders are generated to render virtually everything you see in the game. These shaders are cached for future use, preventing the need for recreation. However, outdated or corrupted shaders may lead to issues and stuttering during gameplay until the problem corrects itself. To address this, clearing the cache is recommended. This may result in temporary stuttering upon restarting the game, as it regenerates the shader cache, a process akin to what Call of Duty does upon reaching the main menu. Once completed, gameplay should resume smoothly, potentially even improving performance