Table of Contents
Windows 10 allocates some system resources to random tasks and services that you probably have no need for or interest in. Unfortunately, most of these tasks, services, and processes can’t be removed or disabled, so you are stuck with the resource drain. That being said, one service that can be disabled is Superfetch, so follow along as we show you how to turn it off.

How to Fit 100% Disk Usage on Windows 10.
Most of the processes that run in the background on Windows 10 are necessary for everyday use and help with the overall performance of the operating system. With the exception of Cortana (popular opinion). Superfetch is one of these processes that ‘should’ make life easier and most importantly faster, that being said, this isn’t always the case.
A lot of the time Superfetch can be counter-productive and slow things down, rather than speed them up. Superfetches basic function is to make note of the programs, apps, and tasks that are used most frequently and keep them at the ready for quick access.
Although this is the case for most users, there are times when Superfetch does the opposite and keeps disks running in overdrive and ram full of unneeded data. If you suspect that Superfetch is causing you issues, it's relatively easy to disable and re-enable, so follow along as this guide takes you through the process of doing both.
How Do You Disable SuperFetch on Windows 10?
The first step in this process will disable SuperFetch for your current user session. If you notice a performance increase with it disabled, the second step will show you how to make sure it doesn’t automatically turn itself back on after restarting your computer. To begin, open the Windows Run tool by pressing Windows Key + R, then type the following command and press Enter.
services.msc
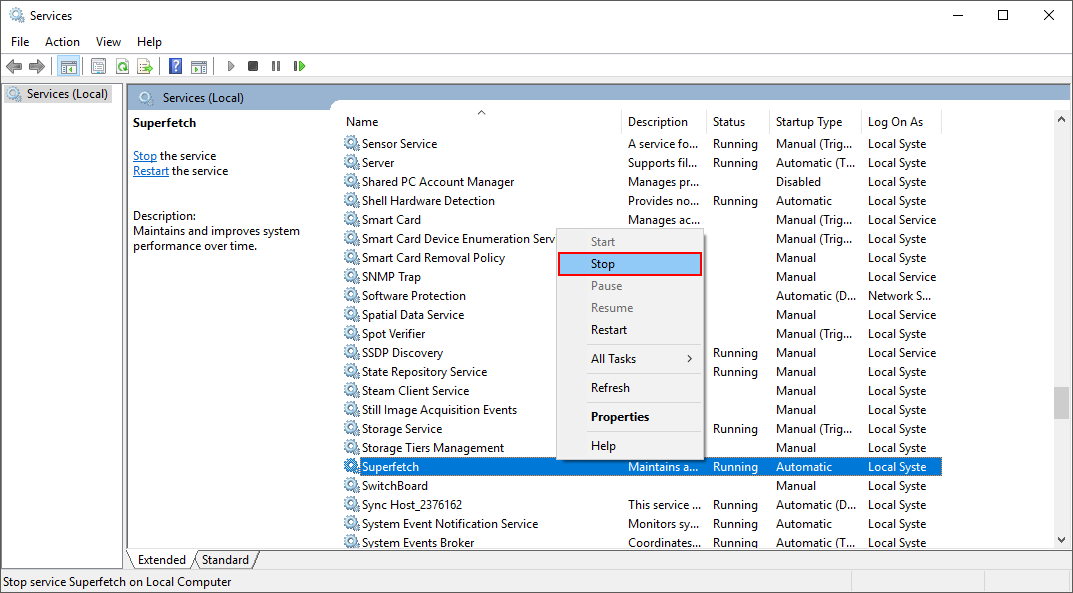
This will open the Services window, here scroll down and find SuperFetch in the list of the Name column. When you find it, right-click on it and select Stop. SuperFetch will now be disabled until you restart your computer. If you wish to keep it disabled, continue with the following steps.
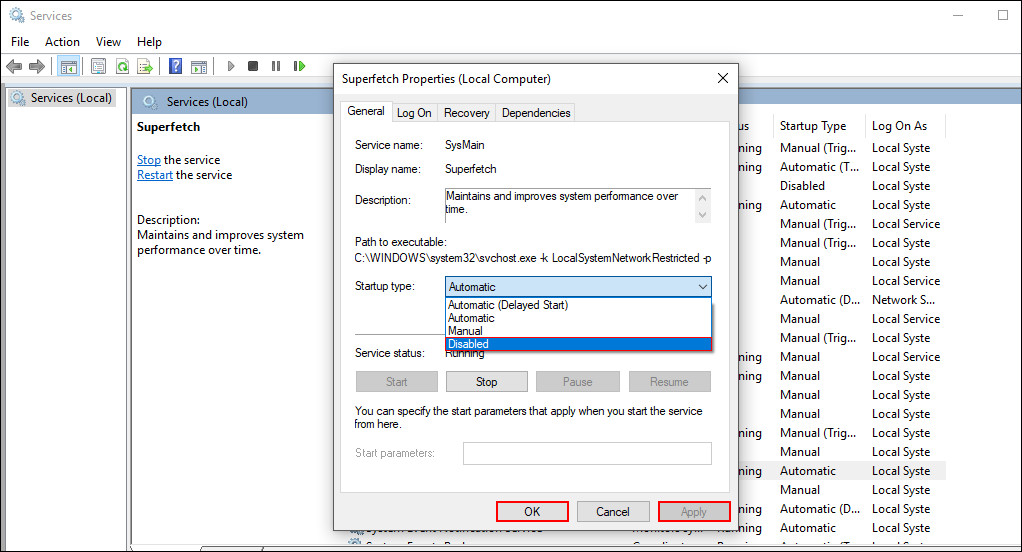
To make sure SuperFetch doesn’t start after a system restart, repeat the steps shown above, however this time select Properties instead of Stop. On this page, find Startup Type and change the setting in the drop-down box from Automatic to Disabled, then click Apply and Ok.
How to Disable SuperFetch From the Windows 10 Registry Editor.
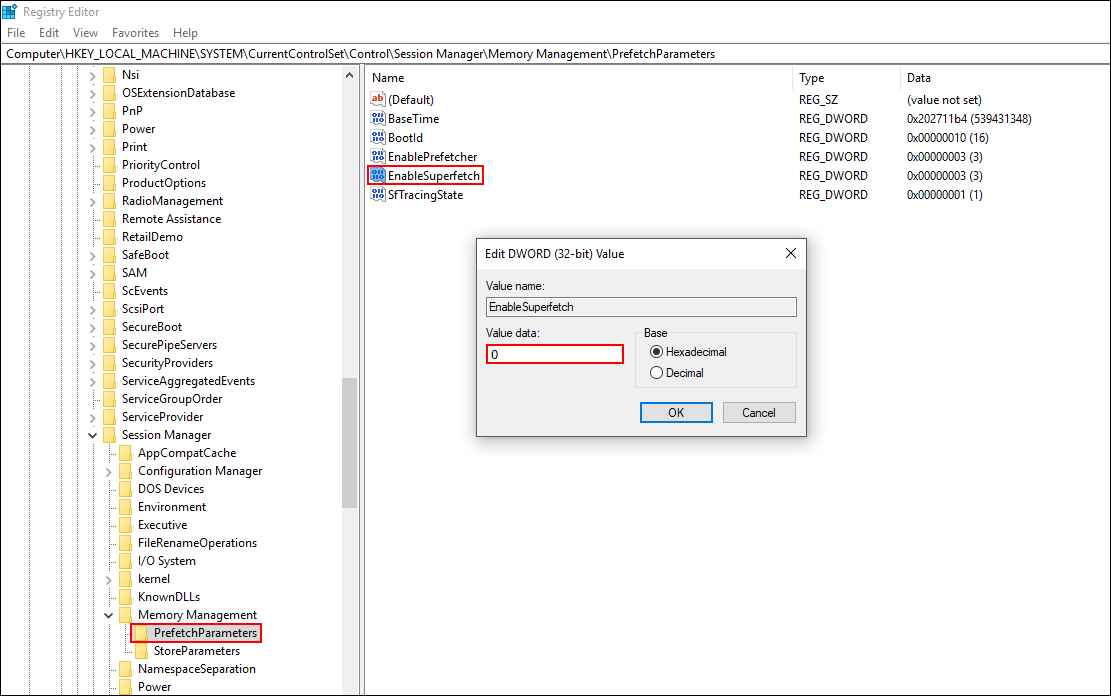
If you would rather disable SuperFetch using the registry editor, you’ll need to do the following. Open the Windows Run tool by pressing Windows Key + R, then type regedit and press Enter. When the registry tool opens, copy and paste the following line into the address bar to jump to the location. (Alternatively, you can navigate there manually)
HKEY_LOCAL_MACHINE\SYSTEM\CurrentControlSet\Control\Session Manager\Memory Management\PrefetchParameters
When you have the PrefetchParameters key (folder) selected in the left-hand pane, find EnableSuperFetch in the central pane, then double-click on it and change the value from its current value to 0. After changing the value to 0, you can exit the registry editor and restart your system. After a restart, Superfetch will be disabled. If at any stage you wish turn Superfetch back On, simply repeat the process and change the value from 0 to 3.