Table of Contents
Maybe you are working on a custom birthday card for your bestie who is a massive Iron Man fan or you are typing up an article about Pokemon Go and want your words to ooze nostalgic Pokemon feelings. Or! Perhaps you are going to create the next killer 'Meme' to take the Internet by storm. Regardless of what you are planning, having the perfect front is going to save you a ton of time.

How to Shoot in Camera .Raw Format on Android Devices. (Smartphones and Tablets)
It doesn’t matter which version of Microsoft Windows you are using they all come preinstalled with a seemingly endless supply of fonts, most of which you probably think look terrible. Sometimes though, you need something specific, like the Star Wars font and even though you are quite sure it’s not preinstalled, you have searched high and low in the fonts menu.
Choosing the right front is also going to make important projects, either personal or professional look much more eye-catching. As the internet is drowning in fonts to choose from, you will almost certainly spend more time looking for a font than actually installing one because Microsoft has made adding and removing fonts super quick.
Installing Your Newly Acquired Font.
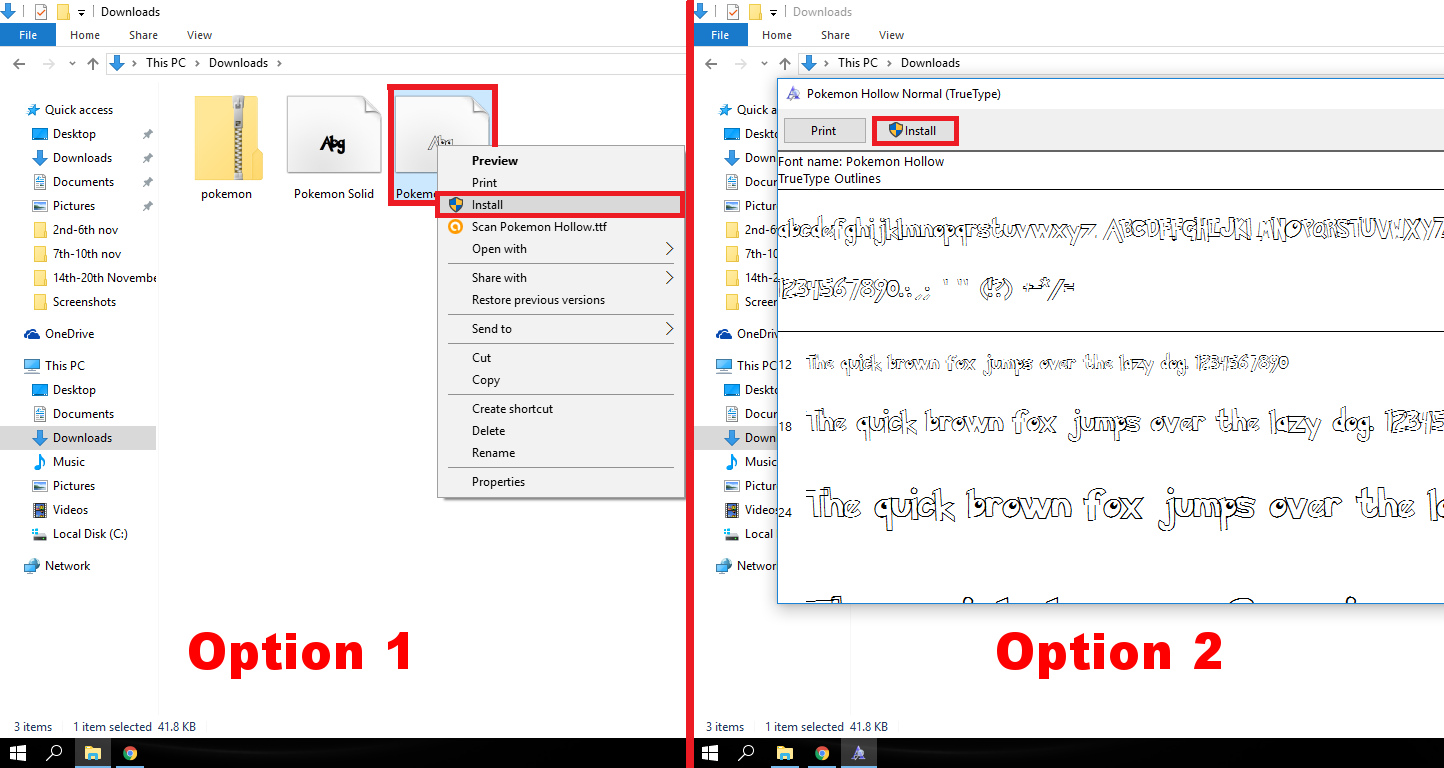
Once you've found the font you are looking for, on Windows 7 and onwards, adding new fonts is very easy. Unzip the font folder if it is zipped. (If you don’t have an unzipper try Winzip or WinRar) Once you have the file unzipped, it’s simply just a matter of right-clicking on it and selecting Install. Alternatively, the other method is to just double-click the file, when the window opens showing the font, click Install.
The font will now be available for use in most programs installed on your computer, programs such as Word, Gimp, Photoshop, etc. Accessing them is done the exact same way as you would use the preinstalled fonts on your system, and inside the programs you use. If you had a program open during the installation process of the Font, the program will most likely not register the new addition. Closing and re-opening the program will initiate the change, making the font available to you.
Uninstalling a Font That You May No Longer Need or Like.
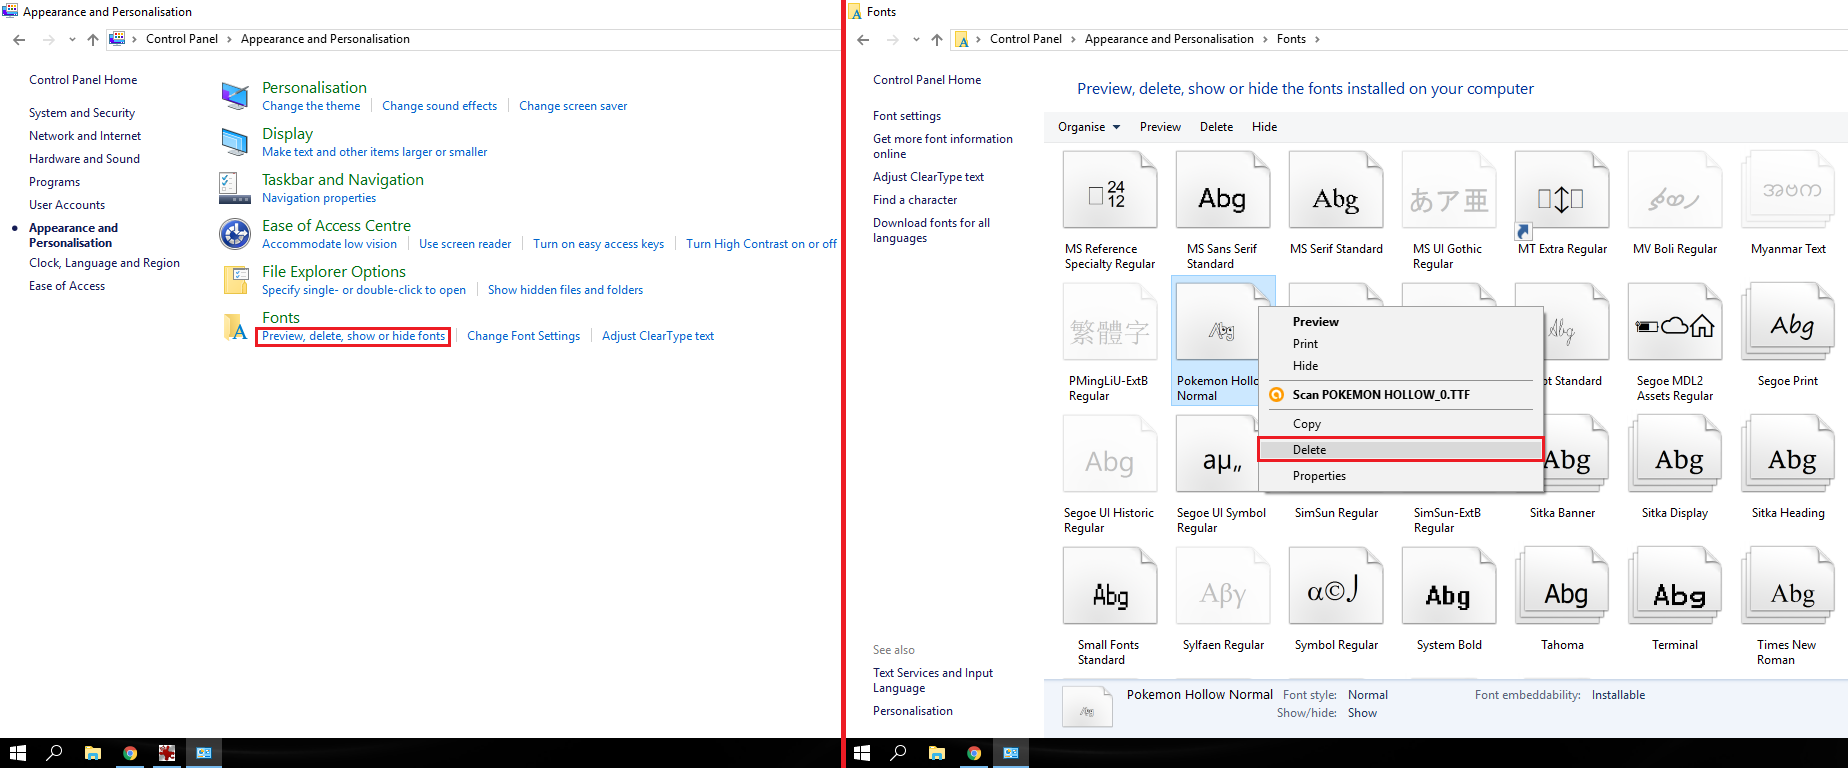
Removing Fonts is almost as easy as installing them, to find the fonts folder on Windows 7 onwards, open the Control Panel, go to Appearance and Personalization, then select Preview, delete, or show and hide fonts. (Directly below the Fonts menu) Once you have found the font you no longer want or need, Right-click on it and select Delete.
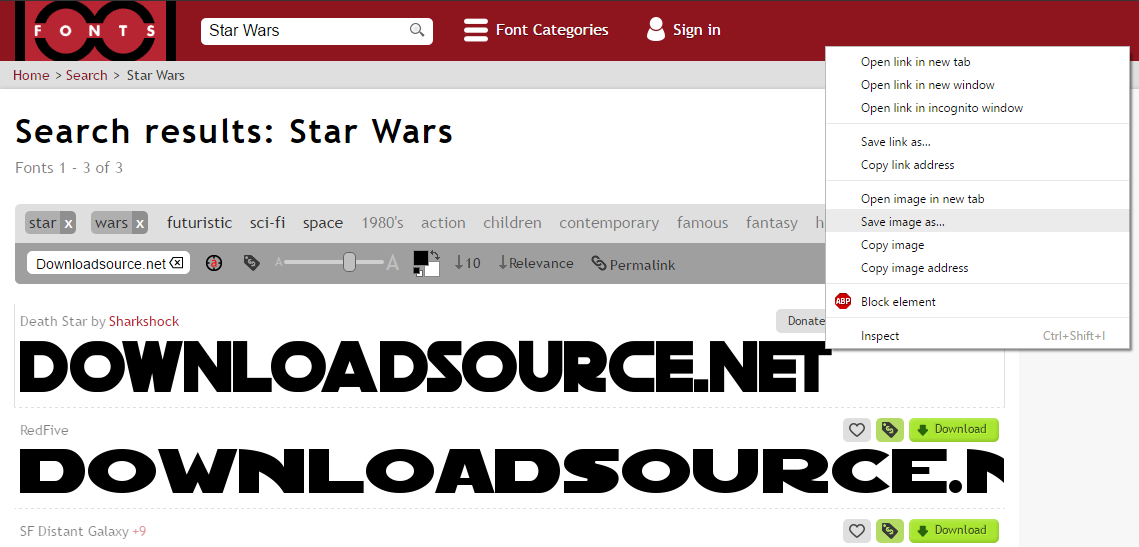
Using Fonts Directly From an Online Source in .PNG File Format.
Another handy way to use a custom font from the Internet is via a .Png image file. This method doesn’t install anything onto your computer, you simply locate the font you wish to use and if the website is set up correctly and offering this method, you type the words you wish, pick the font, size, color, etc, then right click and Save. This method is really useful when you just need a title for something you are working with. The easiest and safest source available for this method is 101fonts.com