
Table of Contents
Anyone who has spent some time around digital cameras or browsed through photo forums the likes of Instagram, Flickr or 500px, has probably heard of the term “RAW image file” The .RAW format file is the preferred file format for professional photographers, enthusiasts, hobbyists or anyone who likes to have more room to play with adjustments when editing photos in Photoshop, Lightroom or any other equivalent program.
This may also be helpful information for you: How to Root Your Android Device.
The main differences between a .raw file and standard jpeg file is the compression. Raw files are uncompressed data, therefore save much more information about the scene. Exposure, white balance, contrast and sharpness adjustments can be made with a larger range of adjustment before image quality is lost. However, by default, an unedited .raw file will look quite dull and flat in comparison to a .jpeg file. Jpeg files, on the other hand, are compressed and adjusted in camera to balance out the images for exposure, white balance and so on, leaving a much more finished look straight out of the camera, no editing required.
The 5 Best Reasons to Shoot Raw Format On Your Smartphone.
- Higher quality images with more detail and sharpness.
- Better adjustment for over-exposure, under-exposure, and brightness.
- White balance options are dramatically more adjustable.
- Better color space to work with.
- They generally print out much better.
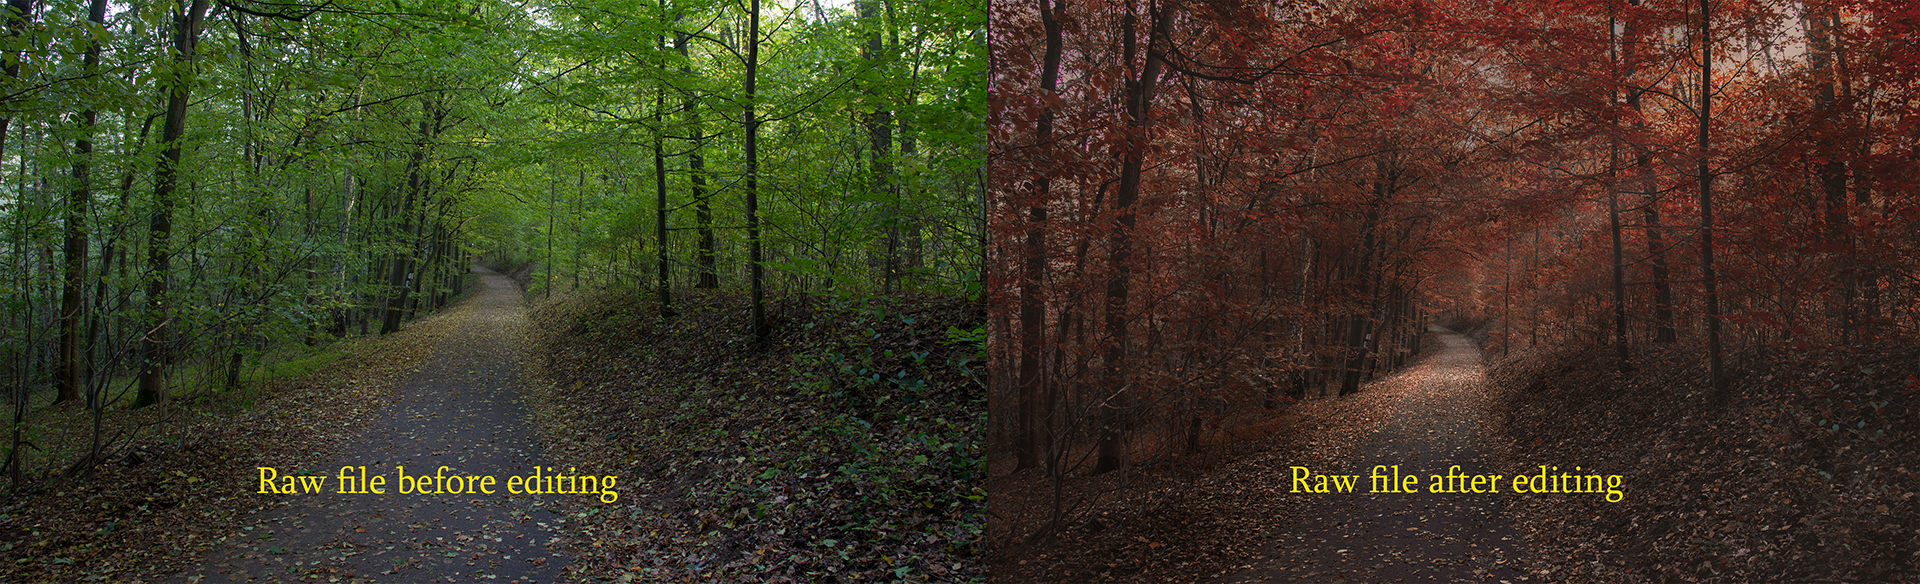
There are of course a couple downsides to shooting in .raw. The files are generally very large and can sometimes be in excess of 50mb, which might be a problem if your current phone storage isn’t very generous. They will also require some sort editing software to get a more finished, desirable look. Honestly though if you have the time to make some adjustments and use the extra space on your device, it’s well worth it.
Start shooting in .RAW with your Android Smartphone or Tablet
Most Android devices released since Android Lollipop 5.0 in October 2014, will have support for the Camera raw file format. To make sure your device is able to shoot in raw you will first have to check if it supports Camera2 API (this can be done with a simple Google search). It is worth noting Camera2 API is far more commonly found on mid to high-end devices even after Lollipop 5.0.
Note: Camera2 API cannot be added via an app. So if your phone doesn't support this, then shooting in RAW will not be an option.
How to Add People and Objects to Photos Using Adobe Photoshop CS6
To shoot in .raw, you will have to download a special camera app that enables your phone to save images in the correct format. (On some newer models of Android, the default camera will allow shooting in .raw. It is worth double checking before Downloading) Android raw files will be saved to the device with a .DNG extension, this is still an Adobe RAW format. To open the file, you will need special software that is compatible with the specific RAW format you're using. Photoshop and Lightroom are two popular choices and will open all .raw files, so long as you are running the latest version of Camera Raw.
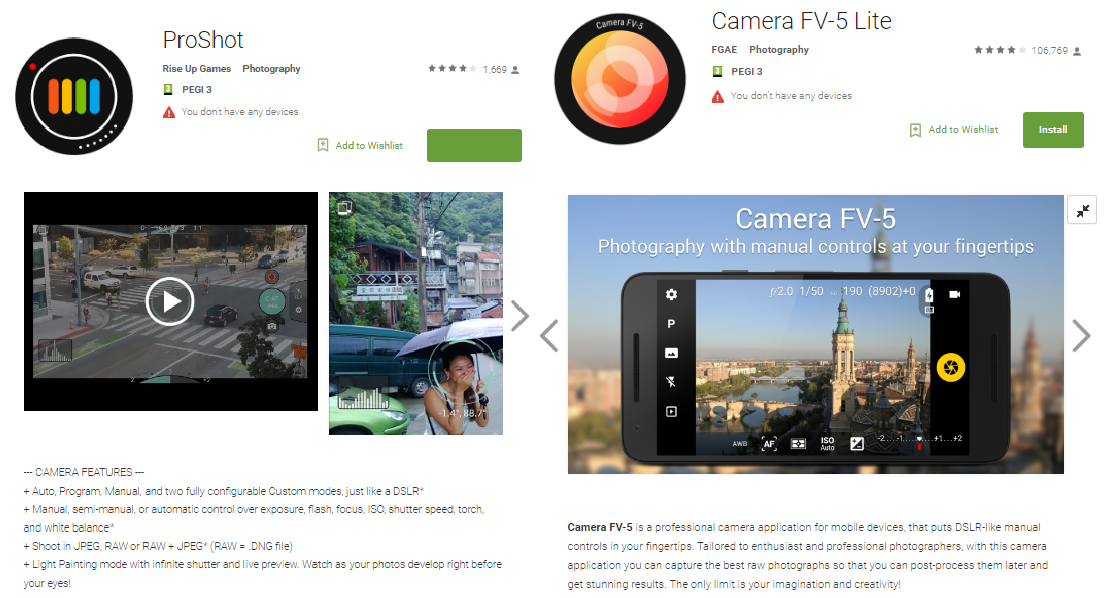
Once you have checked if your phone is compatible with Camera2 API and Raw format files, you will be able to browse the Google Play Store for Camera apps that accommodate this feature. Some of the most popular ones available for download are listed below.
Apps That Allow Shooting in Camera .raw On Android Devices.
.
Manual Camera $4.09 (before purchasing there is a compatibility checker)
.
.