Table of Contents
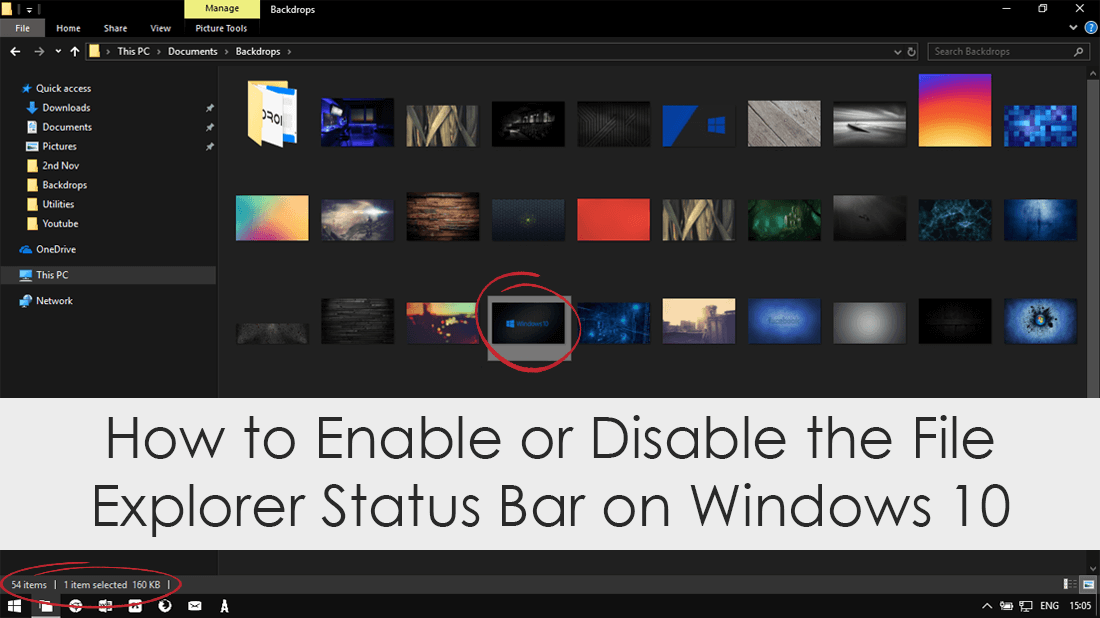
Learn how to hide the File Explorer status bar on Windows 10. The informative bar at the bottom of the Windows 10 File Explorer window which displays an assortment of information about folder contents and files.
How to Fix Windows Update Cannot Currently Check For Updates Because Updates are Controlled.
The File Explorer on Windows 10 is one of the operating systems most revered components and is probably the most stable and refined part of the entire Windows 10 operating system. It’s also quite a customisable area of the OS and has tons of different options which allow you to display your data exactly how you like. Which bring us to the topic of this article, the File Explorer status bar.
If you aren’t exactly sure what the status bar is or does, it’s the thin ribbon at the bottom of the File Explorer window which displays, information about the contents of drives and folders. It also allows you to view how large specific files are when you have selected them. Although the status bar is quite useful for most people, not everything is going to love it, so follow along as this article shows you how to disable it. Alternatively, if you can’t live without it, and need to enable it, you’ll also learn how.
Related: How to Remove the Fill Colour From the Selection Tool on Windows 10.
How Do You Add or Remove the Status Bar in File Explorer on Windows 10?
Unlike a lot of Windows 10 features, there are actually two different ways you can go about either enabling or disabling the File Explorer status bar. The first is through the Windows Folder Management Options. The second is using the Windows Registry Editor. As both options both achieve the same results I’d personally suggest option 1. However, if you want to take the road less travelled, feel free to use option 2.
How to Add or Remove the File Explorer Status Bar on Windows 10. (Folder Management)
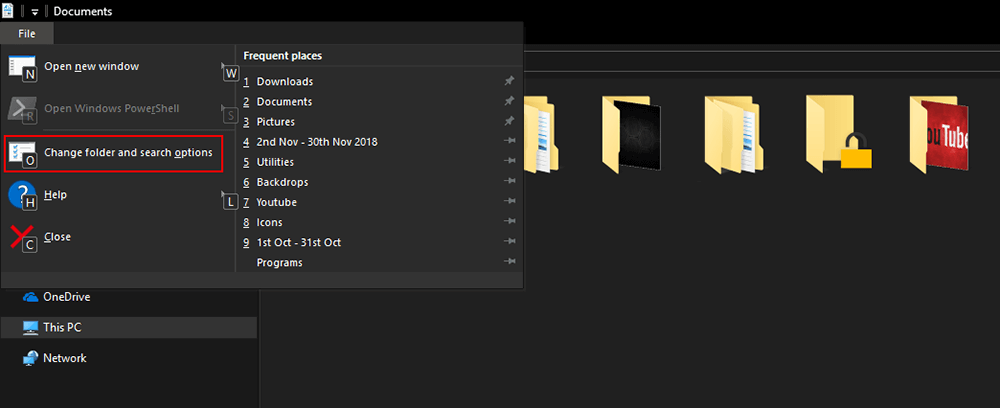
To begin, open File Explorer, press ALT+F on your keyboard, then click Options. On this page click Change Folder and Search Options.
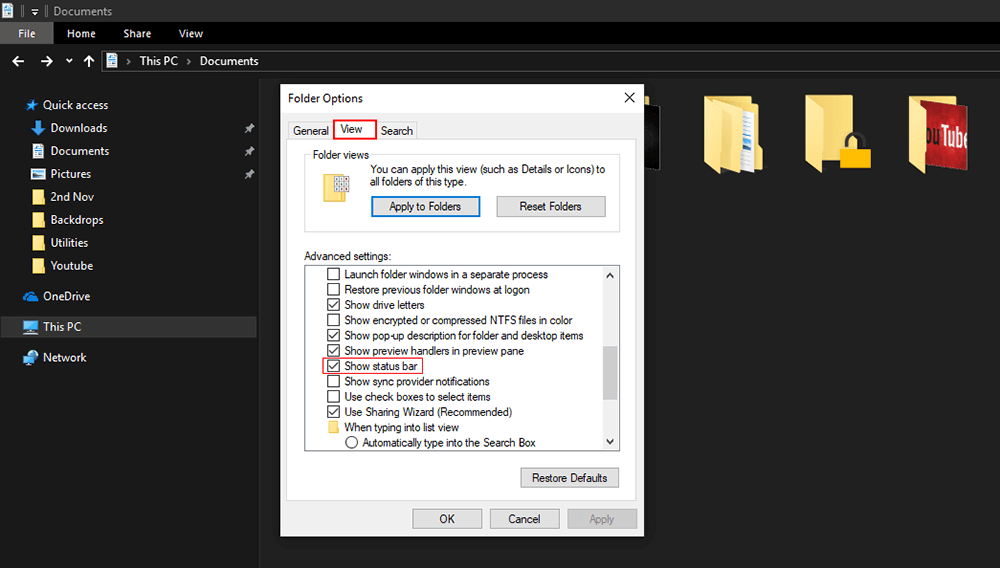
Finally, stay on the View tab and scroll down and untick the Show Status Bar option. Now simply click Apply and Ok to save the change.
How to Add or Remove the File Explorer Status Bar on Windows 10. (Registry Editor)
If you are more of a risk taker, making the change using the Windows Registry Editor will be more your style. However, because of this risk, it’s still important to make sure you have a System Restore Point to revert back to if something goes wrong.
If you haven’t created a restore point before, open the start menu, type Restore, then select Create a Restore Point when it appears on the list. In the new window that appears on the screen, click Create in the bottom right corner of the screen, then follow the on-screen instructions.
Once your restore point has been created, open the Windows Registry Editor by pressing Windows Key + R, then type regedit into the Run tool text box and press Enter. When you have the tool open in front of you, navigate to the following location using the left-hand pane of the Registry Editor.
HKEY_CURRENT_USER\Software\Microsoft\Windows\CurrentVersion\Explorer\Advanced
Once you are in the correct location, find ShowStatusBar in the central pane, double-click on it, then change its value from 1 to 0. After making the change Restart your computer or sign out then in again for it to take effect.
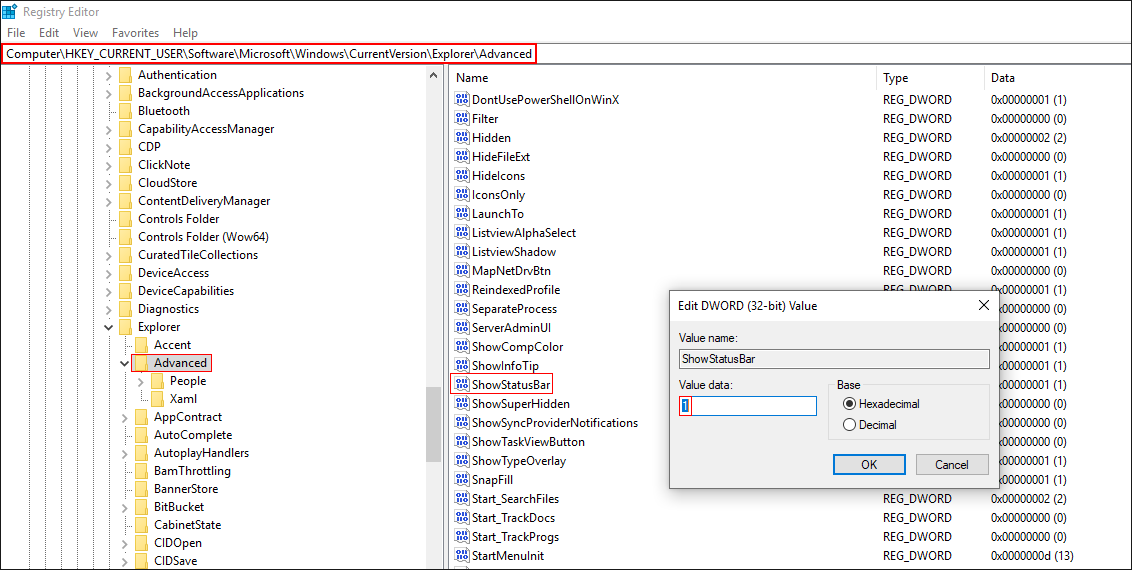
If you can’t find a ShowStatusBar file in the central pane, right-click an empty space and create a New > DWORD (32-bit) Value, named ShowStatusBar. Finally, change its value to 0.