If you are using Windows 11 and would like to enable Live Captions, a new accessibility feature that allows anyone to better understand audio with the help of subtitles/captions. This article will show you how to enable Live Captions and how to start using them.

Table of Contents
Related: How to fix Steam Destination folder must be empty on Windows 11.
Although Windows Subsystem for Android is still the most popular feature to make its way onto the operating system Windows 11 has a lot of other new and interesting that are equally as good and provide extra support for people with accessibility issues. The latest feature to make its way to the operating system is called Live Captions and aims to add subtitles/captions to video, audio, and microphones.
The feature is currently only available on Windows 11 22H2, So you’ll need to make sure you have updated to the latest version of Windows 11 before you start looking for it on your device. To force a manual update go to Settings > Windows update > Check for updates. Now that you are up to date you can follow the steps shown below to enable Live Captions on WIndows 11.
Once captions are automatically generated from any content with audio. The feature can appear at the top or bottom of the screen or in a floating window. You can resize the caption window and personalize the experience. In addition, you can also get captions from an open microphone, which can be helpful during in-person conversations. At the moment captions are only supported in English (US).
How do you enable Live Captions on Windows 11? Enable live captions on WIndows 11.
Now that you have the correct version of Windows 11 installed on your computer, you’ll need to do the following.
- Open Settings by pressing Windows Key + I, then click Accessibility.
- Now click the Captions tab and turn on the Live captions toggle.
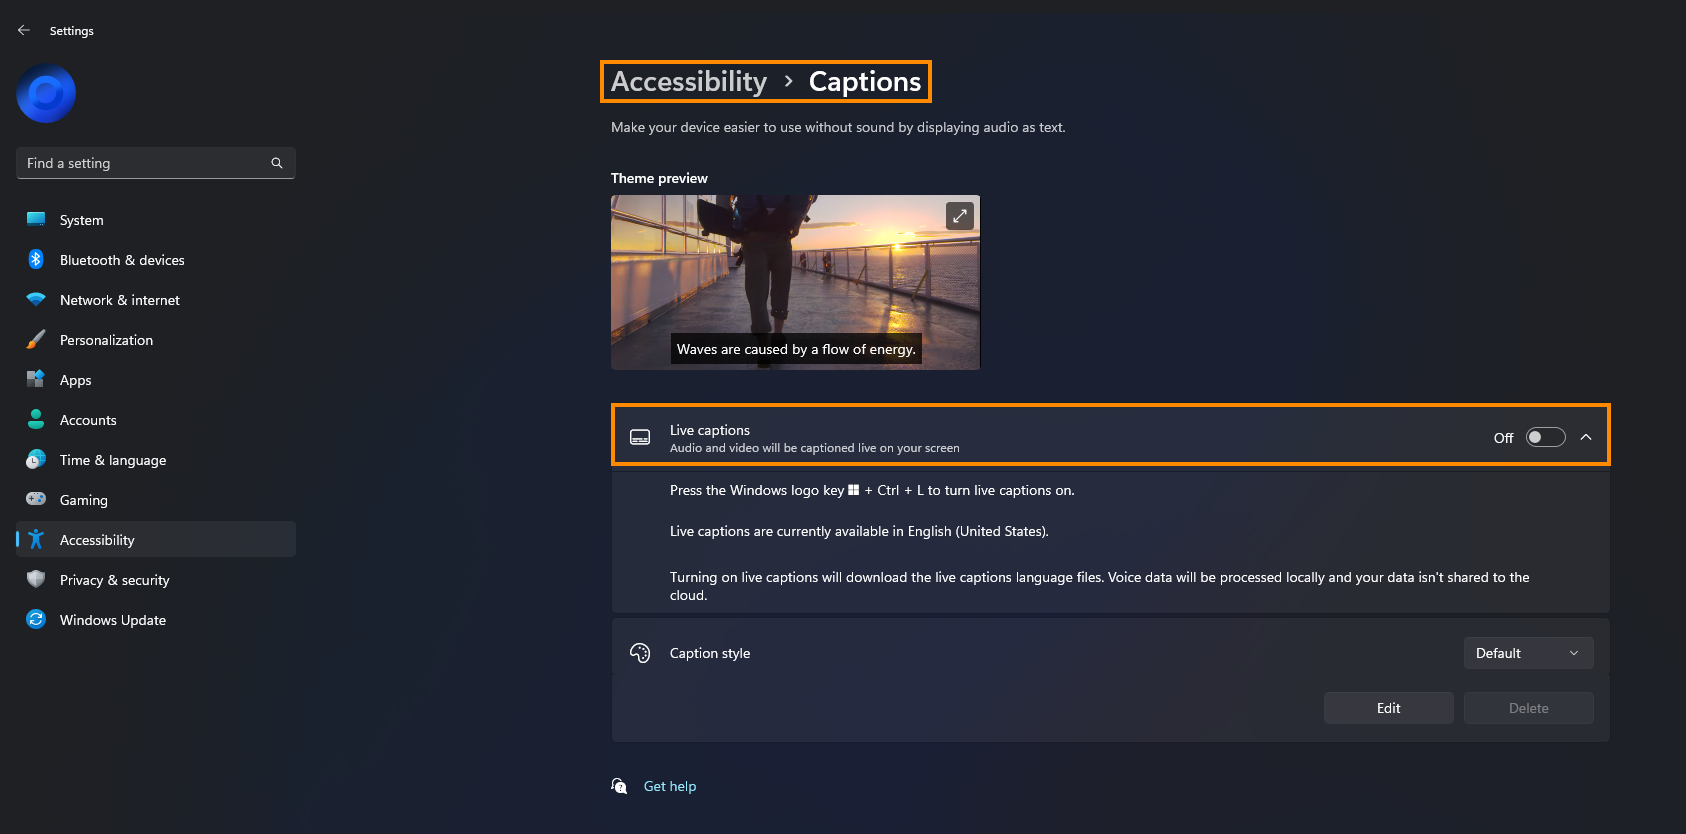
- Finally, accept the “I agree” button to allow local voice processing, then click Download.
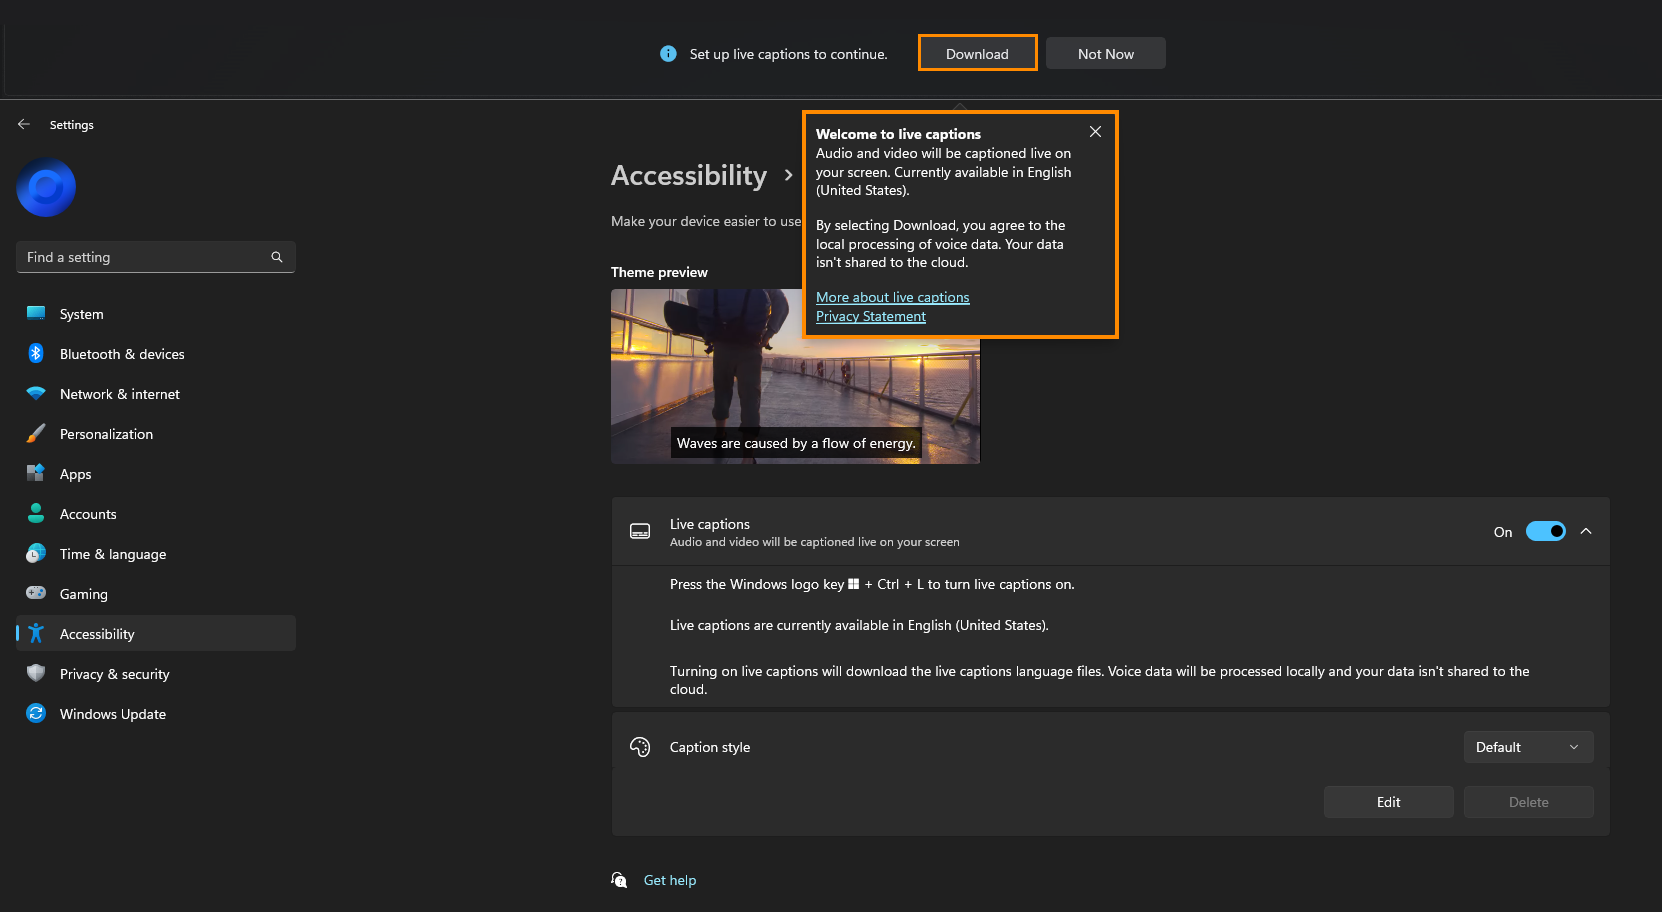
As soon as you make the change Live Captions will start appearing at the top of the screen. If the default positioning bothers you, which it probably will. Keep reading to find out how to customise everything. The hotkey to enable them is Ctrl + Windows Key + L.
How to configure Live Captions on Windows 11.
Now that you have enabled Live Captions, you’re going to want to customise everything about them.
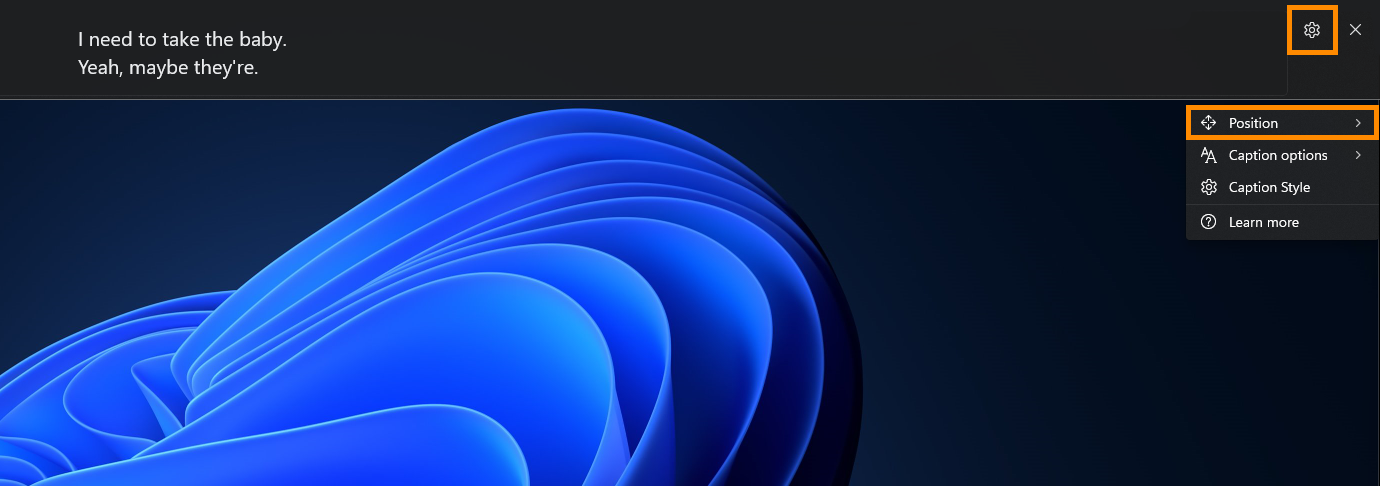
- First, turn on Live Captions, then click the Settings icon in the top right-hand corner.
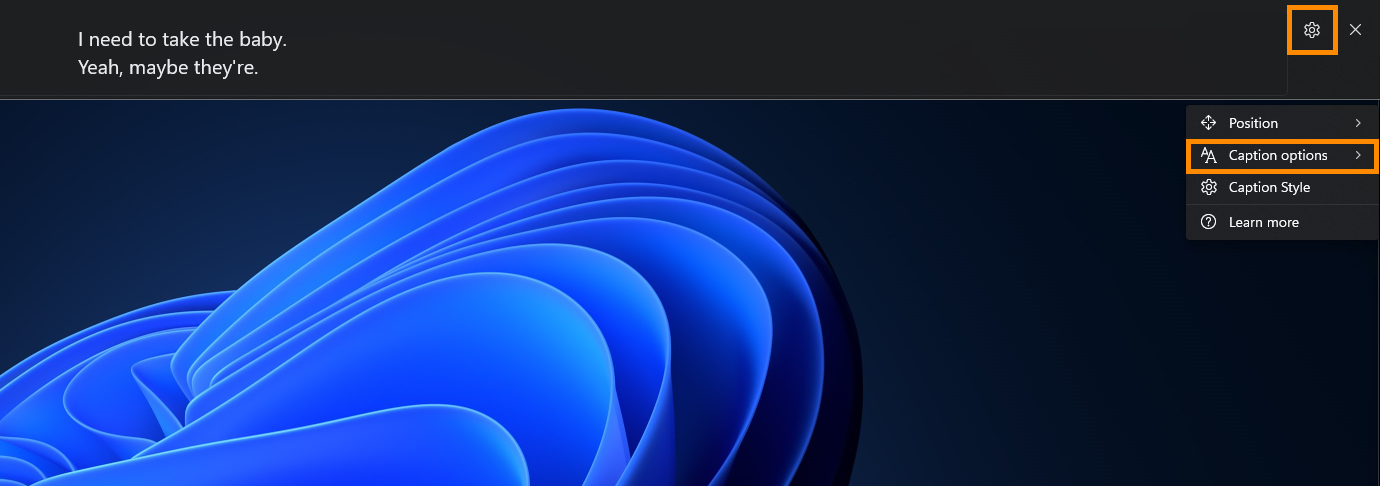
- This will bring up a list of options that will allow you to customise your caption experience.
- The first and biggest change you will want to make is to the captioning position which can be found under Settings > Position. Changing it to free-floating works best as you can move it around your screen easily.
- The rest of the options are straight forward so you shouldn’t have any issues customing them as you please. You can find profanity blocks under Settings > Caption Options.
Live captions work exceptionally well and even does a decent job with music, Provided that instrument levels don’t get too loud and block the voice aspects. It’s a really handy feature to use for YouTube as well or as a subtitle creation tool for making YouTube videos.