If you are using a Windows 11 computer and are getting random Blue screen of death (BSOD) error: fsulgk.sys. This article will guide you through several different troubleshooting steps you will need to take in order to help solve the problem and prevent your Windows 11 system from crashing to a fsulgk.sys bluescreen of death.

Table of Contents
Related: How to fix error 0xc00d6d6f when opening media files on Windows 11.
Windows PCs crashing to a Blue screen of death are some of the most annoying and hard to figure out errors that occur on the operating system. They are also some of the most significant error messages and can sometimes be linked to hardware issues, not just software ones. More often than not, everything will be working fine then, you’ll be picking up the pieces of a major crash.
Fsulkg.sys is a classic example of a Blue screen of death error that can appear when you are least expecting it. If you happen to be running Windows 11 on unsupported hardware, there is a good chance that you will have a higher chance of getting errors like this and Blue screen of death error ksecdd.sys. Thankfully, there is a range of troubleshooting steps you can take to solve this issue, but you’ll need to make sure you aren’t running an OverClock on your CPU to begin, so make sure you disable that first.
Fix fsulgk.sys Blue screen of death crashing on Windows 11 using the SFC Scannow command.
One of the first tools you should run if you get any BSOD error message is the SFC Scannow Command. This tool is very efficient in fixing any corrupted system files.
- First type CMD into the Start menu then right-click Command Prompt and choose Run as administrator.
- When you have Command Prompt open type the following command into Command Prompt and press Enter.
sfc /scannow

Once the command starts, it will probably take a fair bit of time to scan your system and fix any issues. If you get any error messages run the tool again with Windows booted into Safe Mode.
Fix Corrupted System Files using the DISM tool.
If the SFC tool returned an error message and still won’t complete in Safe Mode. Open Command Prompt as Administrator, then enter the following commands in order.
DISM /Online /Cleanup-Image /CheckHealth
DISM /Online /Cleanup-Image /ScanHealth
DISM /Online /Cleanup-Image /RestoreHealth
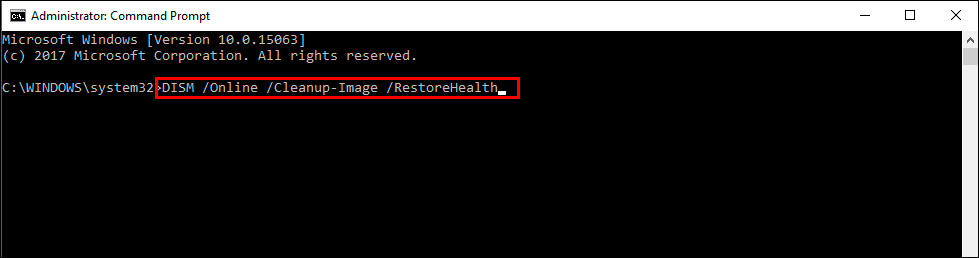
After a system Restart, everything should be back in working order. If you’re still having issues with fsulgk.sys crashing on Windows 11 it’s time to reinstall Windows 11 and start from a clean slate.
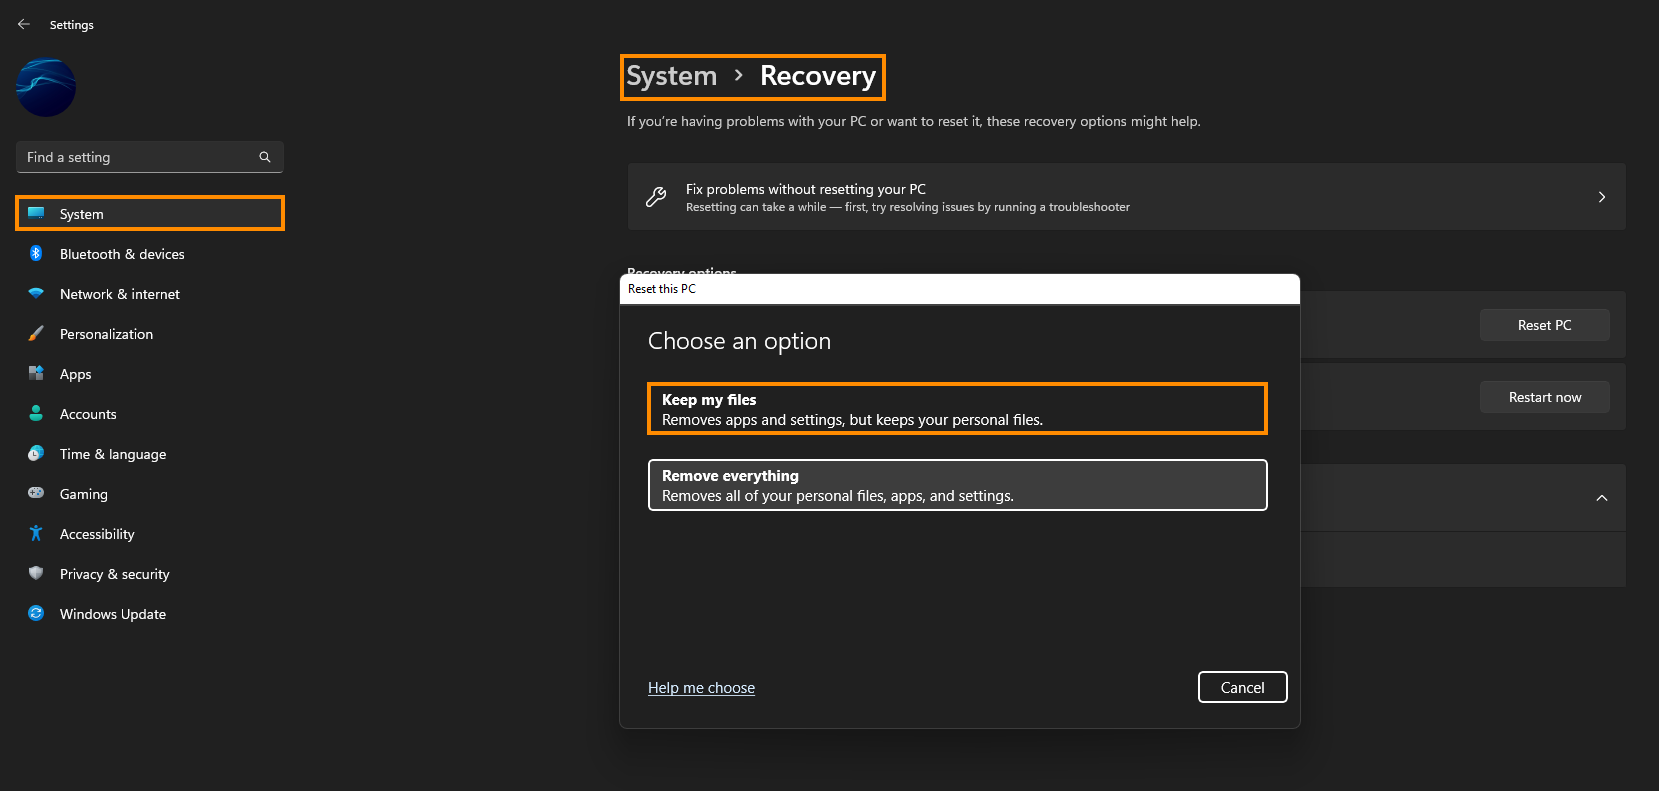
Reset your Windows 11 installation using Recovery Tools.
If nothing listed above has resolved the problem, you will have to reset your computer to a fresh installation. This will solve the problem 100% though it is a lot of work.
- To do this open Settings > System > Recovery > Reset this PC.
- Now choose the Keep my files option and follow the steps shown by Windows 11. It will take a fair bit of time to complete so make sure you have a couple of hours to go through the entire process before you start.
Stop using Windows 11 on unsupported hardware.
If you still have this issue after trying everything above and are using Windows 11 on unsupported hardware it’s time to go back to Windows 10. This probably is clearing being caused by a hardware conflict so no amount of troubleshooting will solve the problem.