Table of Contents
Google Chrome is a great web browser, it’s quick, easy to use and offers plenty of customization. It also has an almost endless library of extensions, which have become a staple part of most Internet users lives. As reliable as Chrome is though, occasionally you may come across an error code. This article will guide you through the process of fixing Chrome Error: Could not move extension directory into profile.
How to Configure and Use Windows Defender Antivirus.
Although not one of the most common errors you may see when using Google Chrome, Could not Move extension error is super annoying, especially when you are desperately trying to install a new extension on your browser. The good news is that like many other errors in chrome, fixing: Could not move extension directory into profile” is easy, you can follow the steps listed below to get started. (works for Windows 7,8,10)
Fix Could Not Move Extension Directory into Profile. (Google Chrome)
Generally, most people who receive this error decide the easiest and only fix is to uninstall and reinstall Chrome from scratch. This is a guaranteed fix but it does come with the pain of having to reinstall Chrome on your system and all the extensions and bookmarks that you use. Admittedly if you have a Google account and profile set, things are somewhat easier.
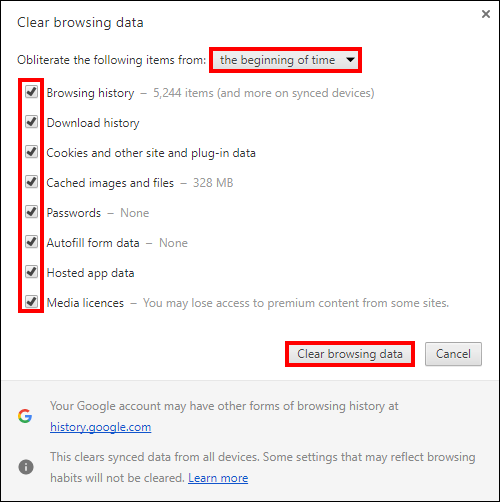
Another way you can fix this issue is by clearing your Chrome Internet cache and browsing data. This can be done be pressing Ctrl+Shift+Delete, when the new window opens, leave all the boxes ticked and set the Obliterate the following items from drop down box to Since the beginning of time. Now all you have to do is click Clear Browsing data at the bottom of the Window.
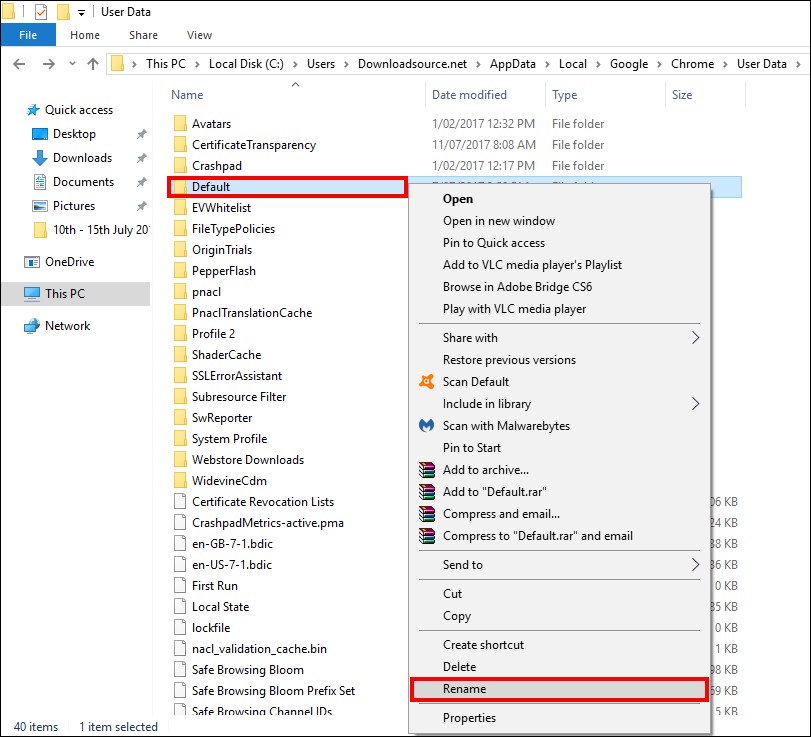
Once you have cleared all the data, close Chrome and open the Windows File Explorer. Using the Windows File Explorer navigate to the following location:
%LocalAppData%\Google\Chrome\User Data\
You can save yourself some time by cutting and pasting the address into the Windows File Explorer address bar. Once you have the text entered into the address bar, press Enter. In front of you, you will see quite a few different folders, the one we are looking for is called Default. When you have found the Default folder, right-click on it and select rename and call the folder Default-backup.
With the name change done, you can now close the Windows File Explorer and reopen Google Chrome. (When Chrome restarts it will automatically recreate the Default folder) With Chrome open go back to the Chrome extension page and try to redownload the extension that was failing to install. It should now download and work normally. If after this change the extension still won’t install, you will, unfortunately, have to do a reinstall of Chrome. Hopefully, this guide managed to fix the problem for you so you don’t have to reinstall Chrome. In future though setting up an account will save you tons of time if you ever need to perform a reinstall.