If you are trying to convert your drive from MBR to GPT so you can install Windows 11 but are getting error "REAGENTC. EXE: The Windows RE image was not found" and/or "Cannot find recovery environment" during the process. This article will take you through several different steps you can use to fix the problem.
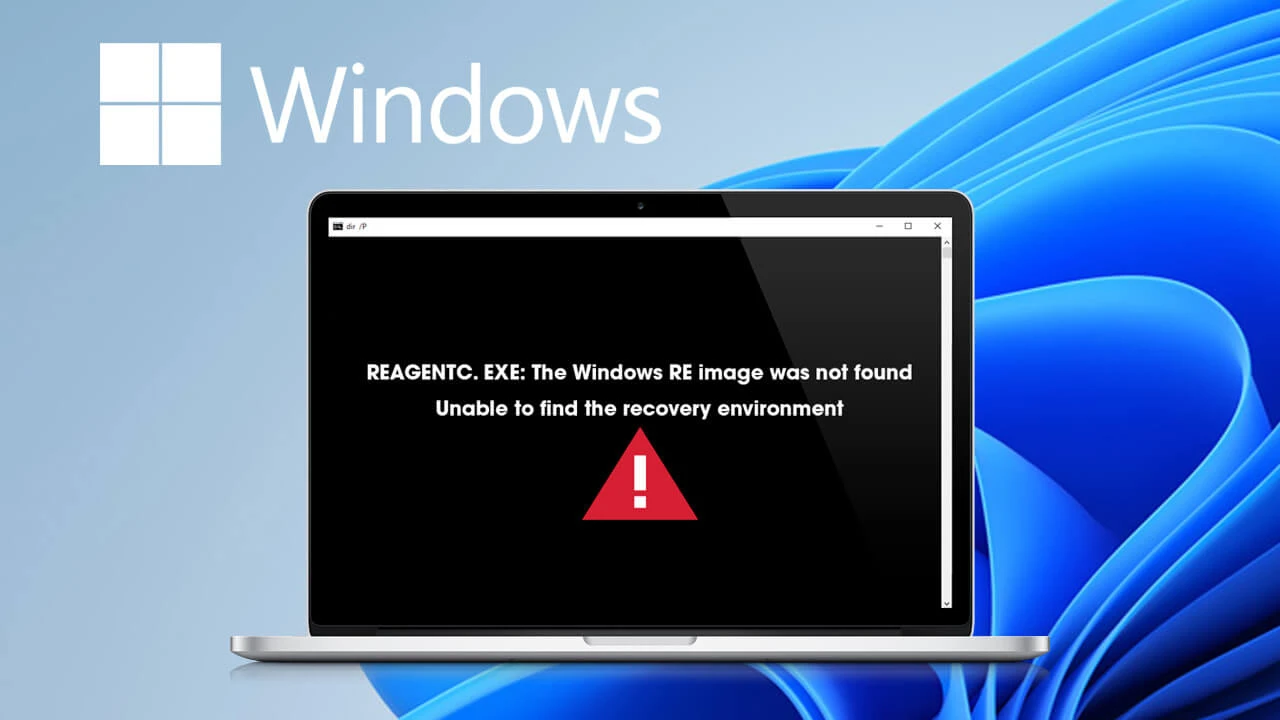
Table of Contents
Related: How to change from Legacy Boot to UEFI to install Windows 11.
In order to fix "REAGENTC. EXE: The Windows RE image was not found" and/or "Cannot find recovery environment" we’ll need to re-aquire the Winre.wim file that is missing. This file is responsible for the recovery of the operating system if there is ever a minor failure. Without this file it’s also impossible to update to Windows 11. Annoying, the only way to get Winre.wim is from a Windows 10 ISO image.
If you aren’t sure how to download a Windows 10 ISO or create a bootable USB drive for this process check out our guide here. Once you have created a Windows 10 bootable USB drive we’ll be able to start the process for extracting Winre.wim (install.wim or install.esd) to fix error:"REAGENTC:EXE: The Windows RE image was not found" and/or "Unable to find the recovery environment"
How to extract/download Winre.wim, install.wim or install.esd to fix the errors "REAGENTC:EXE: The Windows RE image was not found" or "Unable to find the recovery environment"
1. The first thing you need to do is download and install 7Zip (free): Download and install 7ZIP. Sadly this doesn't work with WINRAR.
2. Once you have downloaded and installed 7ZIP double-click the ISO file or access the Bootable USB you created earlier.
3. Once here you will have to go to the Sources folder.
4. Within this folder you find one of these 2 files depending on whether it is ISO or a bootable USB:
|
- install.wim |
|
- install.esd |
5. Right-click on either of these two files and from the context menu select the option: 7Zip > Open Archive
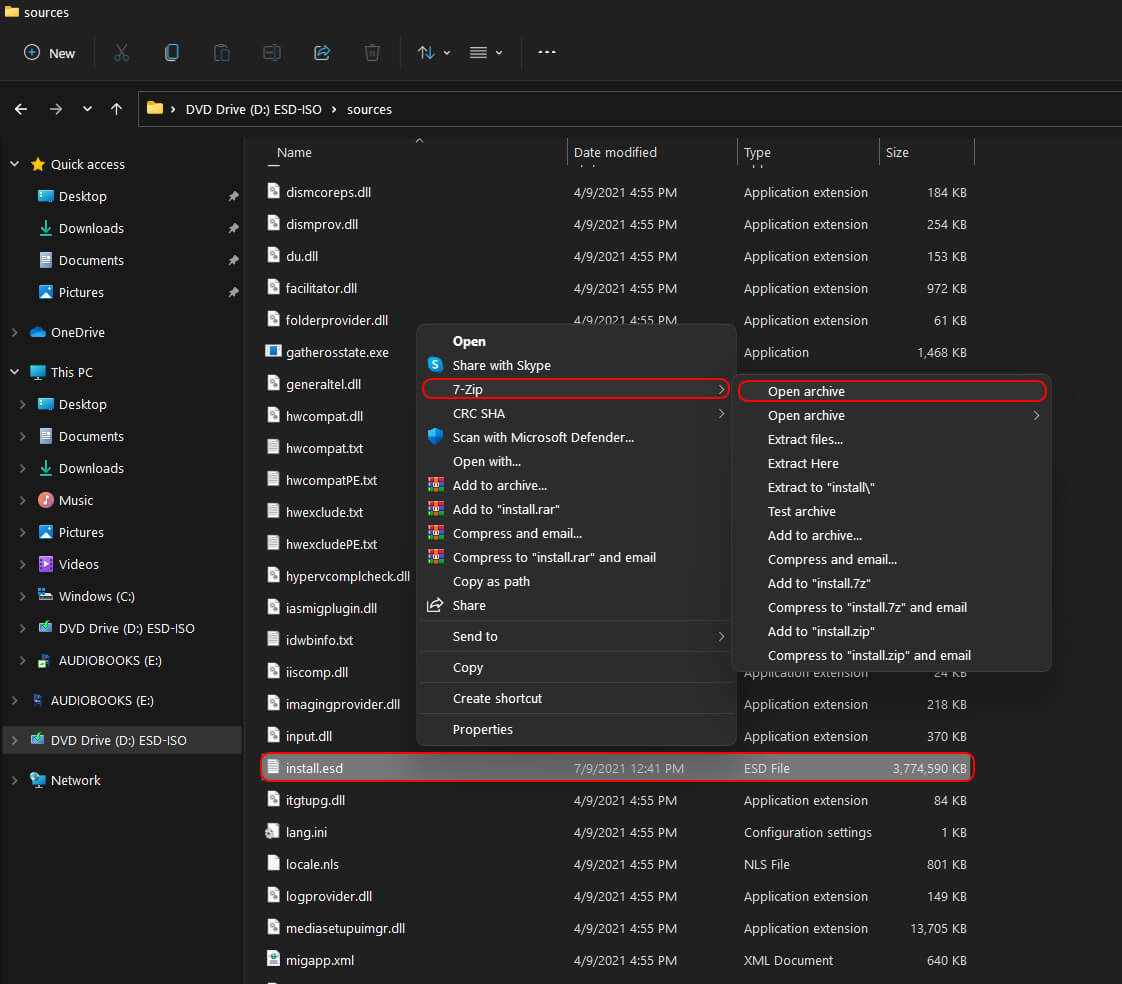
6. After several seconds or minutes the contents of the file will open in the 7ZIP interface
7. Next double left click on the . XLM
8. When it opens scroll down until you find the specific version of the operating system that you have installed. It will be at the bottom of the page. In my case, it is Windows 10 Pro N.
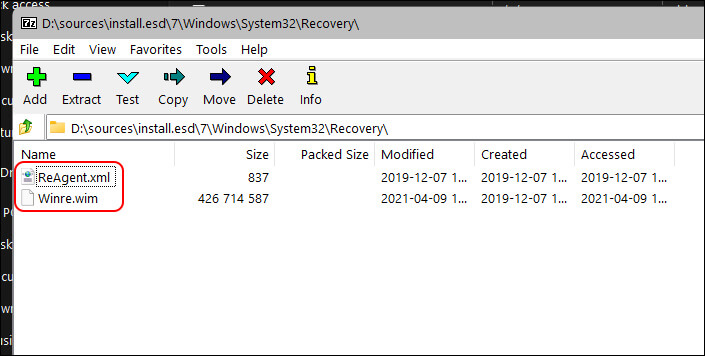
9. Now that you know the version of Windows you have, use the chart below to pick the corresponding folder from the main page where you first clicked the .XLM file. For Windows 10 Pro N we will be using Folder 7
.jpg)
|
1 - Windows 10 Home |
|
2 - Windows 10 Home N |
|
3 - Windows 10 Home Single Language |
|
4 - Windows 10 Education |
|
5 - Windows 10 Education N |
|
6 - Windows 10 Pro |
|
7 - Windows 10 Pro N |
|
8 - Windows 10 Pro Education |
|
9 - Windows 10 Pro Education N |
|
10 - Windows 10 Pro for Workstations |
|
11 - Windows 10 Pro N for Workstations |
10. Inside Folder 7 go to: \Windows\System32\Recovery\ and find ReAgent.xml and Winre.wim. When you have them selected right-click and select Copy to then select one of the following locations as the destination. (Which one you have will vary depending on your system) Though for most people it should be the first one.
|
C:\Windows\System32\Recovery |
|
C:\Recovery\WindowsRE |
11. You will have to grant administrator rights to move the files so confirm the prompt to proceed.
12. Once the files have been pasted into the correct folder, you’ll be able to run the following command and proceed with the drive format conversion process from MBR to GPT.
|
reagentc /enable |