If you are using Windows 11 on a computer or laptop connected to multiple monitors, this guide will assist you in addressing the error message: "Your PC can't project to another screen. Try reinstalling the driver or using a different video card." This error is typically triggered by a problematic display driver or faulty hardware.

Table of Contents
Related: How to Fix SETUPAPI.dll Missing or Not Found Error on Windows 11
Dealing with computers can sometimes be quite vexing. One moment everything operates smoothly, and then, within just a few minutes, it might refuse to start altogether. It's a situation we've grown accustomed to over time, but that doesn't make the frustration and potential financial impact any less significant. The error message, "Your PC can't project to another screen. Try reinstalling the driver or using a different video card," exemplifies one such scenario where resolution could be relatively straightforward but might entail a cost.
Unfortunately, rectifying this error message involves an element of luck, as the solution could be as simple as driver corruption, mismatch, or error. Alternatively, it might involve a hardware problem, which often necessitates a part replacement or repair. In this case, one can only hope the device is still under warranty. Thankfully, it's not all grim news, as the software-based solution is generally quick and uncomplicated. Let's delve into the steps.
Uninstall and Reinstall Your Graphics Drivers Using Control Panel.
This is the most obvious and successful fix for any kind of display driver issues on Windows 11. However, there are a couple of different ways to go about the process. This is option 1.
- Disconnect any external displays.
- Reboot your computer.
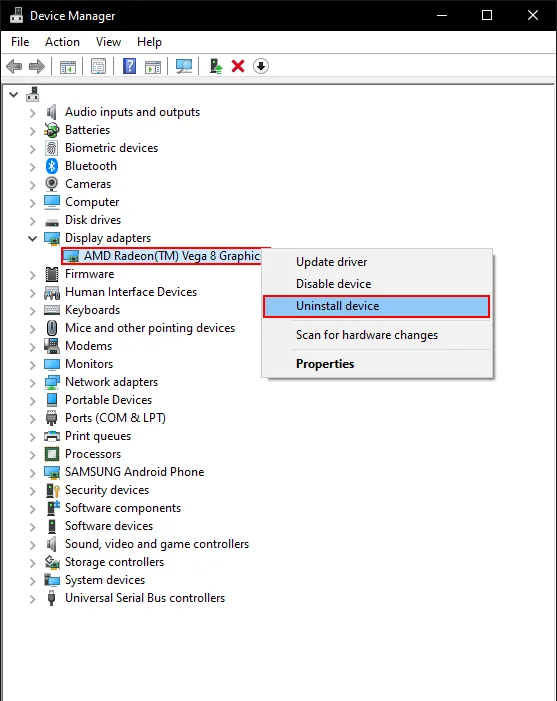
- Right-click on the Start menu and choose Device Manager.
- Locate Display adapters, right-click it, and select Uninstall device.
- Restart your computer and allow Windows 11 to search for updates.
- If the issue persists, visit your computer manufacturer's support page, download the latest drivers, and manually install them.
Fix your PC can't project to another screen. Double-check all of your Hardware.
If the first quick fix didn’t solve the projection issue on Windows 11 you will need to check your hardware as well.
- If your device has an additional display port (e.g., HDMI Display Port, DVI, VGA), try switching to a different port and check if your display connects. Display ports sometimes become faulty over time.
- Experiment with a different cable configuration. Although cable failure is infrequent, it can occur, especially with Display Port cables.
If hardware-focused solutions didn't solve the problem, you'll need to uninstall and reinstall your display (graphics) drivers. As there are two methods to attempt; it's advised to try both as Windows behavior can be temperamental in such cases.
Full manual graphics Driver reinstallation using Display Driver Uninstaller (DDU).
- Visit your computer manufacturer's website (or motherboard manufacturer's site for desktop users) and download the latest driver.
- Download Display Driver Uninstaller (DDU).
- Once the new driver is downloaded, disconnect your Internet and run DDU. This will thoroughly remove your existing drivers, enabling a clean installation.

- After DDU completes its process, it will prompt a system restart. Upon reboot, install the drivers you previously downloaded.
- Perform one more restart to ensure everything is set.
At this point, your "Your PC can't project to another screen" issue should be resolved through the uninstall and reinstall of system drivers. If not, there's a possibility of a hardware complication, which typically incurs some form of cost.