If you are tired of the default light and dark themes on Windows 11 and would like to start using custom themes but aren't sure how to start using them. This article will show you how to quickly and easily find and install themes in Windows 11 23H2 and newer. Over the years the process has changed a little so this guide aims to cover all of those changes to make installing themes on Windows 11 as easy as possible. The steps shown in this tutorial will also work on Microsoft Windows 10 as well if you are still using it.

Takeaways:
- A full step-by-step tutorial for installing themes on Windows 11.
- A guide to Installing custom themes from DeviantArt on Windows 11.
- Fixing custom themes not applying to File Explorer Properly on Windows 11.
Table of Contents
How to Install Custom Themes on Windows 11 23H2 and Newer
Below are all the steps you need to follow in order to install custom themes on Windows 11. Hopefully, you find this guide a lot easier to follow than most of the others you've stumbled across so far. The process isn't as complicated as some other guides, especially those on DeviantArt make it out to be.
Step 1: Download your Custom Windows 11 Theme.
-
To begin you will need to grab a custom theme DeviantArt is the best place to find these. For this guide, I’m using Lyra Workstation by Niivu but you can use any. Just make sure that it was recently created or updated. Some older ones won't work well with the latest versions of Windows 11. Once you have the file extract it on your computer. I generally find it best practice to keep everything related to Custom Themes in a single folder for easy access and sorting you can save it to your desktop and move it at a later date if you like.
Note: Almost all Windows 11 themes on DeviantArt will follow the exact same installation process so once you know how to do it you can quickly and easily switch themes without too much drama.
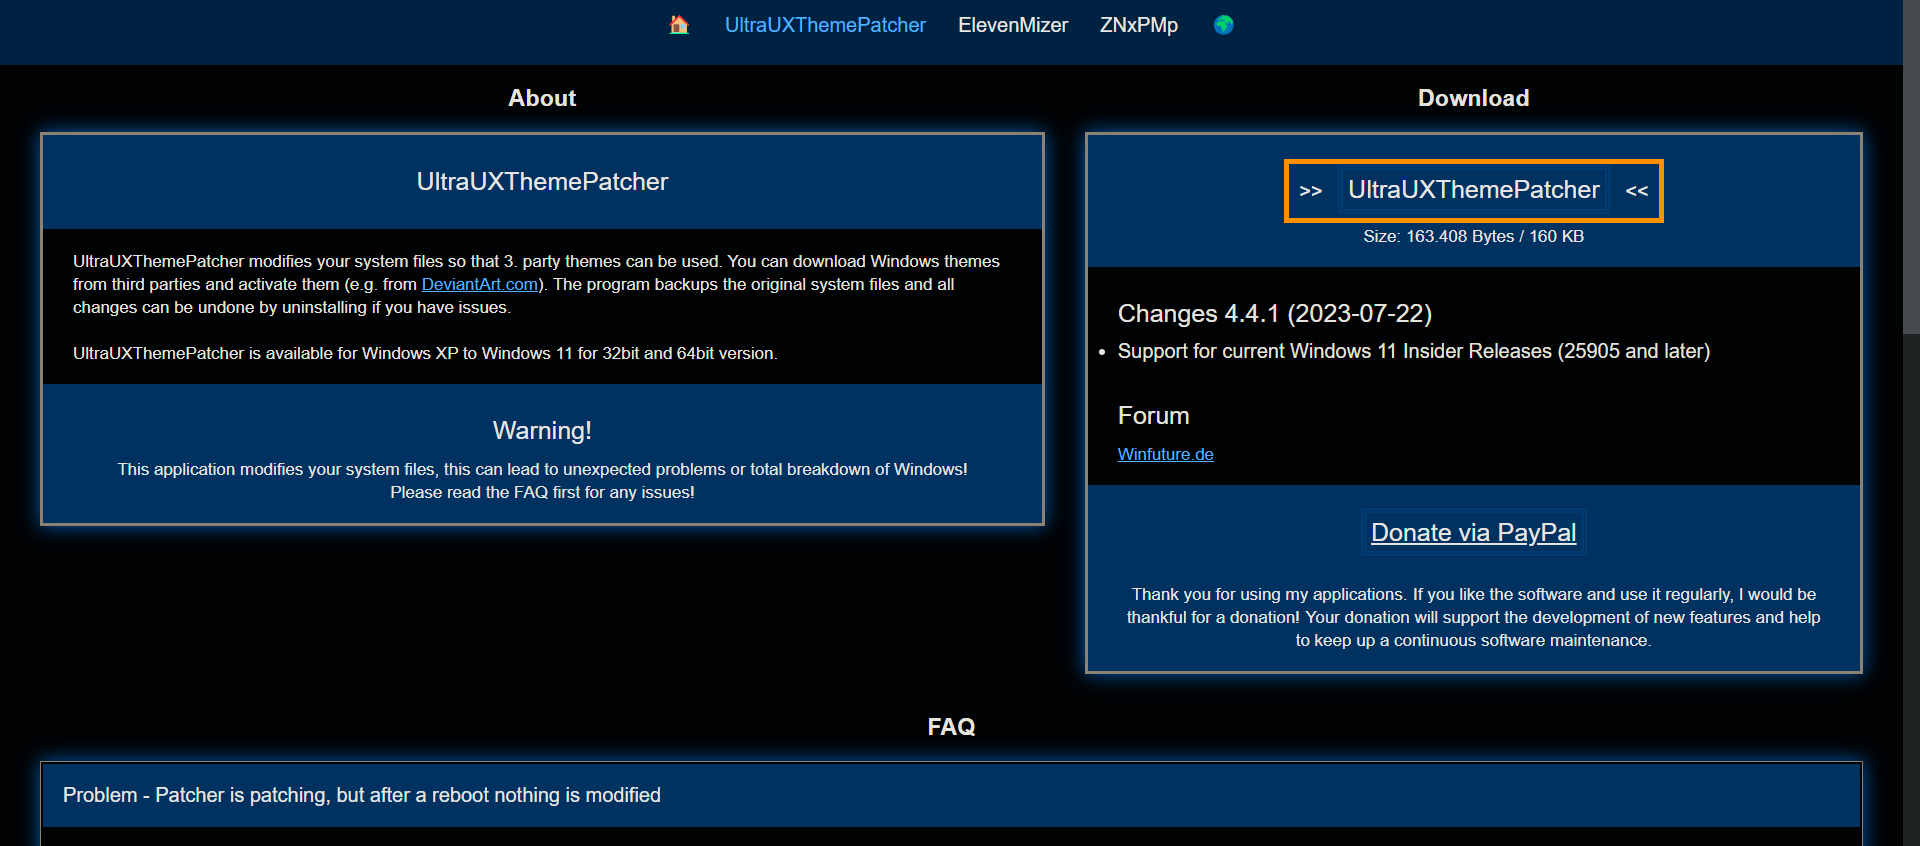
Step 2: Install UltraUXThemePatcher
-
Next download UltraUXThemePatcher this modifies your system files so that 3rd party themes can be used. The program backups the original system files and all changes can be undone by uninstalling if you have issues. However, it’s a good idea to make your own System Restore Point anyway.
-
Once you have downloaded UltraUXThemePatcher install it, then Restart your computer.
Step 3: Install 7TSPGUI For Custom Icons & Icon Packs
-
The next step is to download 7TSP GUI 2019 Edition. Don’t worry about the date it still works well in 2024. This tool allows you to install custom icons and icon packs. Which is a key component of any theme.
- Once you have extracted it open the folder and change the file name for:
7tsp GUI v0.6(2019).ee to 7tsp GUI v0.6(2019).exe
- This will allow you to use the tool when the time comes.
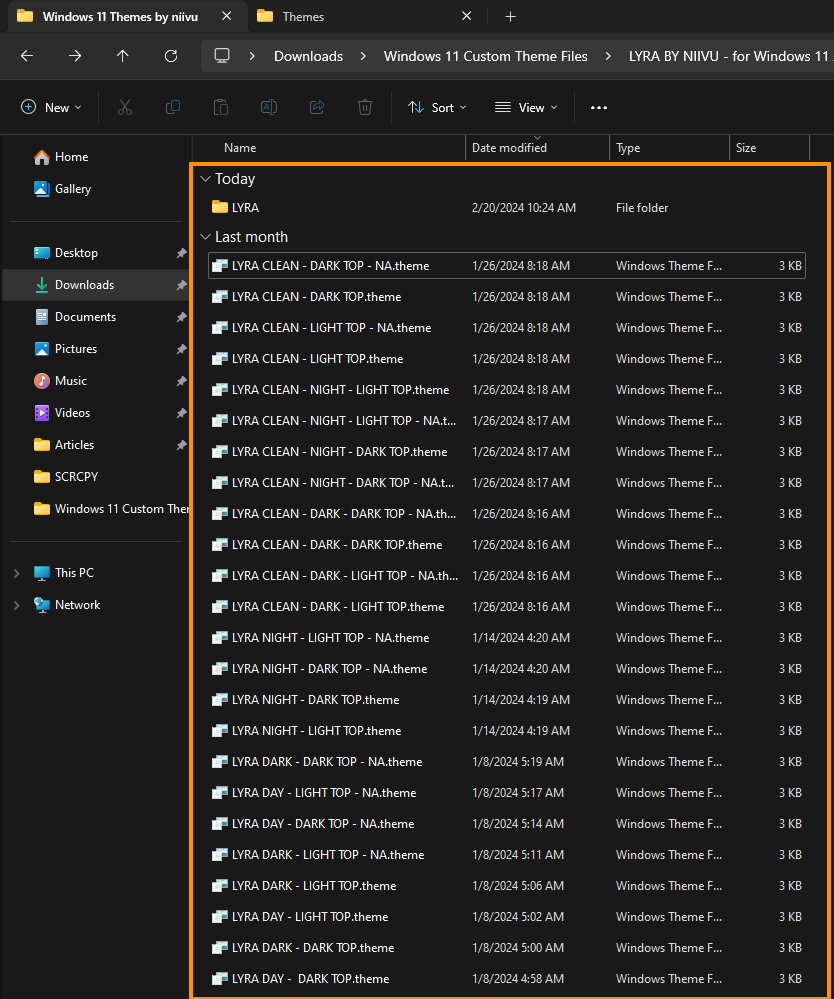
Step 4: Copy and paste the Theme Files into the Windows Themes folder
-
Now copy and paste all of the theme files from your theme into the Windows 11 themes folder here:
C:\Windows\Resources\Themes
-
The theme files for Lyra are found here:
C:\Users\YOURNAME\Downloads\Windows 11 Custom Theme Files\LYRA BY NIIVU - for Windows 11 JAN 31 2024\Windows 11 Themes by niivu
Step 5: Installing Custom Theme Icons using 7TSPGUI
- Now that your theme files have been installed it’s time to install the custom icon pack that came with it.
- Inside the Theme folder, you will see a folder called 7TSP Themes (or something similar). Here, you will see some files that need renaming. Just remove the remove portion from the ending.
- Now open 7TSPGUI (it’s portable and doesn’t require installation) click Add a Custom Pack and navigate to the location of the files you just modified. For the Lyra theme it’s in:
C:\Users\Jasch\Downloads\Windows 11 Custom Theme Files\LYRA BY NIIVU - for Windows 11 JAN 31 2024\7TSP Themes
Next, click Start Patching and the Icons will be installed on your system. If you see a request to install .Net Framework accept the offer and Windows will install it for you.
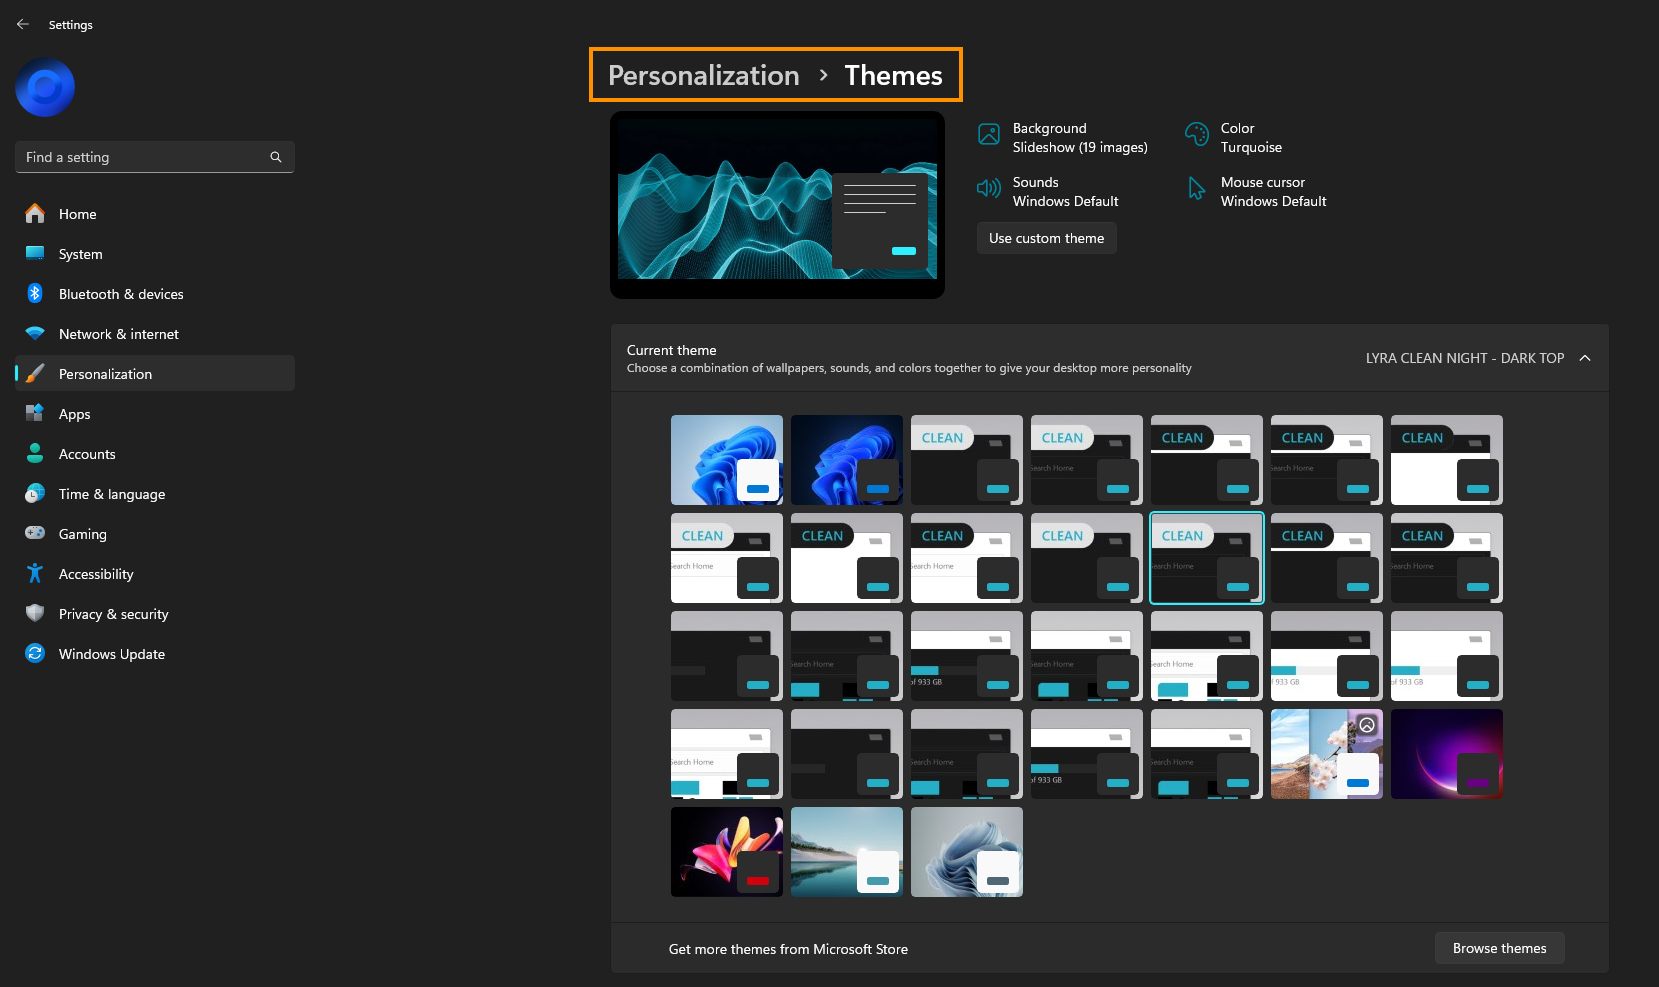
Step 6: Apply the Custom Theme
- Now that you have installed the custom theme and the icons for it you can enable the theme in Windows 11 Settings as you would any other theme. Just go to Settings > Personalise > Theme and Select the theme you want to use.
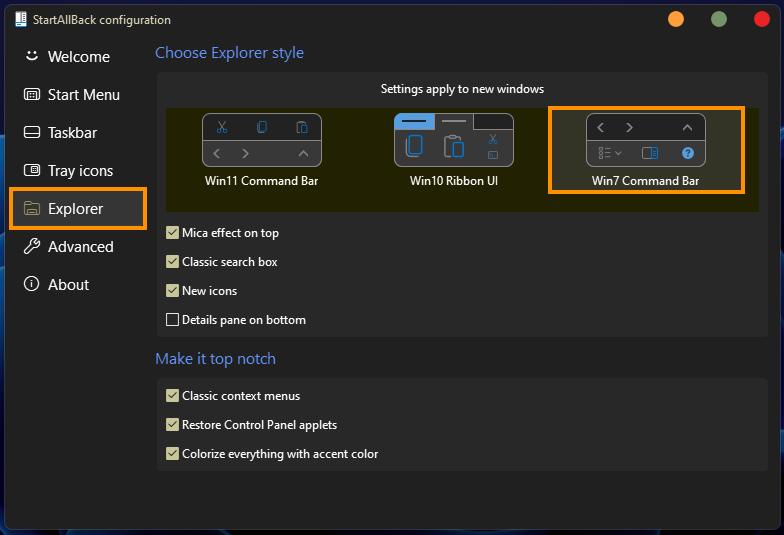
Step 7 (OPTIONAL): STARTALLBACK to Customise the Start Menu and File Explorer
- If you want to change and theme the Start Menu you will also need to install StartAllBack. However, this isn’t a free tool so may be something that you skip. Once installed using it is really easy and it restores a lot of functionality to the Windows 11 Start menu.
Troubleshooting the Top of File Explorer Not Changing with Custom Themes
If the top of File Explorer doesn't change or update to the theme you are using it is more than likely because you aren't using the correct settings inside of Startallback. To fix this, do the following:
- Right-click the start menu and select Properties. This will open Startallback settings.
- Here select Explorer in the left-hand pane, then make sure Win7 Command bar is selected. This will give you the slimline File Explorer look.