Table of Contents
If you have a computer which you share with several other users, you might like to know how to set up a guest account. Having a guest account allows you to separate your information and data from everyone else's, it also allows you to make some restriction on what a person can and can’t do once signed in. If you would like to create a guest account, this guide will show you the simplest method available.
How to Find Out the Password Of Any WiFi Network You Have Connected to in the Past.
Setting up a guest account on your Windows computer is also great if you have children and younger family members constantly using your machine. Not only does a guest account separate information and data, it also prevents certain changes being made to your system. For example, someone signed in using a guest account can use any basic apps installed, browse the Internet, use Office, and listen to music. What they can’t do is change any settings, view your files or install/uninstall programs.
Making a Guest Account on Windows 10 With Command Prompt.
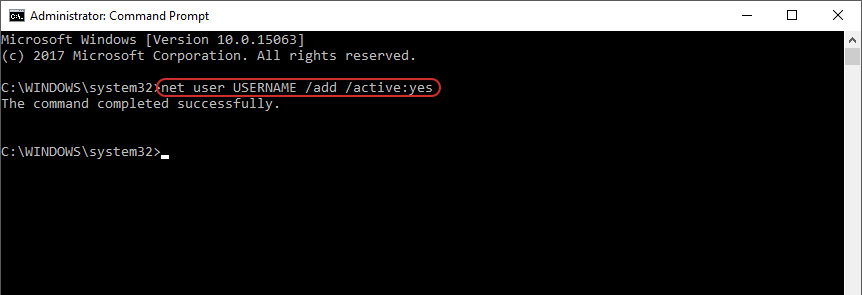
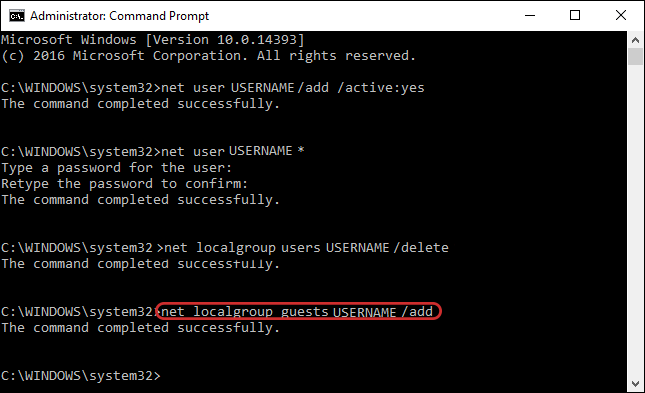
To start the process, you will need to log into Windows using your main account. Once Windows has loaded, press Windows Key + X to open the power user menu. Next, select, Command Prompt (admin), when you have the window open in front of you, enter the following command line:
net user USERNAME /add /active:yes
Note: Replace USERNAME with anything you want. Just don’t use the word Guest, as windows has already claimed this username.
The next command you will need to enter into the window is:
net user USERNAME *
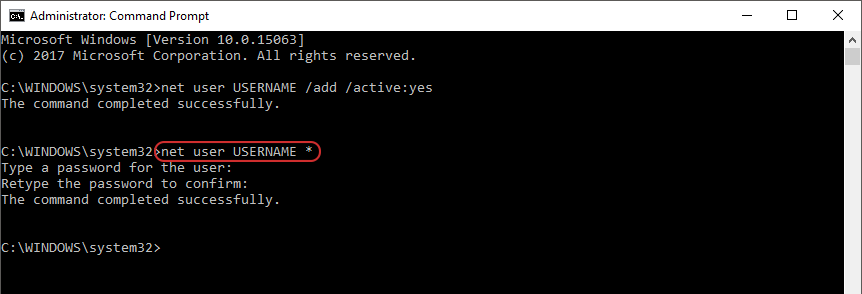
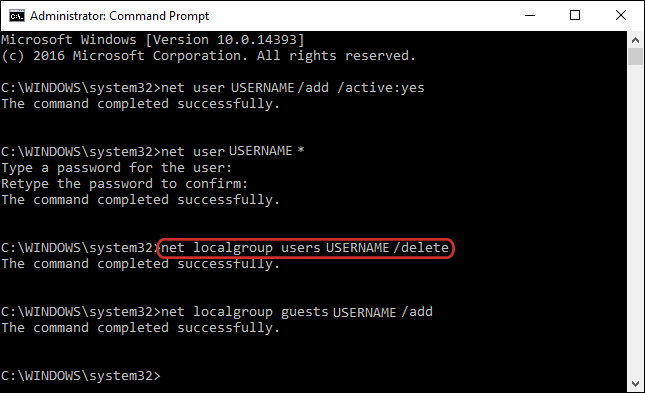
This command will add a password to the account. If you do not want to use a password, which is easier in the long run, you will need to enter the command, then press Enter twice to leave the password field blank. The last thing you have to do is move this new user from the default user group to the guest group. This is done with another two command line entries:
net localgroup users USERNAME /delete
net localgroup guests USERNAME /add
Congratulations, your guest account has been created. If in the future you wish to remove the account, you will have to open the Windows settings and go to the following location: Settings > Accounts > Family & other people. Once here click on the name of the account you made with the command line tool and click Remove to delete the account. You could technically create a guest account using the settings app, but today you learned something new and in all honesty using the Command tool is pretty quick in comparison to using the settings app.