Windows has a huge library of fonts readily available for use in most programs installed on your computer. What a lot of people don’t know though is that Windows 10 and 11 also come with a built-in tool called "Private Character Editor" which allows you to create your own custom fonts from scratch. It also allows you to edit existing fonts. So if you’d like to know where to find this tool and how to use it, this guide has all the information you need.

Table of Contents
Related: How to Fix Graphical Glitches and Display Bugs on Microsoft Edge.
Fonts are one of the quickest and easiest ways to add some spark, creativity or a sense of importance to your projects and although there are thousands of fonts available online, you may wish to create your own. As well as a seemingly countless number of fonts available online there are also almost as many online font creation tools to choose from, some free, some paid, some good and some bad. Before you start searching for a tool online, make sure you check out the built-in Windows tool.
Note: The only downside to creating your own font is that it won’t be readily available on other machines.
How to Create Your Own Fonts With Windows Built-in Font Editor.
For such an interesting feature, it’s strange that Microsoft has decided to hide the font creation tool so deep within the operating system. You can find the tool using either of the below methods.
- The first is to go to: C:\Windows\System 32 and open theeudcedit.exe.
- The second is to open the Windows Run tool and run the following command: eudcedit
Once you have the tool open, using it is relatively easy, however, it does look quite complicated.
Creating a New Character (Font Letter, Number, Symbol, etc.).
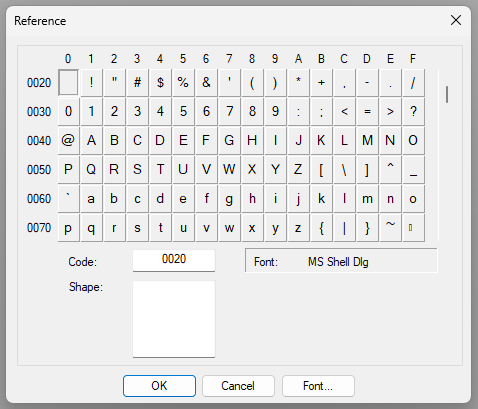
- The first thing you need to do is pick a box from the grid, this will assign your font character a code which is used for search and indexing. As this is most likely the first time the tool has been opened on your computer it doesn’t really matter which code you pick but you may want to follow the existing system to make life easier for yourself down the track.

- If you are planning on making an entire front from A-Z, including numbers and characters, I would suggest starting from the top left and working your way through the grid. The below example is how preexisting fonts use the "Select Code" "Reference System"
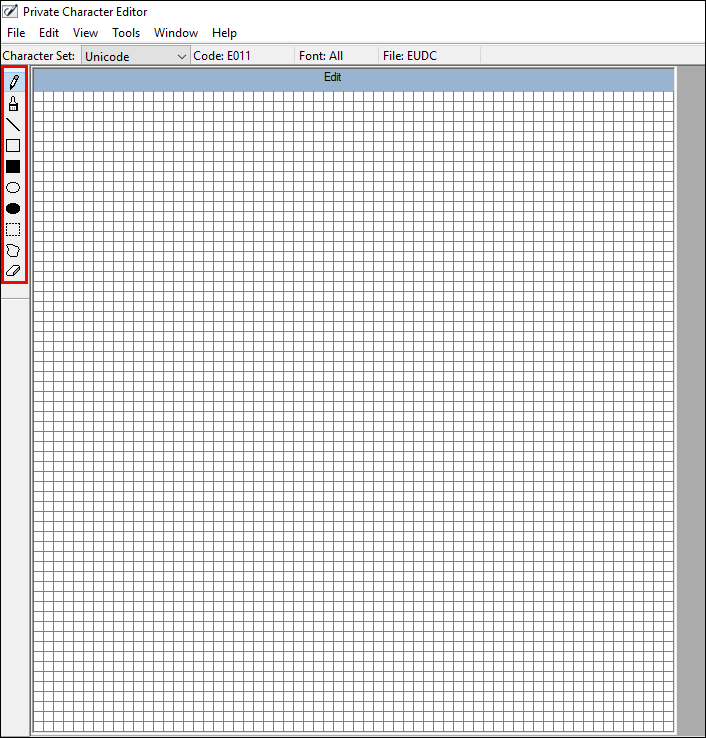
- As soon as you have selected a code, the screen will change to a 64x64 grid layout, which is where you will be designing your font.
- On the left-hand side, you will see a list of tools you can use, pen, brush, straight line, hollow rectangle, filled rectangle, hollow ellipse, filled ellipse, rectangular selection, freeform selection, and eraser. (you must create your font in black which doesn't matter because you manage font colors in programs)
Using these tools you can now start creating your front, left-clicking to add black squares to the grid and right-clicking to remove squares from the grid. Don't be put off by how chunky the characters look, Windows smooths them out nicely when they are used.
How to Save Created Characters in the Windows Private Character Editor.
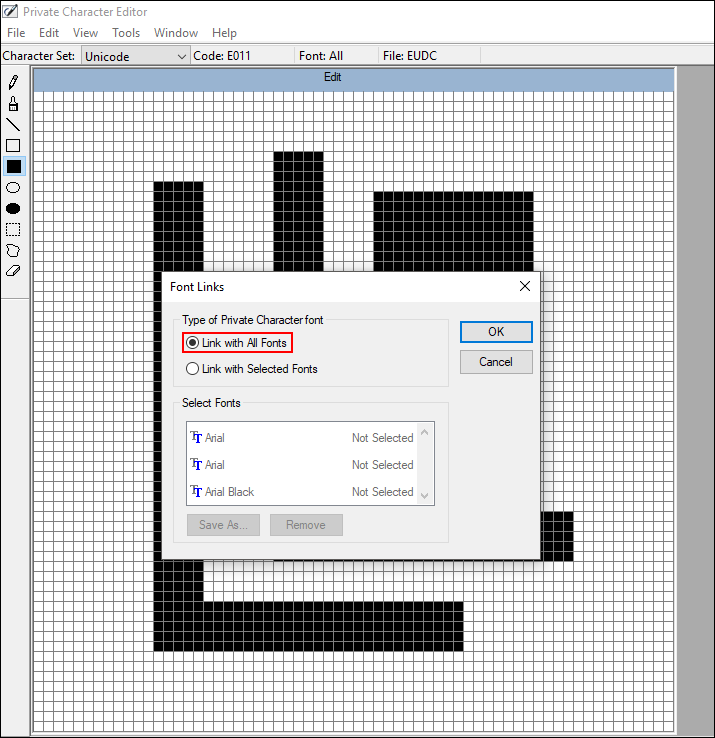
- Once you have finished creating your character, you can save it by going to File and clicking on Font Links and accepting with a Yes.
- For the next step, you have two options, you can save your Character to a specific font of your choosing or to all fonts listed on your computer, which will allow you to access it from any font. Personally, I found it easier to save to All Fonts.
Note: You will need to do this for every single custom character map (letter, symbol, number, etc) you create. So if you are creating an entire font expect to fill a lot of space on the reference grid we showed above.
How to Use Fonts Created in Private Character Editor.
When you have finalized and saved your character, finding and using it requires a fair amount of input.
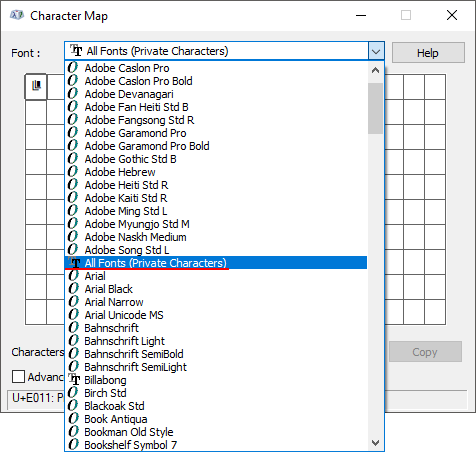
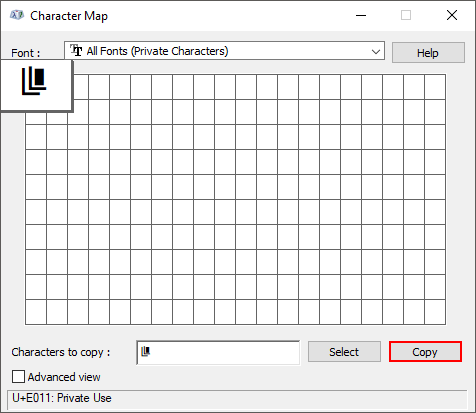
- To begin, open the Windows Run tool again and enter the following command: charmap.
- In this tool, use the Font drop-down menu and find All Fonts (Private Characters). This will separate the custom fonts you have created from the mass of preinstalled Windows Fonts.
- Now simply select your font and copy it to the clipboard using the Copy option, this will allow you to paste your character into any programs on your computer that accept fonts. (so long as they weren’t open when you created your font, if they were, you will need to restart them to continue)
Note: Photoshop doesn't like custom fonts created using the Windows tool. Characters generally load as a square with a x in it. Though this may vary depending on the version of Photoshop you are using. It's one of the problems with third-party apps, unfortunately.
How to Edit Existing Characters With the Private Character Editor on Windows.
If you would like to change an existing character from a font already installed on your computer, you can also use the Private Character Editor to do so.
- Simply go to Edit > Copy Character, choose your Font from the list, and then choose the specific character.
- Once you have made the changes you wish, you can save the changes using the same method shown in the above save section.
Just make sure you read and caution dialog windows that appear. You may also want to take a screenshot of the original font just in case you need to recreate it if you ruin it. Just remember that if you use these custom fonts publically they won't work for everyone else who doesn't have the font installed. So it's best to use private.